There is a great deal of interest about the equipment used on recce ops. I’ve been asked about recce gear quite a few times in recent memory. I’ll tell you what I know about recce gear loadout. It shouldn’t take long.
The Recce Team | Recce Gear Loadout | Recce Rifles | Recce Team Insertion | Patrolling Skills | Individual Skills | Patrol Base Ops
This article contains affiliate links.
If you’re enjoying this series please consider supporting Swift | Silent | Deadly on Patreon. Each one of these recce articles represents somewhere between 8 and 20 hours of hard work. You support is greatly appreciated!
The Real-World Recce Gear Loadout
I’m going to jump right into this one by talking about some real-world military recce gear loadouts, again from my experience in a Force Recon team and a Marine Special Operations team. There are two types of recce gear loadout we will discuss because while complimentary, they are separate. They are the rucksack load and the fighting load. We’ll cover both of these here, then talk about recce weapons in a separate article.
Like the last article I wrote we’ll cover the military version of things, then cover what you might realistically expect to put together. And the same caveats apply: I am not the recce guru or the god of recon. I was on a Force Reconnaissance team and, after the transition to MARSOC, on a Marine Special Operations team. I do have some experience, but I’m only one guy, so this is kind of like looking at things through a soda straw, and my memory is fallible.
Still, this should get you off to a good start. Let’s get into it!
Military Rucksack Loads
The rucksack – the big, green tick that sucks all your energy – carries the primary load for the recce team. Looking back I realize I have a ton of affection for my rucksack(s) and actually kind of miss them. If you want to talk to someone who knows about rucksacks, talk to someone who lives out of one. I’m probably on the lower end of that spectrum compared to most lifers. I can promise you, though – talk to a retired SF guy or Recon Marine and they’ll be able to tell you a thing or two about a rucksack.
The Ruck Itself
I carried two rucks in my career: a Large ALICE pack (called a “mountain ruck”) and a Blackhawk SOF Ruck. The Large ALICE pack isn’t very sophisticated by today’s standards but it’s a really, really solid backpack, and perfectly valid even today. I just checked online and found genuine, surplus mountain rucks going for about $100. I really wish I’d held on to mine – in writing about it I can literally smell the nylon. That sounds weird, but I put a lot of hundreds of hours on that rucksack.
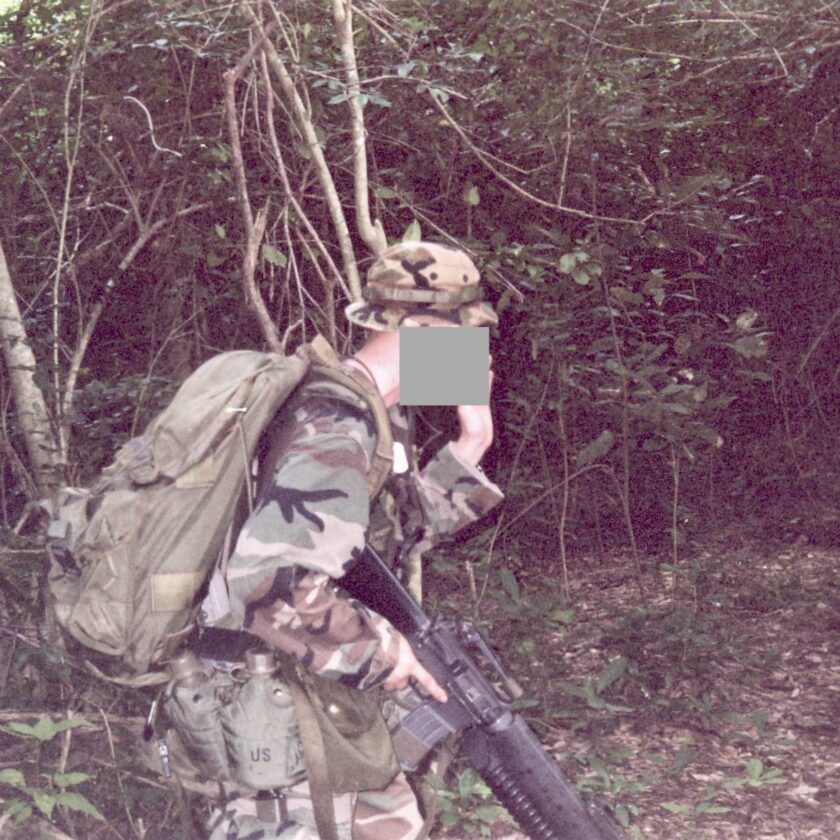
The second ruck I carried was purchased because a dude in the barracks was selling it – it was the Blackhawk SOF ruck. The SOF ruck fit on an ALICE pack frame and had the same general layout thought it was larger and had additional exterior pockets. It was also quite a big heavier with the pack bag alone coming in around 5 lbs. It doesn’t seem like this ruck is made any longer, but a really close one is made by Tactical Tailor: the MALICE Pack. I never owned one but I know dudes who did and this is a solid ruck.
Though the Marine Corps and Army have been through a variety of rucksacks including the fragile MOLLE II system and the Marines’ ILBE ruck, the old ALICE pack is still going strong. It (and a derivative) is the only ruck I carried. There is probably better stuff out there on the civilian side, but be prepared to pay close to $1,000 for a top-end rucksack that’s as tough as the old mountain ruck.
Sample Point Man Loadout
I was never a Point Man, so to be clear I don’t know everything about the Point Man’s load. I don’t know about his personal gear, but I do have some idea what team gear he carried, at least on my team. First, although his ruck is supposed to be the lightest it still probably tipped the scales at 40-50 lbs. That’s still way above the recommended “20% of your body weight, max” recommended by all the manuals. It’s also at the upper limit of the “40 lbs max” recommended by some guys like Pete Blaber.
Because he would spend a lot of time doing actual observation, our Point Man carried our camera gear. That was a DSLR camera, a couple of lenses, spare batteries, and a tripod. He would also carry some shared expendables, like maybe a SAW drum or a couple radio batteries.
Sample RTO Loadout
This is the one about which I can speak most intelligently. When I was on a team I routinely went out on patrol with a pack weighing somewhere in the neighborhood of 85 – 100 pounds…well over half my body weight. A huge portion of the weight and space in my ruck was made up of comm gear: a PRC-117F (9.8 lbs) with 2 BA-5590 batteries (2.25 lbs…each), a CYZ-10 encryption device (2 lbs), 2 spare BA-5590s, a CF-19 Toughbook with Lind adapter and yet another BA-5590 battery, and a satellite antenna. I guess the good news is that as a RTO I didn’t have to carry any SAW drums or whatnot.
When you put that all into a DUI rucksack liner, throw it into a large ALICE pack, and add a shitload of water there isn’t room for a whole lot else. My patrol ruck basically contained mission gear, a few field-stripped MREs, two gallons of water, and a “ranger roll.” I don’t know why but Recon Marines call a poncho liner attached to a poncho a ranger roll.
Here’s what this all means: as a recon team member I froze my ass off a lot of nights in the bush. I mean fetal position, wrapped up as tightly as possible in my ranger roll, head covered, and still freezing. Partially that’s because I consumed maybe 1,000 calories a day on patrol, and burned several times that, and got down for the night soaked, either in sweat from rucking or from moisture acquired from the environment. And partially that’s because I went out with next-to-nothing in the way of warming. But that’s a pretty typical experience for a recce team member. Remember, kids: this isn’t a camp out.
Military vs. Civilian Recce Gear Loadout
There are some key differences between military rucksacks and civilian rucksacks where equipment is concern. This is a good news/bad news proposition. Military recce equipment lists are heavily slanted toward mission accomplishment. Mission accomplishment equipment generally consists of big, heavy, green stuff. The good news in the civilian context is that you can skip a lot of this stuff and save a huge percentage of your weight.
The bad news is the capability of this stuff. This big, green, heavy stuff is used to guide for close air support, designate targets, and call for extract – radios, batteries, computers, really big lasers, etc. It also comes in the form of mortar tubes and rounds, SAW drums, claymores, and grenades. That stuff makes you a much, much meaner, pricklier target, so there’s that.
Let’s put that in slightly different terms. The good news is you, as a civilian, have to carry far less crap. You don’t have to carry 30-40 pounds of PRC-117, CYZ-10, DAGR, laptop, antennas, batteries, and cables. Unfortunately the reason you don’t have to carry that crap is you have no one to talk to on the other end. No CASEVAC choppers, no fast-movers dropping ordnance, no Claymores, no quick extract, and probably no QRF.
With all that said, what will your recce gear loadout look like?
The Civilian Rucksack Load
Now that we’ve talked about military loadouts, let’s talk about what your recce gear loudout might look like. Since you don’t have all the cool-guy gear, you have to make the most of what you do have: light weight, speed, agility. It won’t make you invisible to thermals and it won’t give you the ability to fly…but it’s what you have to work with. Let’s talk about the gear.
The Ruck Itself
You can use just about whatever you want for a ruck, as long as it’s big enough, durable enough, and not ostentatiously brightly-colored. As a default recommendation I would recommend finding a surplus Large ALICE Pack and frame (aka: the mountain ruck). It’s not the most ergonomically-correct, and it’s not as advanced as many civilian rucks, but it has some huge benefits. At 62L/3,800 c.i. it’s a good-sized pack but not huge. They’re also available, affordable, and damn-near indestructible. I will probably be looking to replace my long-gone ALICE pack sometime in the near future.
Of course you can also use a number of ALICE facsimilies from Tactical Tailor MALICE ($335 – 405) or Mystery Ranch Mountain Ruck ($725). These are larger, generally even more durable, have more usable fasteners (i.e. Fastex instead of whatever the hell the military originally put on the ALICE pack), and more pockets. These cost a small fortune, however. If you want to meet in the middle you can have Tactical Tailor modify your existing mountain ruck with the features you need.
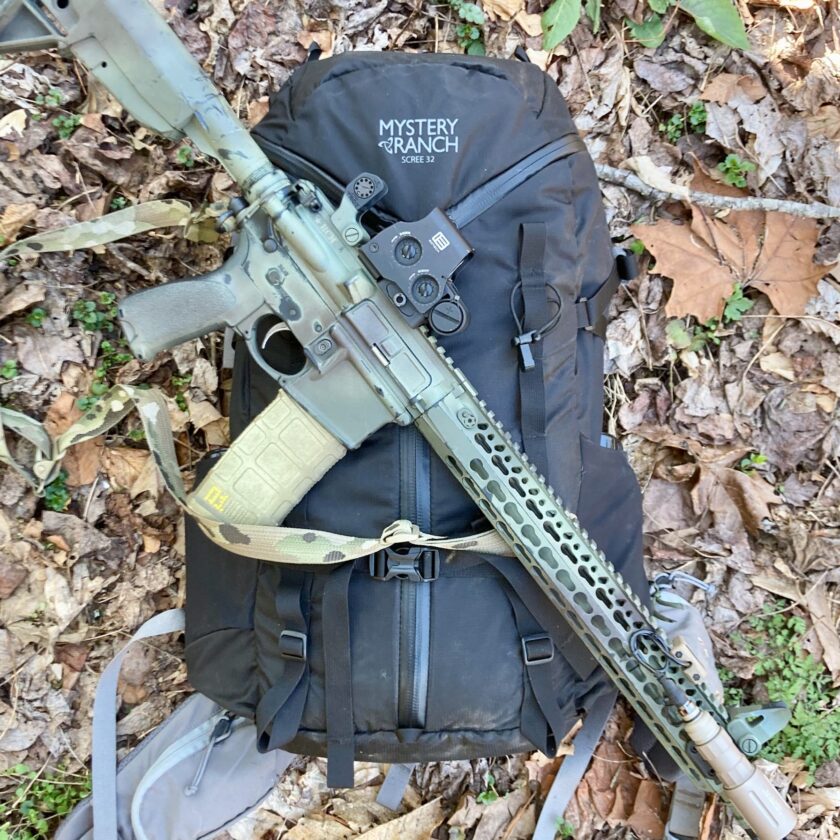
My opinion is that if you’re going to spend $500 or more on a ruck, I’d recommend a more modern design than the ALICE pack. The pack is durable as hell, but the load sticks out very far from your back. This can cause balance issues and isn’t the most efficient. Something to think about.
Of course there are myriad other packs you can use, again as long as they are durable enough. Most outdoor-brand backpacks will work just fine. If you want the absolute latest and greatest in military-style packs and have an unlimited budget, check out Kifaru and Mystery Ranch…and be prepared for some sticker shock.
Rucking Pro-Tips
Don’t buy the biggest backpack you can find to use as your patrol ruck. Big ruck usually equals big weight because the bigger the pack is, the more stuff you can carry. The more stuff you can carry, the more stuff you will carry. Choose something that is appropriate to your mission, whatever your mission may be.
Your ruck isn’t going to carry itself. If you aren’t up to getting out and walking around under a load, don’t bother buying a ruck. I recommend you start with light weight on smooth, even surfaces. Work your way up to covering longer miles under a heavier load over rougher terrain. Then repeat. Hit the gym, and ruck some more. The fact that you can make three laps around your neighborhood really doesn’t mean shit because a recce patrol isn’t even going to be on a trail (it’s explicitly going to avoid high speed avenues and natural lines of drift). So get strong.
Waterproof your ruck, even if you’re not doing amphib ops. A soggy ruck weights infinitely more than a dry one, wet sleeping gear absolutely sucks, and wet clothing can be deadly. Waterproof your ruck as described in this article. Make sure you store your water bottles/bladders/etc. OUTSIDE the waterproof internal bag.
The Stuff in The Ruck
Now that you have your rucksack, what do you put in it? Some of the gear lists out there are pretty long on creature comforts. Your recce gear loadout should have the stuff needed to get you out and back safely, and accomplish the mission. Again, this isn’t a campout.
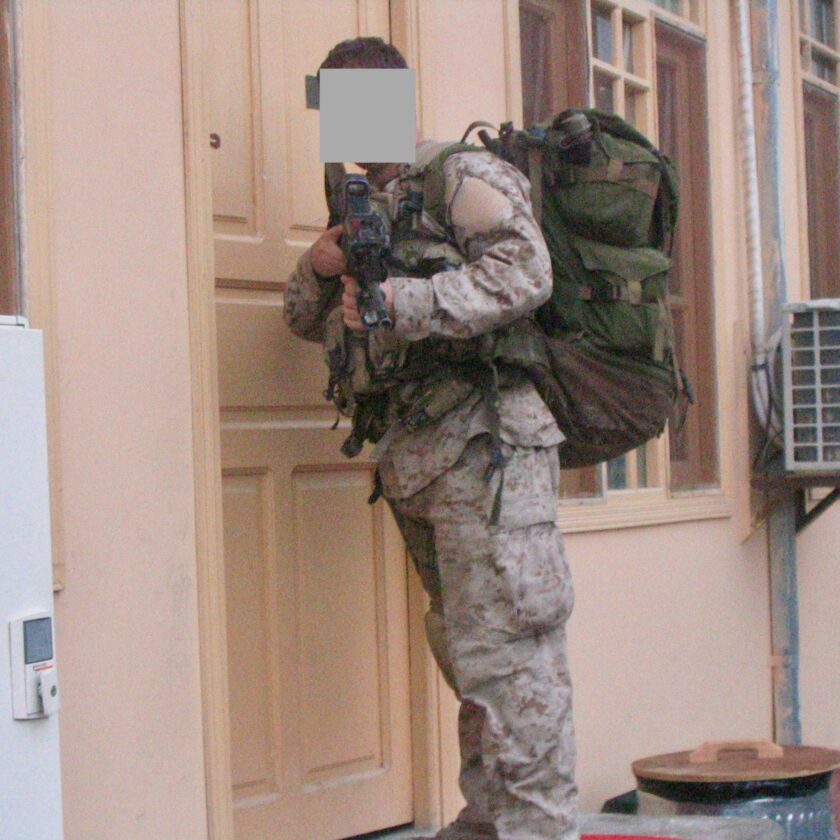
Mission-Specific Gear
Your recce gear loadout will probably contain some mission-specific gear. We talked about the limitations of comm gear in the last installment. Even if your plan is to simply go out and observe, and come back and report, you’ll probably bring something along to support that task. It might be as simple as a notepad and a pen, or as complex as night-vision cameras.
Remember, though, recce is about “getting eyes on” the objective and learning as much as you can about it. Usually recce gear involves some sort of glass (spotting scope, binoculars, etc.). You may want to record this information using a still-camera or video camera.
Back in the day before we had all these cameras and the ability to transmit images we carried a sketch kit. Recondos would sketch the objective and surrounding area and transmit that data back. This is still an extremely valid technique for carrying data back out of the woods with you. The USMC’s west-coast sniper school specifies the following items in a sketch kit: clipboard (usually something like this, painted green and reinforced with rigger’s tape), map pens, protractor, acetate paper, pencils, pens, a ruler, and of course, paper.
Sleeping Gear
Your recce gear loadout should contain some form of sleeping system. You won’t have the luxury of using the nice, warm, comfy USGI 4-piece with bivy with double sleeping bag…at least not if you’re truly doing recce. You’re going to be piled up in the roughest, thickest briar patch you can find. Space will be tight, it might be wet, and you’ll be lucky if it’s even level. You’ll want just enough stuff to make it bearable.
First, you’ll want something to insulate your body from the ground. This might seem like a comfort measure but it’s to keep you from getting hypothermia. Normally this is a piece of “isomat” material. You don’t need the whole damn sleeping mat – we tended to cut of a strip about 12″ wide and about 4′ long. Folded in thirds this would fit in the void created by the ruck frame. It’s not wide enough to lay supine on, but you can lie on your side and retain your body’s heat (and, secondarily, be a tad more comfortable).
Next you’ll want some sort of blanket. The poncho liner has answered this call since time immemorial. A sleeping bag will work, but personally I prefer some sort of blanket rather than a bag – they’re faster to get in and out of and pack up smaller. If you’re in very cold weather a bag may be necessary, though. I now own two Kifaru Woobies. The Woobie is expensive but this would replace my poncho liner any day of the week. The Woobie can also serve as camouflage and as a light-tight cover when stopping for a map-check at night.
Shelter
You aren’t sleeping in a tent, but your recce gear loadout should have something to keep the rain off your head. It’s impossible to hold security from a tent because you can’t see out of it. You can’t pack up a tent quickly and go. Setting up a tent is noisy, and setting up a tent for everyone requires a lot of extra space. If you’re sleeping in a tent you’re on a camping trip, not a recce patrol.
You likely will wish to have some sort of waterproof shelter, though. The standard, USGI poncho is superb in this roll. You can wear it as designed, even with a ruck on, and it does a decent job of keeping you dry. You can tie the hood closed, then string it up as a light roof over your head. It’s still kind of slow to take down but it’ll keep you dry, and you can old security from it. Or you can make a ranger roll with it, tying it to your poncho liner to make yourself into a (somewhat) warm, water-resistant, sleep-taco.
Chow
The main goal of a recce patrol being to remain undetected, so there’s no hot chow on a recce patrol. You can skip the camp stove unless it’s really, really cold out – like below freezing every night. Otherwise you’re eating what you eat at room temperature. I could pretty much survive off of peanuts in various forms (plain, trail mix, candy bars, peanut butter, etc.). Peanuts pack a ton of calories and protein. Add in some carbs and you’re good to go.
In one of the really popular, recent recce videos on Youtube, the host mentioned carrying peanut butter and tortillas to the field. This works beautifully as both are inexpensive, durable, fairly compact/lightweight, and calorie-dense. Maybe add just a bit of candy, jerky, etc. for variety and you’re golden. If that sounds like a pretty boring meal plan…well, it is but again this is recce, not your eighth-grade sleepover.
Water
Water will depend heavily on your environment. Regardless of where you live you will have to carry water. Where you live will dictate how much you need to carry, though. If you live in the mountains like I do water is everywhere – I could probably get by with a couple quarts in my rucksack as long as I had a water procurement capability. If you live in the desert you may very likely be carrying much more water. Each man in your team may have to carry as much as three or four gallons, and rely on caches or resupply.
Most recce patrols will need a water procurement/treatment system. When I was in the Far East this was an issued water filter. Where I live now I can get by on a $3 bottle of iodine because I’m living and (ostensibly) patrolling near the heads of most of these streams. No matter where you live, don’t drink untreated water. Looking, smelling, and tasting water to determine if it is polluted with a chemical, heavy metal, or organism is about as effective as listening to a piece of lumber to tell if it is straight or not.
Military Fighting Loads
The rucksack is only one half of the whole of a recce gear loadout. The other half is the fighting load. This is sometimes called different terms: LBE/LCE (Load-Bearing or Load-Carrying Equipment), 782-gear, “Deuce” gear, and probably a bunch of other things. This is the load carried on your body with a belt and suspenders or on a chest rig. Like rucksacks, I carried two distinct setups in my day.
I’ll talk about them, in detail, in just a bit. First I want to talk just a bit about the philosophy of the fighting load.
The Philosophy of the Fighting Load
“You live out of your rucksack and survive out of your deuce gear,” was the conventional wisdom when I was coming up. Even if you have to jettison your rucksack, your fighting load never leaves you. This means a few things. First, although you have canteens on your fighting load, you don’t touch them until everything else is empty. That’s right – even though you have a canteen on your belt, you dig one out of your ruck to drink. The chow in your fighting load is for survival only, so it’s the last food you even think about touching. You preserve the stuff in your fighting load because it may someday be all you have.
This also mean that you never take your fighting load completely off in the field. Your rifle was never out of arm’s reach, and – at very least – you had one arm through your fighting load. Period. You had to be ready to stand up with your rifle and your fighting load at a moment’s notice. As such you should be able to get somewhat comfortable in your fighting load. Not “binge Netflix” comfortable, but comfortable enough to get horizontal when time permits.
Your fighting load is a critical, life-support piece of your recce gear loadout. There are a couple other things you should spend some time on when building your fighting load. This is “Sunday afternoon in the barracks” kind of stuff. Put on Platoon, crack a beer, put on your Ranger panties, and start working on polishing your fighting load.
In article planned for the very near future I’m going to detail my recent rebuild of my jungle patrolling rig from back in the day.
Dummy Cording
It sounds like silly RIP-student stuff, but you should considering dummy-cording, at least for critical items. If you have pouches that are likely to spill gear, dummy-cording said gear isn’t a bad idea. In my jungle-phase rig detailed below all my canteens were dummy-corded because USGI pouches like to loose USGI canteens. As with everything else use common sense, but dummy-cording is not a bad practice for critical items.
“Polishing” Your Fighting Load
I’m not sure what this is called so I’m going to all it “polishing” your kit. I don’t mean waxing it then shining it up. I mean going through it with a fine-toothed comb and cleaning up loose ends. It means streamlining your kit to the maximum extent possible. It means tightening straps down and either cutting/burning the ends, or carefully folding the excess material and taping it up so it won’t dangle.
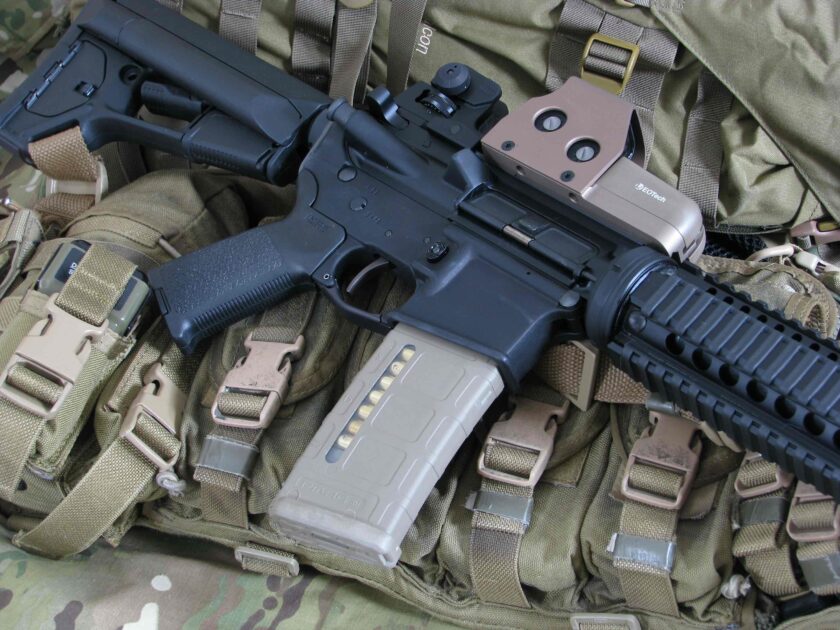
Polishing means burning off all loose threads and cut ends of 550 cord on your kit. Sometimes it even means cutting off flaps and burning the cut end for pouches that don’t need a flap. Obviously be sure this is what you want to do before you cut, but if you spend enough time really working the kinks out of your kit you’ll eventually modify it somewhat.
Ultimately polishing means getting your kit how you want it, then locking it down and streamlining it. The mark of a professional isn’t a gear-bomb around his waist. It’s a tight, well cared for rig that’s been modified based on lessons learned from hard work in the field.
Fasteners
Think about the fasteners on your kit. Some things need to be accessed quickly, with little concern for noise. Some things don’t need to be accessed in any particular hurry, but you need to be able to get to them quietly. Everything must be carried securely. You have a couple options here, depending on your needs.
Velcro is very noisy but is great for things that need to be accessed in a hurry, like magazines. In the midst of a break-contact drill the noise of a Velcro pouch being ripped open isn’t going to be a factor in any conceivable way. Velco also offers speed, so it’s a good choice for applications like mag pouches.
Another main option is Fastex buckles. Fastex buckles can be opened quietly. They take a tad longer to open than Velcro, though. I always made sure all my slow/quiet pouches were secured with Fastex. Things like water bottle pockets, admin pouches, and my rucksack were secured with Fastex buckles. I also kept one magazine pouch secured with Fastex instead of Velcro, in the event I needed to reload in a lull and didn’t want to rip a Velcro pouch open.
Think about how the pouches in your recce gear loadout are secured. With a needle and thread (or dental floss, which is the strongest thread you can imagine) you can add Velcro of Fastex pretty easily, though it does take some time.
My Jungle Phase Fighting Load
During my time in Okinawa I used cobbled-together military-issue stuff. I created a bastardized belt/suspenders situation, which worked really well for the insane heat of the Pacific Rim. The basis of the system was an ALICE belt with shoulder straps fashioned from a USMC-issue LBV (load bearing vest) with the front magazine panels removed. I did this because the LBV’s shoulder straps were very wide and comfortable, but the magazine panels were unnecessary, and hot.
To describe the contents of the belt imagine you’re wearing it. Again, everything here was an ALICE component. We’ll go clockwise, starting at the buckle. First, I had a SAW pouch that contained frequently used items like a compass, map stuff, camo paint, etc. This pouch was super hard to come by back then but somehow I got my hands on one. This served as my “possibles bag.”
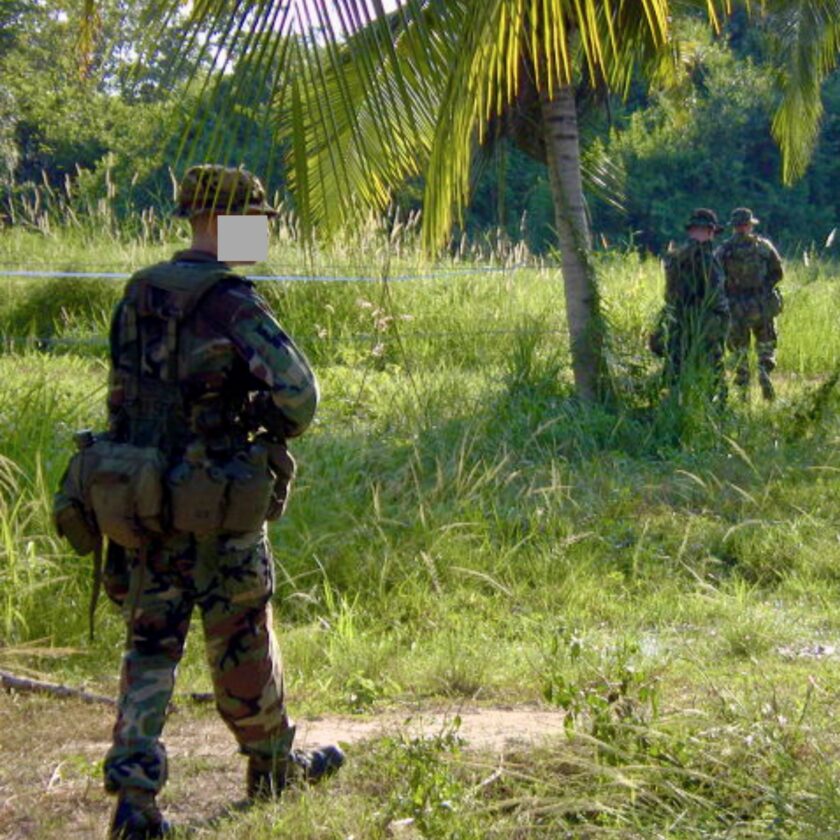
Next were two USGI canteens. Behind the canteens, in the center of my back was a buttpack. The butt pack contained survival gear: a poncho, an emergency MRE, a waterproofed polypro top and bottom, extra socks. It also had an old school first aid kit hanging off of it (maybe you remember the one with the plastic box?). Next were two more canteens, and finally four, 3-mag magazine pouches. If you’re keeping count that’s 4 quarts of water, 12 magazines, admin kit, first aid kit, and survival kit.
This was a nice setup, and one that is still pretty valid. I recently recreated this rig. There is a bonus article coming out this Friday with all the details.
Desert/Mountain Phase
The second fighting load setup I wore was a chest rig. Honestly, I don’t think this would have worked for me in Okinawa – chest rigs just cover too much of your core’s surface area and hold in heat. It worked well enough in Afghanistan, though. Sadly I don’t have a single, clear photo of this rig and it has since been discontinued. The rig was from High Speed Gear, purchased way back when “”Mean Gene” had a little shop out the back gate.
The rig had X-pattern straps and had 4 magazine pouches, each holding two mags. At each end of the panel was a 1-quart Nalgene pocket, covered in MOLLE webbing. The panel holding the magazine pouches zipped open to an admin pouch that held all my mapping gear and comm references. The MOLLE webbing got used for a PRC-148, IR strobe, multi-tool, blow-out kit, etc.
My exact HSG chest rig isn’t made any more. It’s kind of similar in layout to the Guardian chest rig made by Helikon-Tek. I may try to get my hands on one of these rigs soon.
Body Armor
While we’re talking about body-worn gear is a good time to talk about body armor as it pertains to the recce gear loadout. Recon has always had sort of a mixed relationship with body armor. When I was in Okinawa it was sort of a mark of pride that Recon Marines went out without body armor. The job, it was supposed, was to stalk and not be seen, hunt but not fight. Being light and agile was valued over the protection afforded by body armor.
That was until Iraq kicked off and got hot and heavy. Now, pretty much always (unless I’m WAY out of the loop) dudes are wearing body armor on the majority of recce patrols. Once incoming fire is a realistic possibility the “light and agile” thing becomes less important than having something hard to hide behind. Then again if you live in extremely hot, humid area body armor might be a hard no. Again, factors to consider.
For civilian purposes it’s unlike that this conversation on body armor matters a whole lot anyhow, since most of you don’t have body armor. It’s something to think about, though. If you do have body armor you may want to think about using it if you’re doing recce against a real adversary.
Civilian Fighting Loads
Here is where we get to the meat and potatoes of the article. You probably didn’t come here to read about what military guys did 15 years ago. Instead you probably came here to answer how to set up your own fighting load. Fortunately, fighting loads aren’t actually going to be that much different for a civilian recce gear loadout. You’re going to carry much the same things in much the same ways.
The fighting load in the civilian context is honestly difficult to imagine a true need for. I think more often we come up with the gear we want, then manufacture a need around in “what if..” scenarios. Honestly it is very difficult for me to imagine a situation, even if our stability as a nation should decline rapidly, in which an AR with a mag in each back pocket is insufficient.
In the interest of a good artilce I’ll play along. If you plan to do reconnaissance operations as a civilian, where is what your load should probably look like.
Load Carriage System
You need some way to cart this stuff around. There are essentially two options: the chest rig and the belt rig. Obviously there are pros and cons to each. Matt Robertson at Everyday Marksman has written a bunch of awesome articles on load carriage, including a comparison of belt rigs vs. chest rigs, and his belt rig and chest rig setups. Though not necessarily designed for recce, I really recommend you give his articles some thought. Let’s quickly look at some of the differences between the two systems.
Chest Rigs
The chest rig usually has criss-crossed straps that go over one’s shoulders. The load is carried on one’s chest (obviously). This keeps stuff off your waist which can be aggravating, and makes it easier to sit down. Chest carriage also makes your rucksack slightly less likely to interfere with your fighting load. And, stuff on your chest is easier to access than stuff behind your back on your belt.
There are a few cons to the chest rig. First, they can’t carry quite as much stuff as a belt-and-suspenders rig. Since everything is bunched up in one spot on your body there just isn’t as much room. The chest rig also covers your core pretty tightly, holding in heat. In hot climates this can be a huge detriment. A Finally, it is really hard to get into a low prone with a chest rig.
Most of the chest-rig options out there today are more CQB-oriented than recce-oriented. Most of them (this is probably just my bias talking) seem cut-down for wear over a plate carrier, and most feature MOLLE. For recce I like a generously-sized rig. I also like a chest rig with sewn (rather than modular) pouches. Making the system modular also makes it bulkier and heavier.
Belt Rigs
The alternative to a chest rig is a belt rig. A belt rig carries stuff around your waist via suspenders, much like the old ALICE system you see me carrying in some of these old photos. I have recently assembled a belt rig mimicking my old, military jungle rig. You’ll see a lot of photos of that soon.
The belt rig has some advantages. Since little of your core is covered by the rig, it doesn’t hold in a ton of heat. They can also be really comfortable if assembled well, and can let you get low into the prone, assuming you don’t have stuff across the front of the belt.
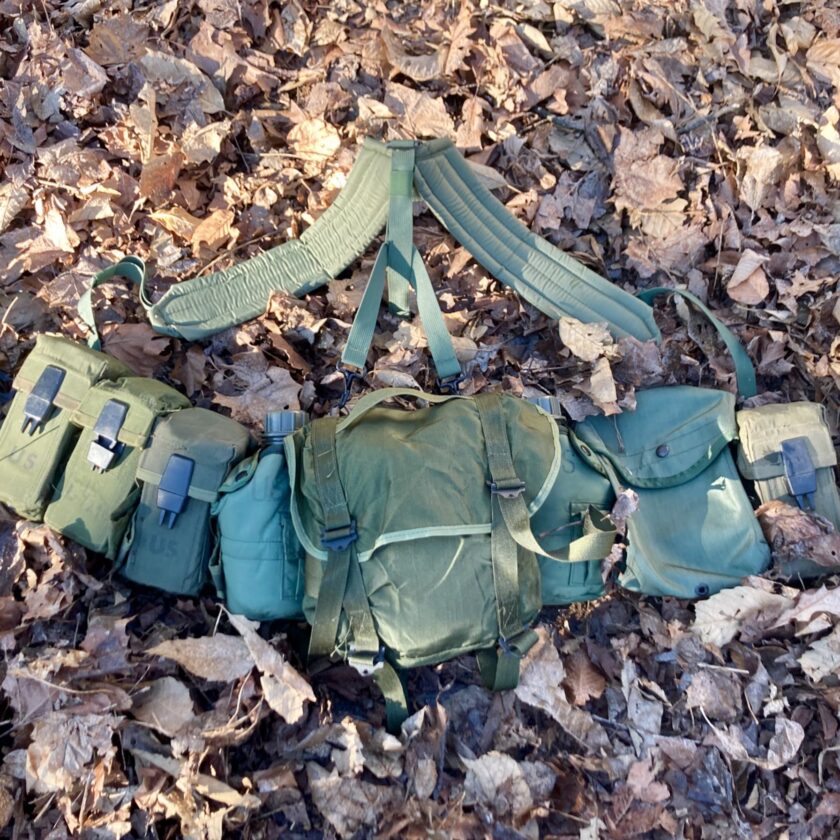
Unfortunately belt kits also have some disadvantages. First, you won’t easily be able to sit down in a vehicle. With bulk all around your torso you also cut a wider figure, and risk snagging on stuff in tight jungle/woods, or if you should have to transition to an urban environment. If you have stuff in front of your legs you’re going to hate it when you have to walk up and down hills. And stuff in front of your body makes it hard to get into a low prone.
The Stuff In the Fighting Load
Now let’s talk about the stuff in the fighting load portion of the recce gear loadout. This is the stuff that will keep you alive if thing end up going sideways.
Navigation
If you fancy yourself doing recce but don’t know how to land nav… I’m afraid I have some bad news for you. We’ll get to individual skills later on, but suffice to say: every single member of the team needs to be shit-hot at land navigation. In addition to skill you also need some land nav equipment.
Map
First, you need maps. I would recommend going ahead and getting paper maps of your area now. If I had nothing else I’d like to have a map. You can direction-find in various other ways, but a map is critical. Don’t rely on phone-based maps if your planning to do this in any kind of adversarial environment. Also keep in mind the inherent fragility of smart phones, and the need to keep them charged renders them unservicable for front-line, recce gear loadout use.
National Geographic maps are my go-to. They are water- and tear-resistant, you can write on them with map pens, and they work with MGRS (if you don’t know what MGRS is, you’ve got some work to do, pal). If you can’t find a National Geographic map of your area you may want to consult your local outdoor store, or get familiar with CAL Topo and a local print shop.
Compass
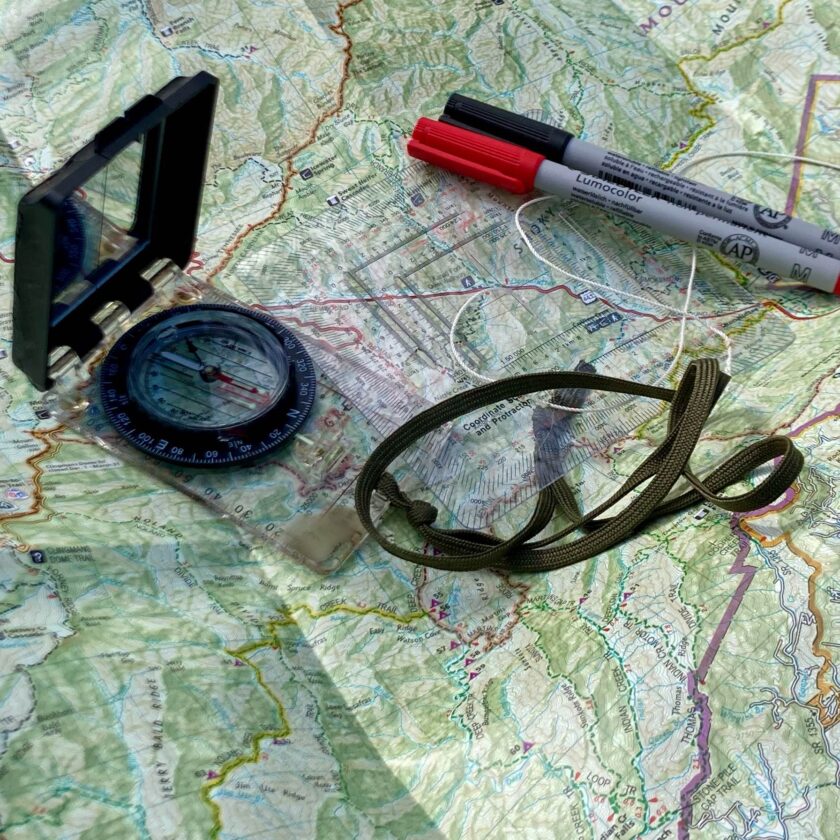
Next, you need a compass. I can ramble on and on and on about compasses. The official, Cammenga, USGI-issue lensatic compass is about bombproof. I dont’ like it because it’s big and heavy, but if you go that route it’s the last compass you’ll ever need. My other favorite, and the compass I actually use these days, is the Silva Ranger. It’s way smaller and lighter than the USGI lensatic compass, yet still durable and very accurate.
After that you’ll need just a couple other things. First, a protractor. This allows you measure distances and figure bearings on the map. It makes like very easy when planning routes and doing other map-heavy work. You also need some map pens that will write on laminated maps but are erasable. Having an alcohol correction pen (it functions as an eraser) is also a good idea.
GPS Navigation
I’m not going to get into GPS here. GPS is amazing technology, and professional recce teams the world over rely heavily upon them. You should probably have one and be familiar with its use, but keep in mind that GPS can be jammed, spoofed, or “turned off.” A recce team needs to be extremely adept at using map and compass.
Ammunition
You also need ammunition carriage. This pretty much goes without saying, and I’ll cover it in more detail in the next installment on recce weapons. For now I would say you need somewhere between 6 and 12 magazines on your kit. Determining the exact number is up to you and your team and should depend on risk of compromise/contact, availability of resupply, distance from reinforcements, and a bunch of other factors. Personally I would probably shoot for about 8 magazines on my fighting load.
Water
You need some water on your fighting load. If you end up in E&R (escape and resistance) mode, you aren’t going to have time to stop and purify water. I strongly recommend the military standard of two quarts on your fighting load unless you are in an extremely arid climate, at which point you may wish to upgrade to four quarts. All that water is heavy, but it’s just as important to life sustainment as ammunition.
First Aid
Finally, you need some first aid. Your first aid kit should probably resemble a military IFAK, reinforced with some boo-boo stuff. The IFAK portion should contain a CoTCCC-approved tourniquet and hemostatic dressing, an Israeli bandage or two, gauze for packing wounds, and maybe a decompression needle. Oh, and of course you’ll need the training to use this stuff.
The boo-boo portion should contain some bandaging material for smaller, non-life threatening wounds that may become infected if not treated. Personally I’d have a couple 2x2s and 4x4s, a roll of gauze, some steri-strips, and a 10cc syringe for irrigating small wounds. This should just about cover the first aid gear for everyone but the medic in a recce team.
Survival Gear
Your recce gear loadout isn’t complete without a small stash of survival gear. In the military signalling was my single most important survival tool. My PRC-148 radio, a smoke grenade, an IR strobe and maybe a VS-17 air panel would all be on me. Getting a signal out to an aircraft is the evading soldier’s single biggest chance of survival. For you, here in CONUS, if you find yourself truly doing “recce” I’m not sure signaling is going to be your best bet. You just aren’t going to have aircraft to signal. “Self recovery” is probably going to be what’s necessary.
Here’s what I recommend keeping in your on-body, fighting load, if possible. First, a warming layer. This is usually just a polypro top, waterproofed in a Ziploc bag. Next, some kind of food. It can be jerky, peanuts, whatever else you have lying around…or you can field strip a MRE down to its most calorie-dense bones. I would have some 2% iodine for purifying water, a fixed-blade knife, and some method of starting a fire. That should get you off to a pretty good start.
Closing Thoughts
If that gear list sounds like a lot of weight without a lot of creature comfort in return, it is. Then again, this isn’t a picnic with your kid-sister. The purpose of recce is to move around very near the enemy, remain undetected, and gather information. Your recce gear loadout is to provide you with enough to stay alive and comfortable enough to accomplish the mission. That’s it.
Six-thousand words down and I’m sure there’s plenty more to say about recce gear…but I’m tired of writing about it for right now. But I’ll be back. Friday there will be a standalone article detailing my old-school belt rig. In two weeks, in the next installment of Recce Patrolling Basics I’ll talk about what I’m sure you’ll all waiting for: recce weapons and address the mythical “Recce Rifle” concept. Stay tuned!
