Know a Knot! The Water/Tape Knot
Welcome back to Know-a-Knot! It has been a while since we've looked at a new knot but I've received emails from a couple of you asking for the series to continue. Today we're going to talk about an interesting joining knot: the water or tape knot.
The Water or Tape Knot
I've told you guys before, but when I was in RIP (Reconnaissance Indoctrination Program) in the military we had to learn a lot of knots. One of them was this knot, the "water" or "tape" knot. The instructors would say "water or tape" so fast that it sound like "water tape" so for a long time I thought this was the water tape knot. In hindsight I suspect that some of my instructors might have thought the same thing. Nowadays I mostly hear it called the water knot, but for nostalgia's sake I threw both names in the title. For simplicity though, I'm now scaling back, myself. The rest of this article will refer to it simply as the "water knot."

The water knot is both a joining knot and a special knot. It is a special knot because of the medium in which it is tied: nylon webbing. It is a joining knot because it can be used to securely join two pieces of nylon webbing, or two ends of the same piece of webbing. Tying the two ends of one piece of webbing makes a loop, which is useful for things like setting a "wrap-three-pull-two" anchor. The water knot can also be used to join other flat, cord-like objects like ribbon or leather straps. I don't recommend this knot for standard rope, though you can practice it with rope if so desired. Let's get into the tying the water knot.
Water Knot: Step 1
First, begin with two pieces of nylon webbing. Here I have used two different colors to make it easy to see the two pieces. In one of the two pieces, tie a simple overhand knot.

Water Knot: Step 2
Next, with the other piece of webbing, begin to trace back through the first in reverse direction. Start with the working end of the overhand knot. Follow the original piece of webbing all the way back through the knot as show in the series below.


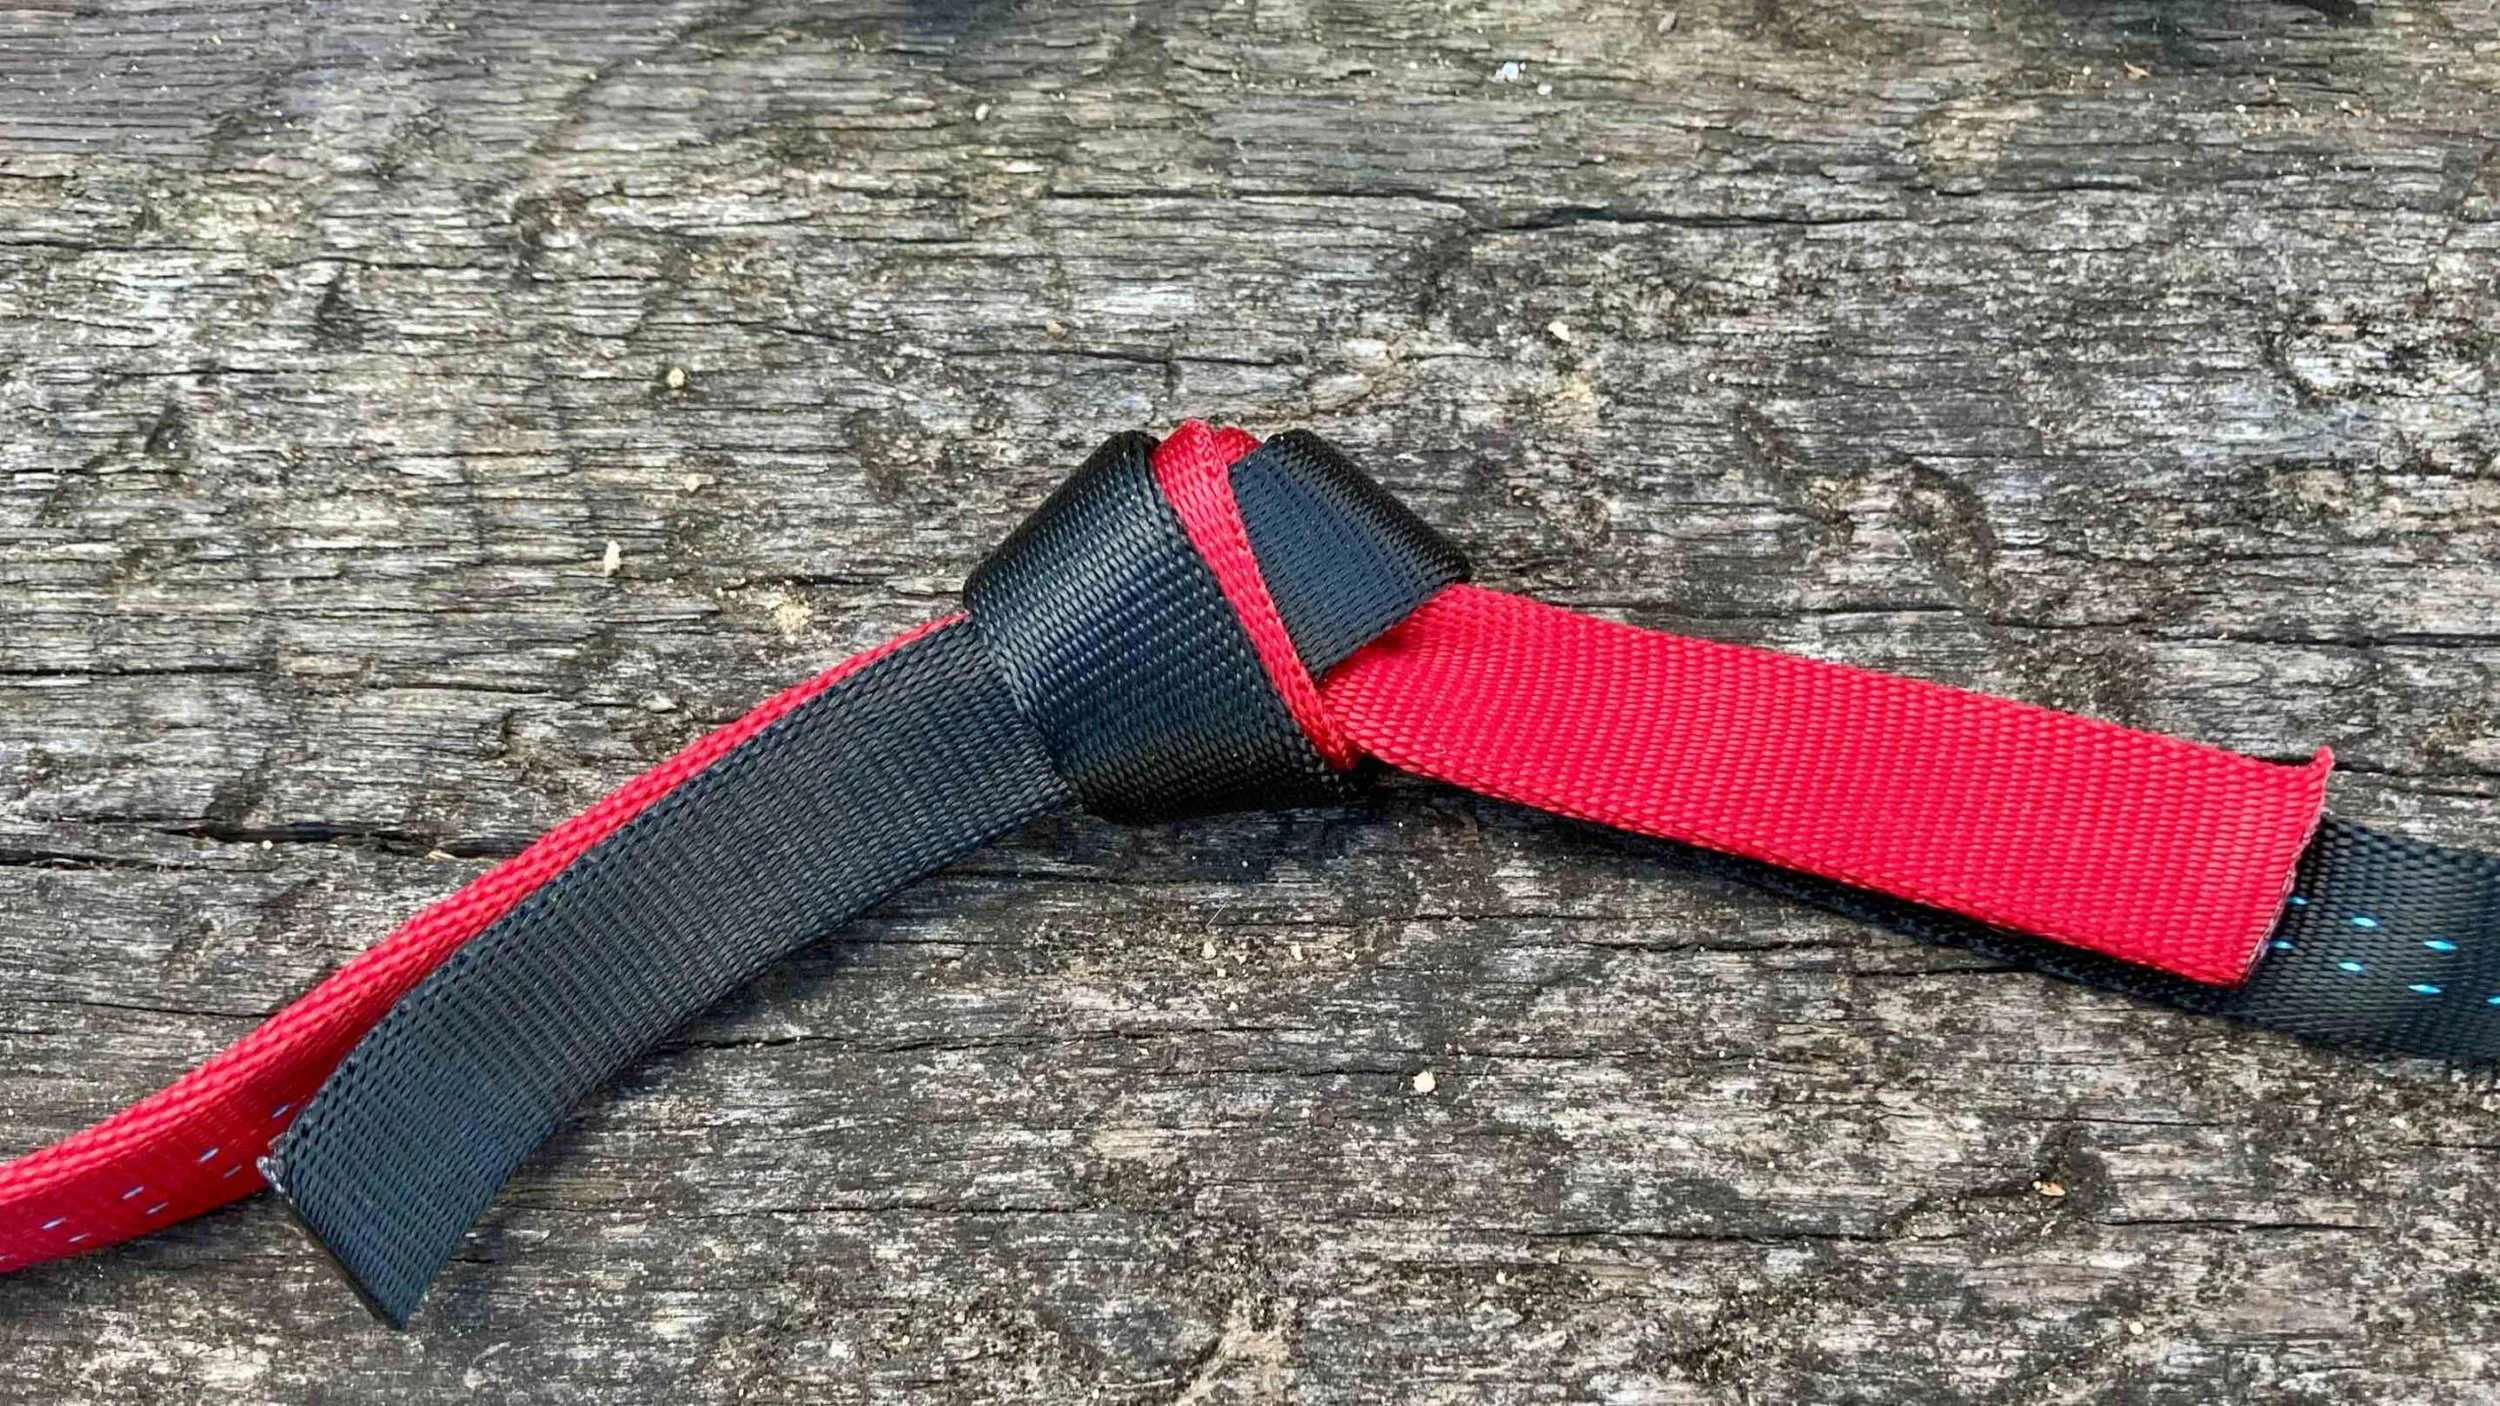
Water Knot: Step 3
At this point the knot is basically tied. All that is left to do is tighten it up and clean it up. Like I've pointed out many times before, pigtails should be between a fist and a fist-and-a-thumb. I don't think I set a good example in the accompanying photos, but for your knowledge, you should have a nice pigtail if you are relying on this knot.

And that's it! That's the Water or Tape knot. I hope you've enjoyed this quick little installment of Know a Knot!
