Chickens are one of the quintessential preparedness food sources, and for good reason. While it is still fresh in my mind, I’m going to offer some after-action information for those of you who may be thinking of raising chicks. It’s a little late in the season for this, so maybe I’ll repost it early next spring, as well.
First and foremost, I am not an expert on poultry production. I do have some experience, though. I have kept both chickens and ducks and used both for meat and eggs. I have also raised a few turkeys for meat. I have now participated in the entire process from raising chicks to building coops to butchering and cleaning animals. Still, I am far from an expert; this was my first time raising chicks without a mother hen. What I do hope to provide here is a brief primer for individuals who are thinking of getting started with chickens.
Chicks vs. Chickens: Pros and Cons
I did not really want to raise chicks but in the end I’m very glad that we chose to go this route. There are some pros and cons you should think about, though.
Pro: chicks are way, way less expensive. Even when you factor in the cost of heat lamps and some of the other chick-specific stuff you need, chicks are still way less expensive. There’s an economy-of-scale, too; it doesn’t cost a ton more to raise 20 chicks than it does to raise five or six. So how much does it cost? Let’s just look at the cost of birds and we can add up supplies as we go along. Chicks cost anywhere from $3 to $5 each. Sometimes you have to buy then in sets of 10, as was the case with us. Pullets or adult hens, on the other hand, can cost as much as $20 – 40 per bird depending on age, breed, and demand. Sometimes even finding adult chickens is difficult. Cost was the biggest factor for us.
Con: chicks are risky. Some of them will probably die. We have maintained zero attrition rate which I honestly still have a hard time believing (and absolutely know that it won’t last). We expected to lose three or four by now. This introduces some “chicken math” complication: you have to buy more than you think you’ll need. We currently have 20 pullets, we want about 12, so we have some to give away or, failing that, put some in the freezer in a few weeks.
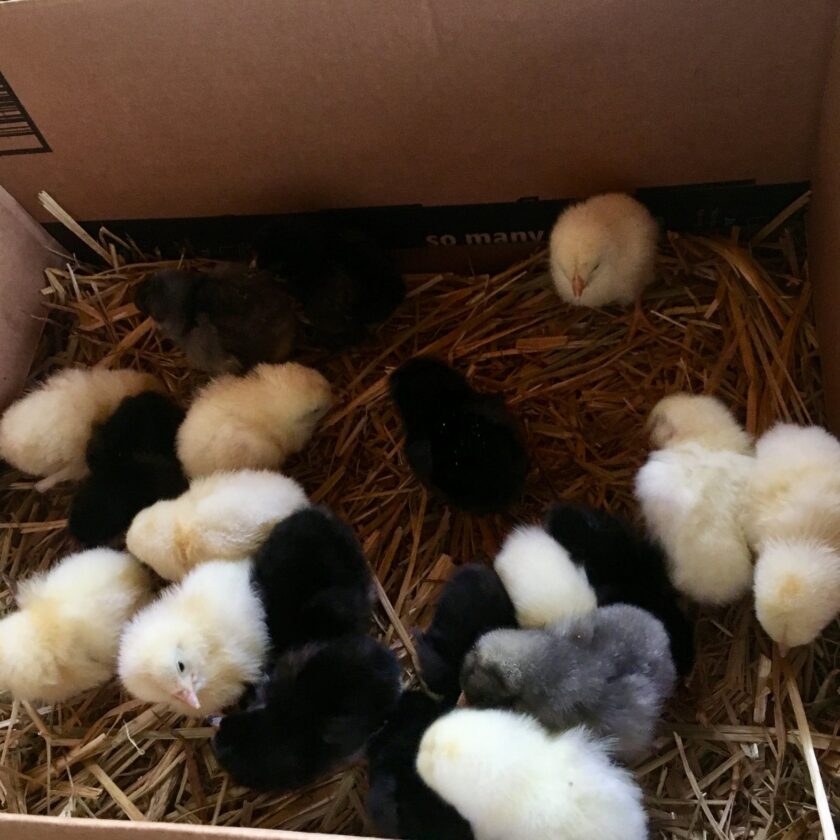
Pro: you know exactly how old your birds are. Hens lay really well for two to three years, then eventually stop laying. You don’t want to spend $25 on a bird that has six months of laying left in her. On the other hand…you aren’t going to get any eggs out of chicks for the first four or five months you have them…but you’re still paying to feed them.
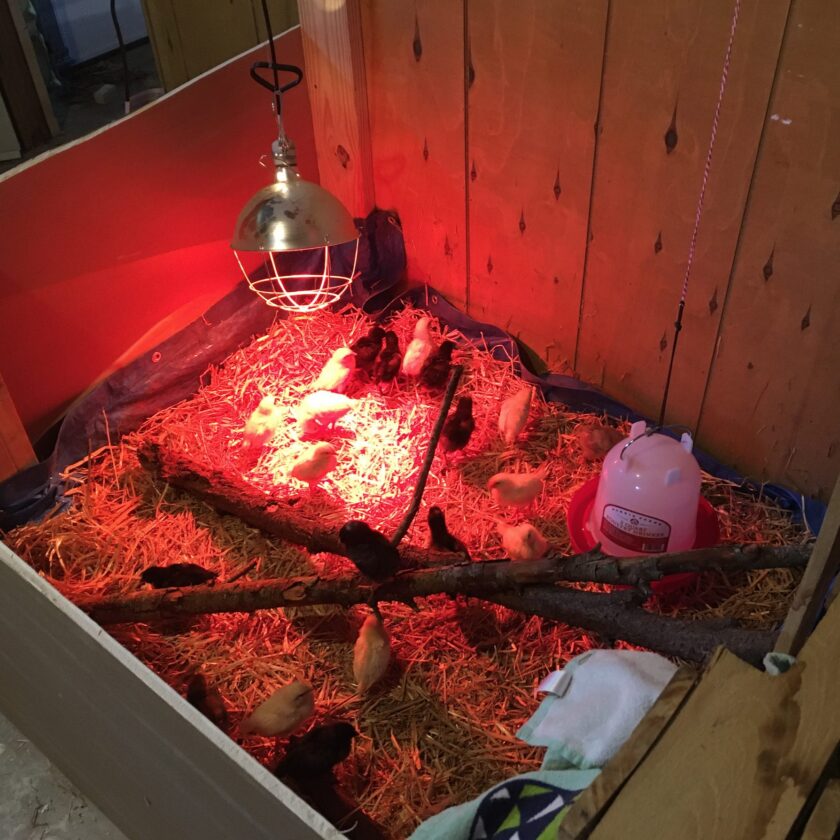
Con: you’ll need a space for brooder. We started out chicks out in the bathtub of our spare bathroom (believe it or not we didn’t get a ton of guests between March and May of this year). I’ll talk more about that, but it only lasted two weeks, max, before they were too big for that space. I built a much larger 6′ by 8′ space in the basement out of some old materials and it worked well until they were almost 7 weeks old and ready to go outside permanently.
Pro: it’s an experience. I’ve watched hens raise chicks before and I hope to do that again, but I’ve never been involved in the process. I was very glad to get to do this and learn a few more things about chickens.
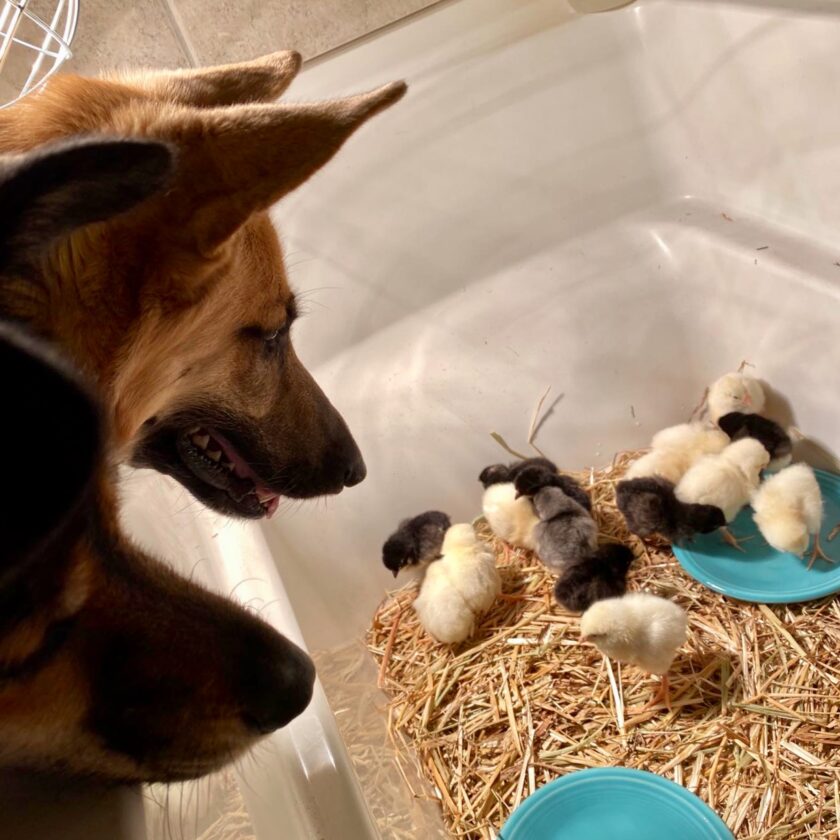
Con: they are dirty and smelly. All chickens are dirty and smelly. The difference is that you’ll have to keep chicks – and all their dirt and odors – indoors for a while. The older and bigger they get, the worse they will smell. We managed to deal with the smell by cleaning out their brooder regularly – almost daily by the end. The dust, though… the dust was never ending. I don’t know how chickens generate so much dust or project it so far but EVERYTHING in our laundry room had a very thick coat of dust on it. To be honest the dust bothered me more than the smell.
Plan Ahead
When we got our chicks, the local feed and seed stores were sold out, so we ordered them from Tractor Supply. I would have loved to support a local business, but such is life. The chicks actually came in the mail, through the United States Postal Service. I was pretty amazed by that – our post office called one day and said, “your chicks are here.”
The only problem: our chicks arrived about a week before the estimated delivery date. We expected to have the weekend to prepare a brooder but that obviously wasn’t the case. Because of that we bought some sub-optimal equipment and certainly didn’t have everything set up exactly the way we wanted it set up. If at all possible have everything ready to go the way you want it before the chicks arrive, and expect to make some modifications once they’re there.
Equipment: Heat Source
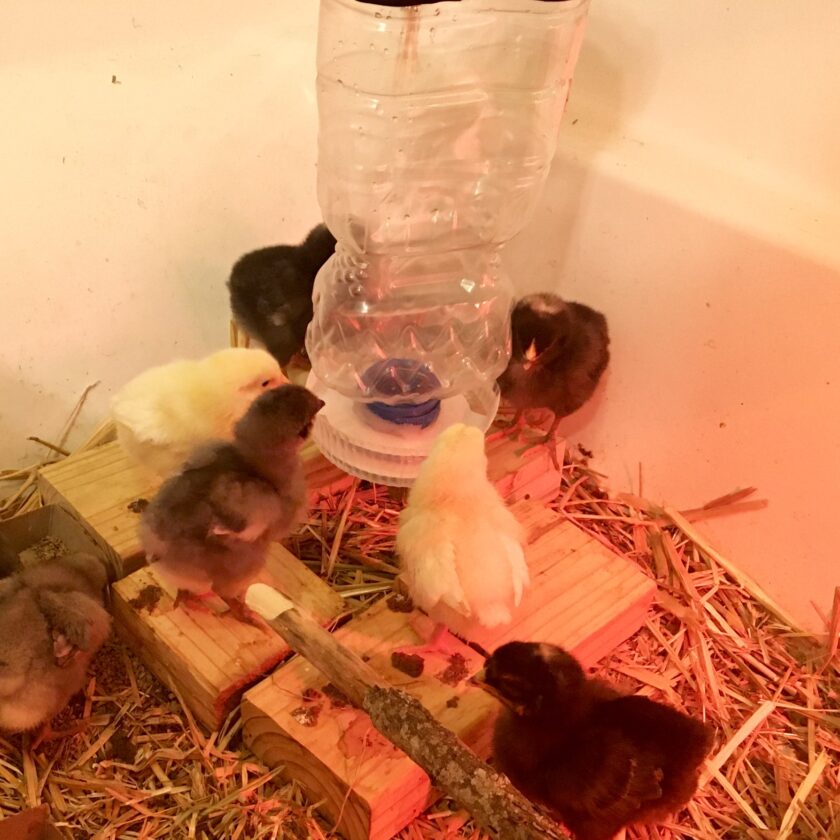
Baby chicks need to be kept warm. Up to about a week old they need a temp of 95 degrees, and this temp drops about five degrees for every week of life, until they are about six or seven weeks old. Even if you keep your house really, really warm, chicks are going to require some auxiliary heat. Most often, due to cost and availability, that ends up being a heat lamp.
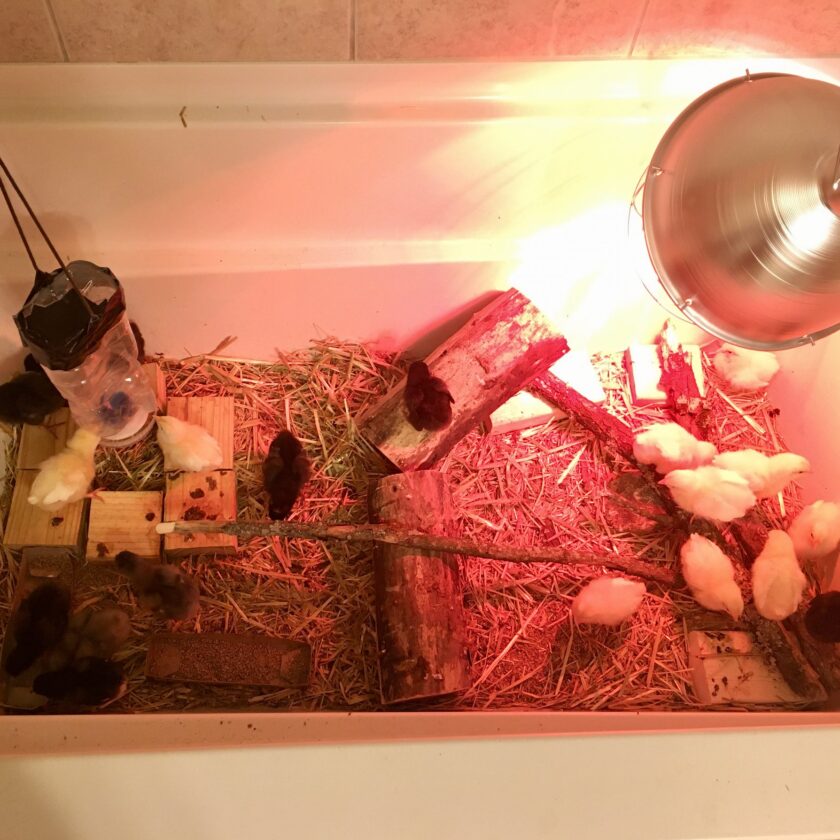
Warmth is the reason we started them in the spare bathroom; we kept the upstairs of the house nice and warm, plus they had the benefit of the heat lamp. We used the shower curtain tension rod, lowered and place mid-way over the tub, to support the heat lamp. Every week we would back the heat lamp off a bit, as the chicks got taller and closer to it, and needed less heat. When we transitioned the birds to the basement we moved to two heat lamps because the area was much cooler and the space was much larger.
You can get a good idea about the adequacy of heat in a space by watching the chicks. If they all stay clustered directly under the lamp, it’s probably too cold in their space. If they are all at the opposite end of their space from the lamp it may be too warm. If they’re just happily walking around, exploring, eating and drinking they’re probably just fine.
We also used both white and read heat lamp bulbs. This was partially due to availability and partially due to ignorance on our part. We read that red bulbs are preferred, both because they don’t keep the chicks from sleeping, and to cut down on the birds pecking each other. Knowing what I know now, I probably would have opted for a ceramic heat emitter rather than a light bulb. Same concept – it plugs into a light bulb socket and emits heat – but it doesn’t emit light. Since we’ve had these chicks we’ve read about all kinds of negative effects of raising chicks under 24 hours of light, and not starting them off right away with a day/night cycle. How true it is I can’t say, but it does make emotional sense to me.
Heat Lamp Safety
Heat lamps pose a pretty big fire hazard. The lamps themselves can potentially melt (I’ll talk about that more in a second) and they are posed over beds of straw, wood chips, or other flammable material. I was never one hundred percent comfortable having heat lamps going. We did take a couple steps to make them a bit more secure.
First, we made sure to buy heat lamps with a porcelain socket instead of a plastic socket. The plastic socket can melt which causes obvious safety issues. The porcelain lamps aren’t much more expensive, and I wouldn’t buy a heat lamp that didn’t have a porcelain bulb socket. Secondly, we bought actual brooder lamps rather than work lights or whatnot. They have a cage over the bulb that prevents chickens and other foreign objects from getting too close to the bulb.
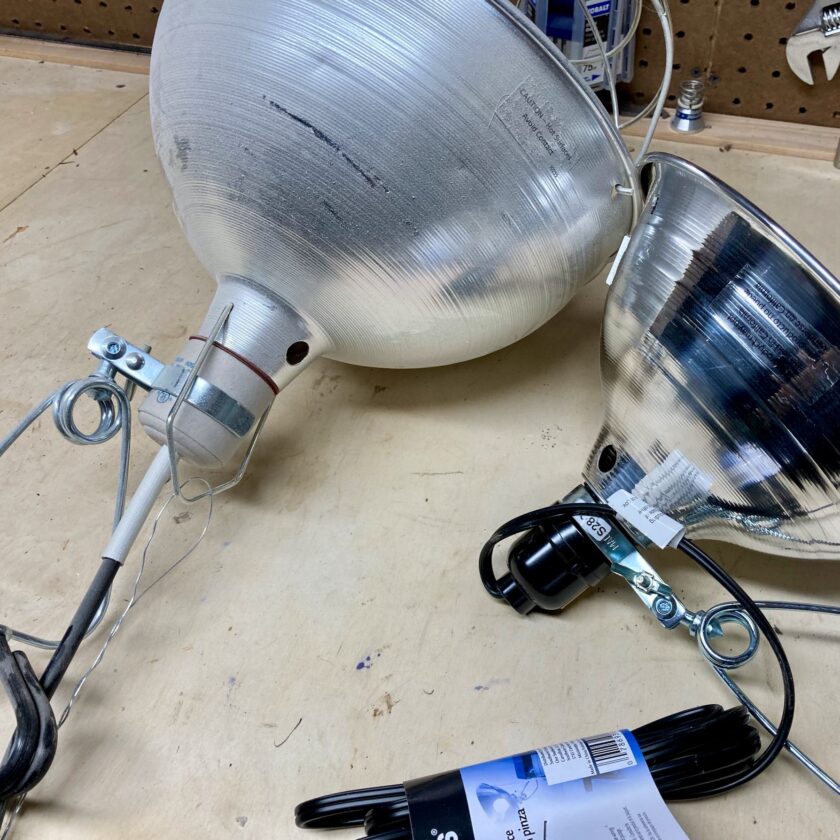
Secondly, rather than rely on the clamp to support the light, we suspended the lamps from above. Instead of using string, cord, or something else that could burn or melt, we used wire to suspend the lamps. I am probably a little paranoid but the thought of a house fire terrifies me.
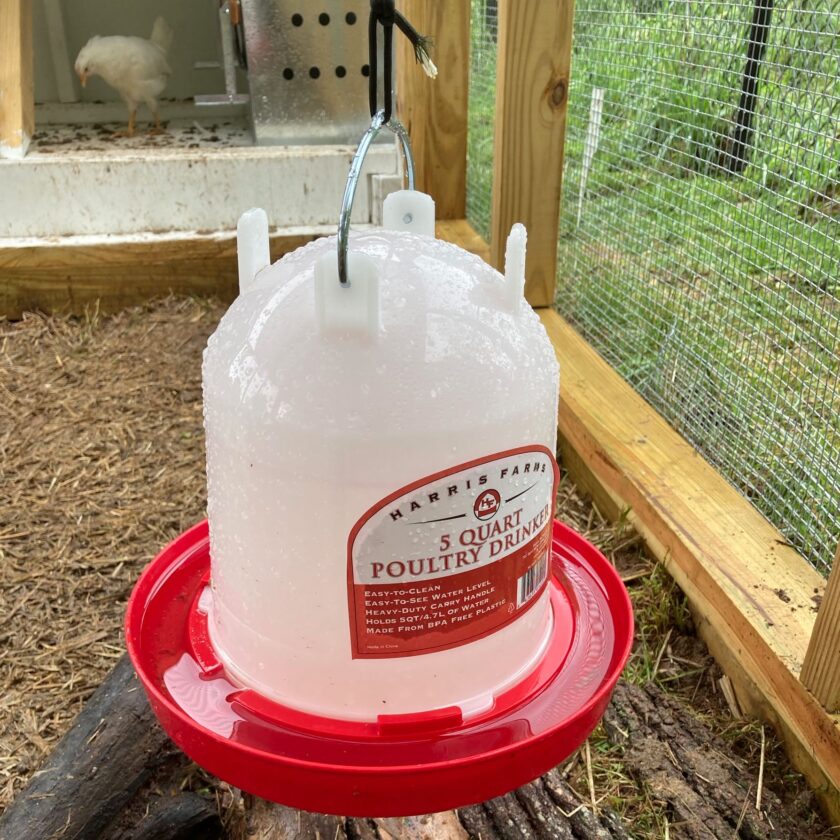
Equipment: Waterer(s)
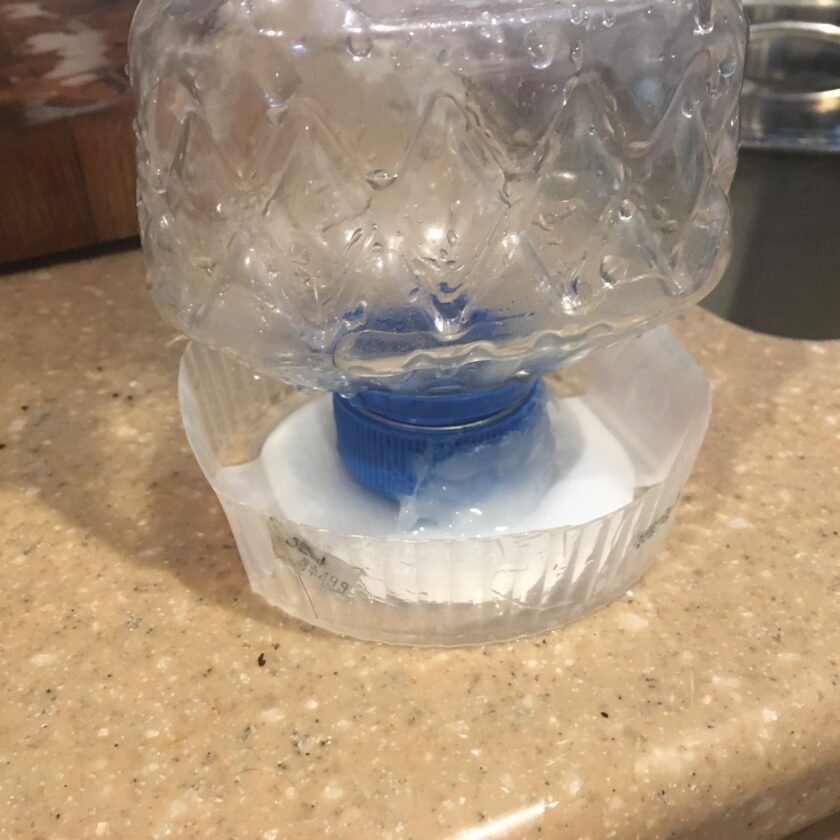
Obviously chicks need water, and you’ll probably want to purchase a waterer. We ordered a couple of waterers ahead of time, but they turned out to be a bit much for the brand-new chicks. So I improvised. I made a smaller waterer from an old cooking oil bottle, a feta cheese container, and a hot glue gun. Necessity is the mother of invention. That worked until the chicks were about moved to the basement, at which point they were ready for a regular waterer. In their coop they now have three waterers to choose from which cuts down the frequency we have to refill.
If you don’t want to make a waterer for your chicks, there are tons of options you can buy. There are smaller, chick-specific waterers. There are special lids that go on Mason jars to make them waterers. The world is your oyster but again, be prepared before you get your chicks.
One thing we did discover is that we kept having to raise the waterer as the chicks grew. Chicks – and chickens – shit constantly. If their water is at such a height that they can just hop up onto it they can and absolutely will soil their own drinking water. This is mainly a problem when they are fairly small, as most chicken waterers just won’t support the weight of adult chickens….but you want the waterer above vent-height (a chicken’s vent is its excretory orifice).
Equipment: Feeder
Another mistake I made was not getting a feeder right away. I assumed baby chicks would be so small they wouldn’t be able to use a feeder. Huge mistake. For the first two weeks I fed them from small trays I made by cutting the bottom out of cereal boxes. That seemed to work great…until I cleaned the tub out and realized I was throwing away probably 10 to 15 pounds of food. They had scratched it out, it had gotten wet – from water, the excretions, whatever – and turned into a disgusting mess, to say nothing of the waste. I really got under my skin to throw away that much feed.
Chicks are growing extremely rapidly and need food available constantly. They can generate a ton of feed waste if they can physically get into the feed source. They will scratch around in it and scratch more – sometimes much more – out onto the floor than they eat. Once its on the floor…they might eat it, but more than likely they’ll keep going back to the source. The feeder cuts waste down to nearly nothing. I’m currently looking at rain-proof feeders to leave in the coop. Since these guys are still growing I want food available to them but don’t want to waste 10 lbs of food if it rains, and keeping an eye on the weather this time of year is daunting.
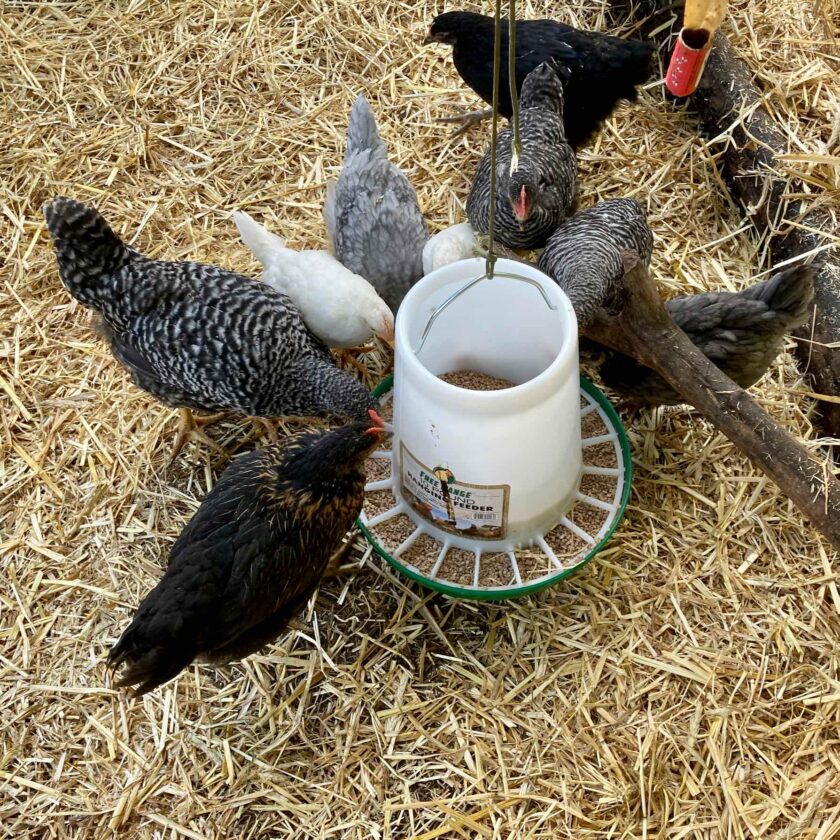
We fed our chicks Purina Medicated Starter Crumbles. I know, I know – it’s not organic but it’s what the local feed store has in stock. I initially purchased a 50-pound bag and that would have easily lasted us for the entire first six weeks. Unfortunately my lack of a feeder resulted in me composting at least 15 to 20 lbs of feed, so we ended up going through another 25-pound bag before they were outdoors.
Time and Attention
I thought this would be much more demanding than it was. Basically, all they really require is a check-in a couple times a day to make sure they haven’t killed themselves and have food and water. “Haven’t killed themselves…” let’s talk about that one. There were a couple who surely tried. One chick managed to get herself stuck down inside the feeder. She spent as much as four or five hours in there before we discovered her. This prompted me to fashion a lid for the feeder.
I also gave them some “terrain features” consisting of logs and sticks, something that has also carried over to their coop. This provides them with a little stimulation and places to roost. That was a pretty minimal time investment – going outside and rustling up a piece or two of firewood and some downed tree branches. They definitely seem to appreciate it.
Other than that filling the water and topping of the feeder is about all the attention the require as long as they are warm enough and have plenty of space. I’m very surprised by this; every talks about how hard raising chicks is. They’re basically tiny dinosaurs, though: they don’t care about you, they just need food, water, and warmth – not your constant intervention.
Transitioning Outdoors
We transitioned our chickens outside permanently at just over six weeks old. The would have gotten them out a few days sooner, but we have five solid days of rain and I didn’t think it would be good to throw them into that deep end.
We transitioned them outdoors over time rather than making it a super abrupt change. As soon as they were four weeks old we started doing field trips down to the coop on warm days. They seemed to enjoy this. We made it a bit more enticing by catching some worms and bugs for them, which they went crazy for. These early trips were short – just a couple of hours.
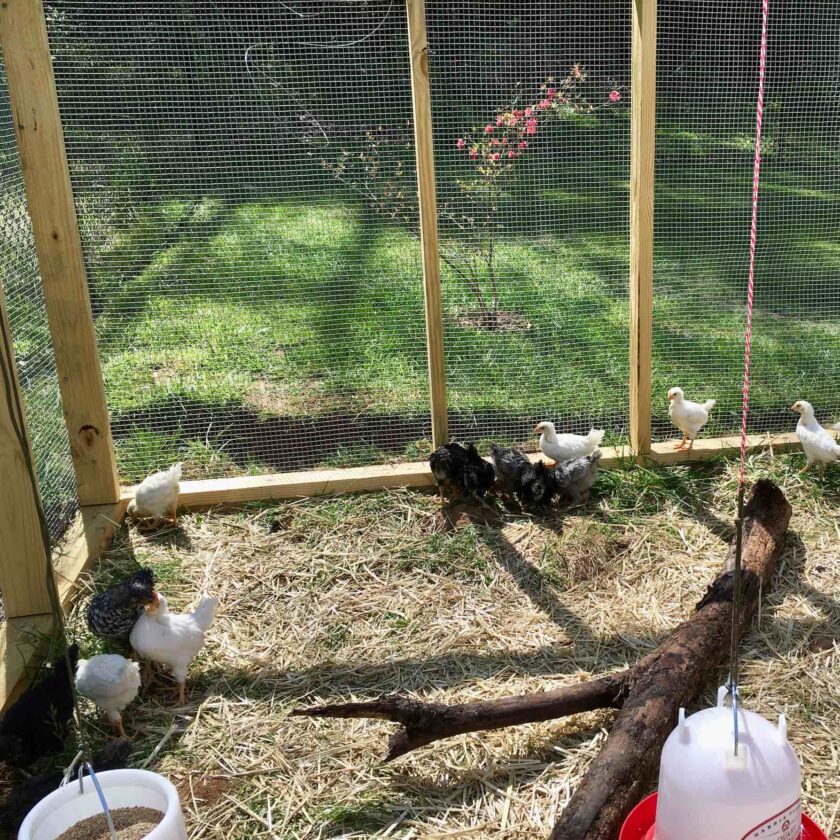
A week before we put them out for good we did one sleepover in the coop on an unseasonably warm night. We put them back inside the next day, but discontinued the use of the heat lamp. getting them used to slightly cooler temperatures and a regular night/day cycle. And as I write this, we’ve had them out for exactly seven nights. So far, so good.
Wrap Up
And that’s about all I know for sure right now. The last time I had chickens I lived in the desert and didn’t have to worry much about rain, cold weather, etc. Even though I’ve done this once before it is still very much a learning experience. I will write a follow-up as I learn more and gather more experience, and I’ll probably talk about chicken coop design at some point (I made some big mistakes that you can hopefully learn from).