Helikon Essentials Kitbag and My Minimal Survival Kit
I recently wrote about the contents of a theoretical minimalist survival kit. I love the concept of such a kit: the bare minimum stuff you'd want to survive in the wilderness, so I decided to put one together. I've walked with it several times now and here's what I have to report.
This article contains affiliate links.
The Survival Kit Bag
I built my minimalist survival kit around a Helikon Essentials Kitbag. This bag is sold by Self Reliance Outfitters at a very reasonable $46.50. The bag is basically designed with one central pouch to hold a water bottle and nesting cup. It also has a couple of side pockets and various other slots and pouches, yet is fairly compact. This is just about exactly what I was looking for for such a kit: enough for the essentials but not so big as to get heavily laden.

The bag is constructed of rugged Cordura nylon. When I ordered it "shadow grey" was the only available color, though Coyote and OD green are offered, too. The main compartment shuts with a Fastex buckle and the side pouches zip. The interior of the flap has a flat, netted compartment for the storage of water purification tablets. Behind the main body on the exterior of the pouch is a slot for a fixed-blade knife.

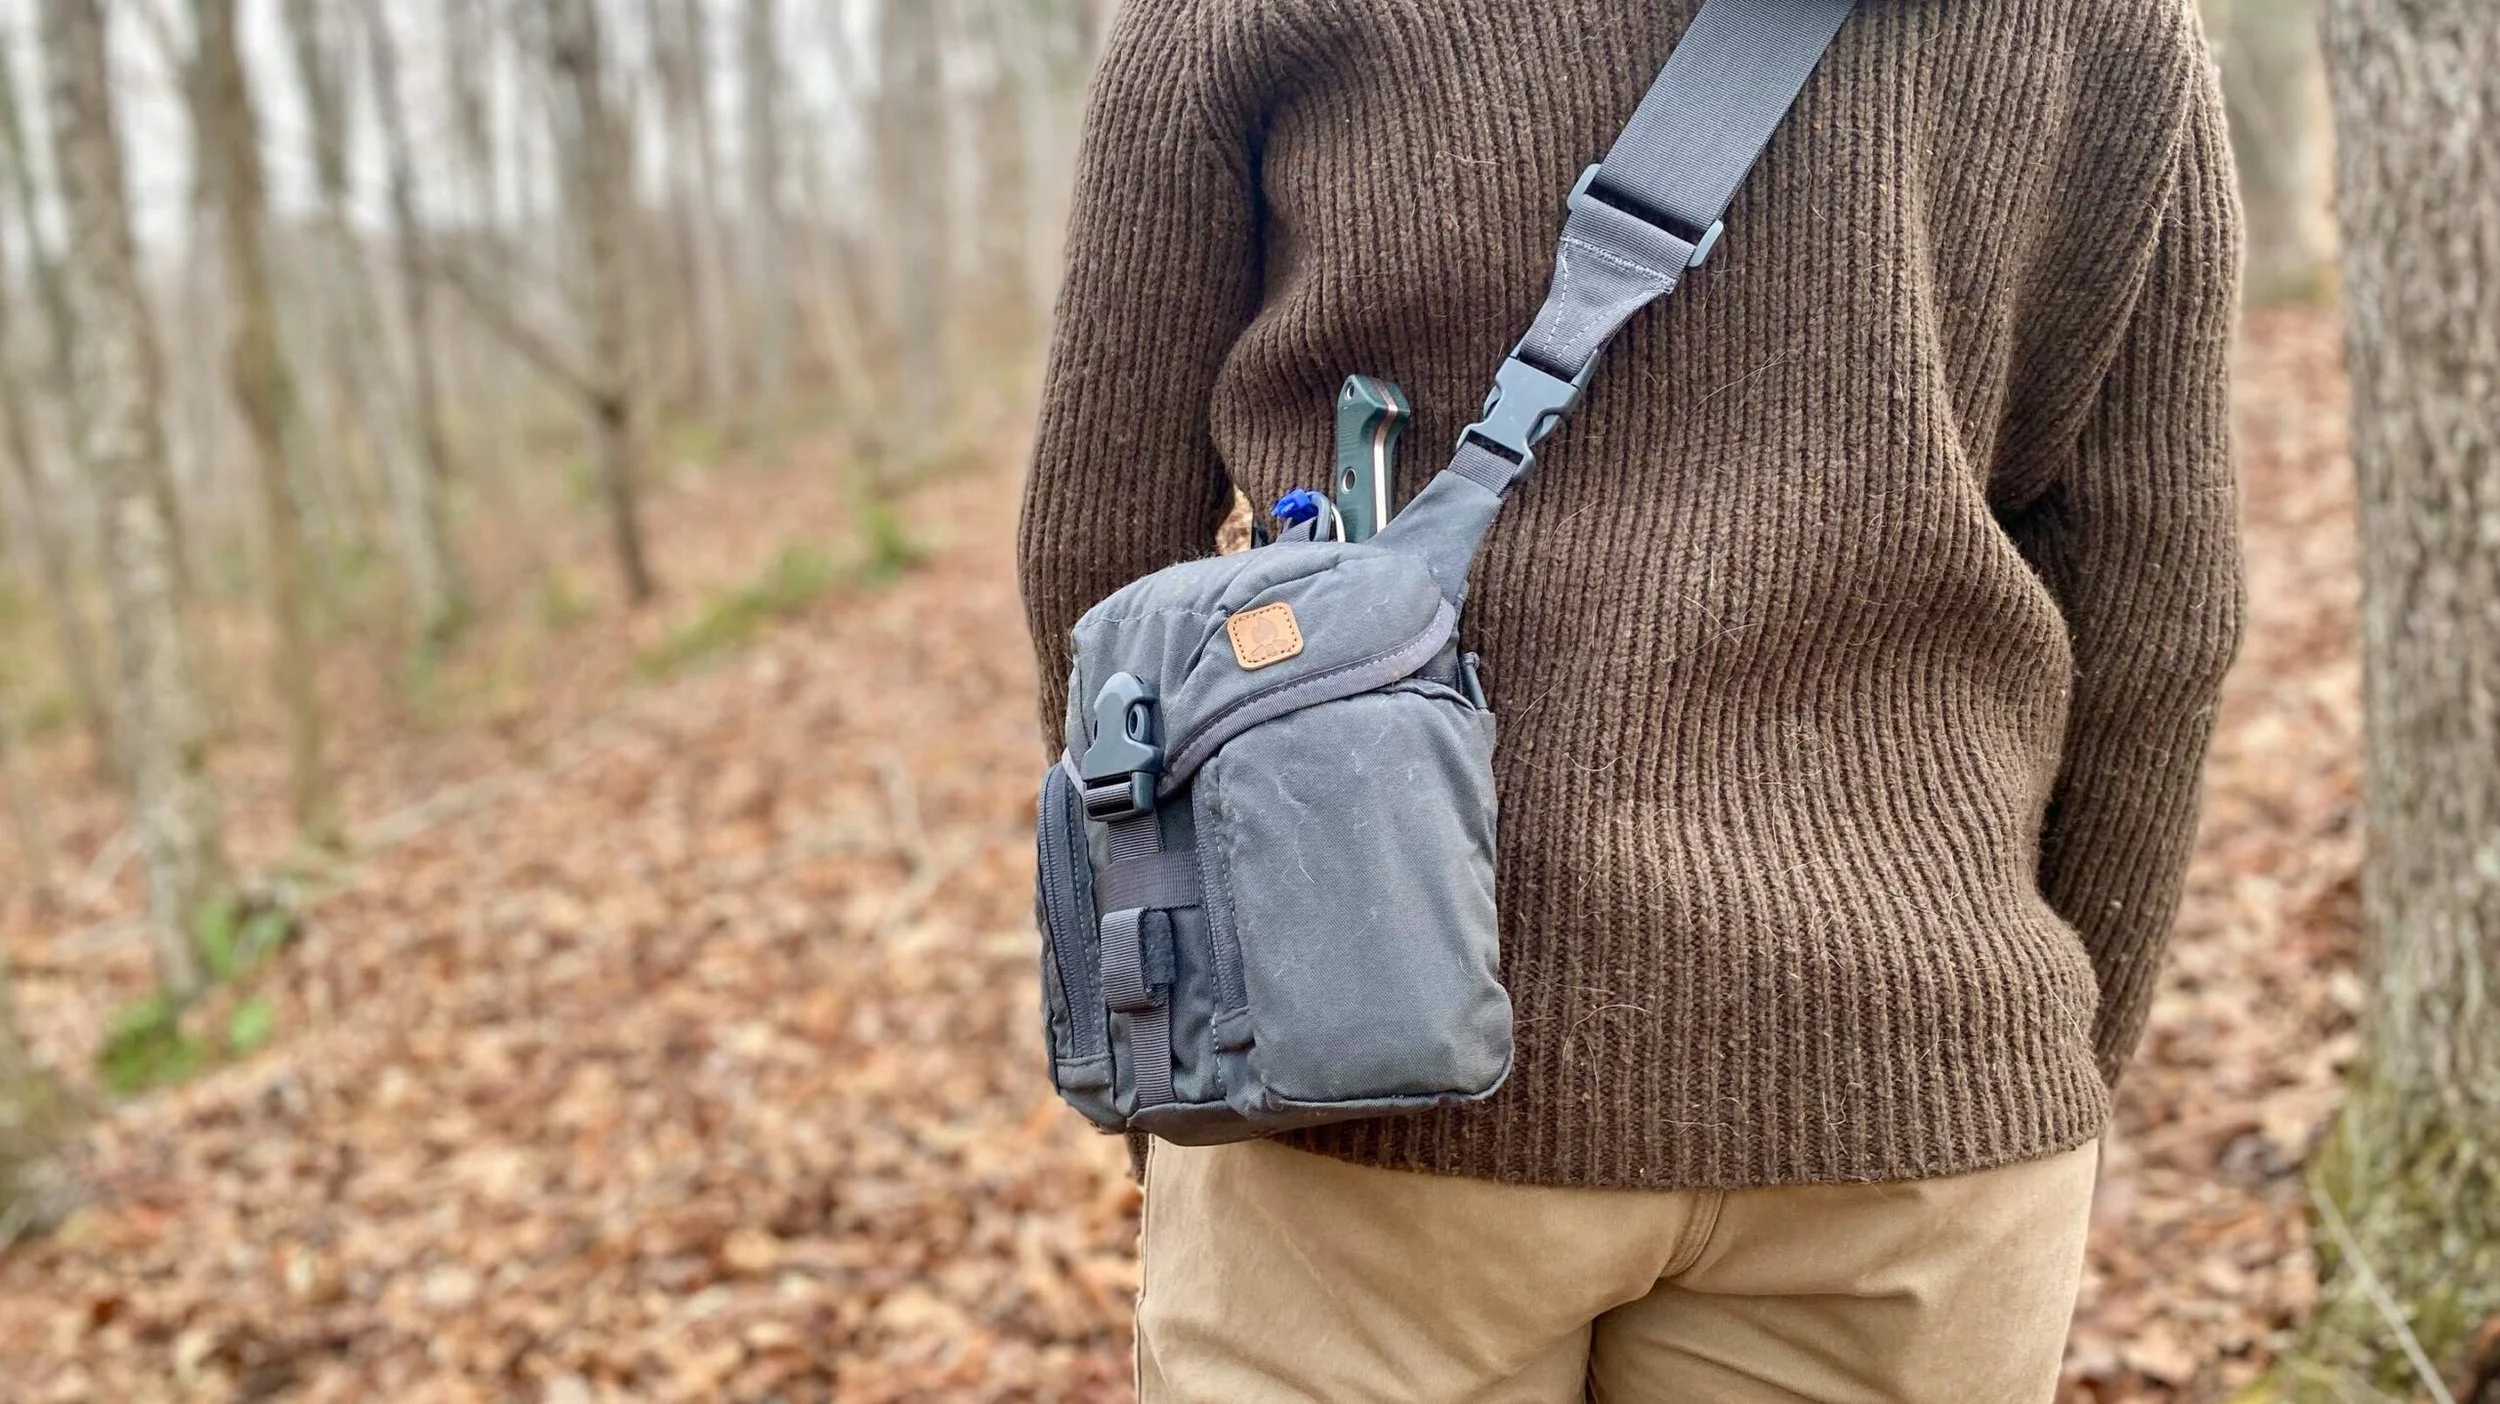
Though the pouch has MOLLE webbing on the back I think it is most effectively - and probably was intended to be - worn as a sling bag. The strap is adjustable and nice and wide, though not padded. It attaches to the bag with a buckle at each end. I took the time to secure these buckles with zip ties; I'd hate to take a tumble and lose my whole kit because a buckle came loose. Personally, I also would prefer the MOLLE stuff just be gone to cut down on a bit of weight, a project I might undertake one day.

The main pouch will hold just about any 32-ounce water bottle. There's still a bit of room to spare around the edges with my Self Reliance Outfitters stainless bottle and cup. I really appreciate that these items don't stretch the bag super tight. Generally I'm really impressed with the size and layout of the Helikon Essentials Kitbag.

I've worn this bag over several miles and am pretty happy with how it carries. Even though the strap isn't padded there isn't really room in this bag to make it uncomfortably heavy. It does start to wear on you after a bit, but not unbearably so. Swapping shoulders occasionally might help, but when I hike I typically carry a pistol OWB on the strong side. I'll continue to use the bag and report back at some point about durability. So far I'm more than happy with it, though.

That's the bag - now let's talk about what's inside. After that I'll talk briefly about the role this kit fills for me.
Main Compartment: Water & Knife
The contents of the bare minimum kit haven't changed a whole lot since my last article on the topic, but they have changed a little. Let's look at each compartment.
Main compartment. The main compartment holds a water bottle, in my case a 32-ounce stainless steel bottle from Self Reliance Outfitters (and nesting cup). Honestly, I could probably do without the cup but the weight is negligible in a pack this small and it maybe of some benefit, so why not? The top lid (predictably) holds 20 Katadyn MicroPur MP1 water purification tablets - enough for 5 gallons of water.

I also added one other piece of kit to the center pouch: a Self-Reliance Outfitters bottle hanger. This rigid piece of wire expands to grasp the inside of the bottle's mouth, allowing you to suspend it over a fire. In my first wilderness survival article I wrote about the difficulty of boiling water in a water bottle. This alleviates a lot of that difficulty, costs on $3.50, and weighs only an ounce.

In the photo below the hanger is holding a full, 32-ounces of water sturdily. I'm pretty impressed with this little piece of kit. Stretching the hanger out a bit also allows it to work with the nesting cup, too. I haven't tried this out over a fire yet but I have very high hopes and I will soon. If it works as advertised I'll have much greater confidence in the ability to purify water via boiling.

I'll also briefly address the knife in this section, too. It isn't stored in the main compartment, but close enough. My knife is the Benchmade 162 Bushcrafter. It's a very good knife and I'm exceptionally pleased with it, though I think an ESEE 4 for half the money would be every bit as good.

I did zip-tip the sheath's D-Ring to the bag's D-ring in an effort to prevent loss in rugged terrain.I like this setup. The knife isn't in any quick-draw setup but that's not it's function. It's accessible, protected, and secure, and doesn't take up unnecessary space inside the bag.
Left Compartment: Fire & Signal
In the bag's left compartment I have my fire and signal equipment (and one other item I'll discuss later).

Fire: Fire is pretty important, so I expend a ton of my space on it. Most of this space is taken up by waterproof match case containing 25 UCO Stormproof matches. The matchcase is something I've neglected to purchase for a long time, though I can't really say why. It's sturdy, sealed with an O-ring, and contains matches and striker strips, and it's not that expensive. I also have my exoTAC fireROD, just in case my match case should become compromised. The fireROD is my favorite ferro rod because of its size and the two on-board tinder tabs it stores.

Since tinder can be hard to come by in the wild (article coming soon) I have come to realize the importance of bringing your own. I have included a prescription bottle packed full of petroleum/cotton balls. With this and a match I should easily be able to start a fire even in bad conditions. Again, this is a big expenditure of the available space in the bag, but I know my capabilities and limitations.

One other cool feature of the bag: since my ferro rod is my last-ditch backup, I want to be absolutely sure I won't lose it. Immediately I started looking for a way to dummy-cord it to the bag. Ask and ye shall receive! There's an paracord attachment loop inside each side-pocket on the bag. This made it really easy to tie in the fireROD with its included lanyard. If the zipper does come undone and scatters my possessions I should still have my ferro rod and those two tinder tabs. Very cool.

Signal: the signal equipment in here hasn't deviated at all from my last post. I have a signal mirror and an ACR whistle. Both are on a paracord necklace that I can throw around my neck should I suddenly find myself needing to be able to signal help quickly.
Right Compartment: Shelter
The bag's right compartment contains items needed for shelter. This is a very short list: a trash bag and 550 cord, the bulk of which consume most of the space in this compartment.

The trash bag is an upgrade to a 65-gallon, 2-mil bag. The dimensions of this bag, when cut into a flat sheet are 74" by 54", or a little over 6' x 4.5'. Not too bad, and a definitely improvement over the 40-gallon bag I had before. The trash bag is left intact so it can be used as a bag for water storage, tied up to make a flotation device, used as a hasty sleeping bag, etc. I recommend leaving the bag in its default state until you need to cut it for a shelter.

Next is a 50' hank of of 550 cord. As I mentioned in one of these posts I'm also interested in tarred bank line. I ordered some from Self Reliance Outfitters. I am interested in it but have yet to mess around with it. I'd like to take it off the spool and restack in some sort of flat, wide format that fit the bag's pocket a bit better. It would be awesome if I could stack it smaller or more efficiently than the 550 cord and make room for something else in this bag, possibly a second trash bag.

Capabilities and Limitations
This bag doesn't have a tiny version of everything under the kitchen sink. There isn't much stuff here, and most of the stuff here is tends to be pretty substantial, full-sized versions. For example, a lot of fire kits would be half the size of this one or rely solely on a ferro rod. However, I think honestly believe it's more important to have a few capabilities down cold than have two dozen that are barely met. No fishing gear, snare wire, whatever. But I'll absolutely be able to meet my priorities of survival:
- signal,
- start a fire,
- put a wind-resistant and waterproof shelter over my head, and
- produce plenty of potable water.
The big limitation of this kit is in first aid. I've agonized about that - I have a large amount of medical knowledge and - relative to the general population, at least - a large amount of experience. It kind of sucks to be without the basic tools to take advantage of that. On the other hand, I don't want to clutter this kit up too much with superfluous stuff. My compromise lies in the one item in my Fire/Signal pocket that I said I'd get back to: a triangular bandage.

I'm working on an article about the triangular bandage. Tourniquets are cool and all but they only perform one, single function and treat one very specific type of injury. A triangular bandage does lots of things...including being just about the best possible improvised tourniquet (which is not the same thing as being the best tourniquet - trust me, I understand the compromise here). Aside from being an improvised tourniquet, a triangular bandage can be used for wound packing, as a head dressing, sling, splint binding, etc.
A triangular bandage also serves a lot of non-first aid purposes, too. It can filter particulates out of water, serve as a head wrap to preserve warmth or cut down on sun, be worn as a dust (or COVID) mask, an scarf, be tied up as a carrying container, and on and on. If in a survival situation I'd try to preserve it for first aid use by not subjecting it to a lot of high-wear applications. This would admittedly be a balancing act.

I currently have a triangular bandage from NA Rescue. Soon I will upgrade to the version from Chinook Medical that is much larger (37 x 37 x 52" for the NAR vs. 46 x 46 x 64" for the Chinook). Both come with the standard two safety pins, and both are a much heavier weave than the cheap cravats you'll find in most first aid kits or at your local pharmacy. I will probably soon hang a carabiner from this bag to increase my chances of successfully improvising a tourniquet.
The only other medical gear in this bag is five bandaids and a small, single-serve packet of of antibiotic ointment. I do have a bit more room in both the left and right pockets.

And that's it for now, but let's look at some potential modifications.
Potential Modifications
Though I love where this bag is now and think it offers a great capability, there are a couple things I'd like to look at changing. First, I think I could economize space just a bit more in a couple areas.
First, I think tarred bank line has the potential to free up a bit of space in the right pocket. Secondly, I think carrying petroleum jelly-cotton in a prescription bottle isn't as good as it could be. First, the bottle isn't waterproof, which is pretty important for fire-starting material. Secondly, the way the lid sticks out eats up a lot of space. I'd like to find a better container for this stuff, and possibly one just a smidge smaller. Now, what do I do with this hard-won space once I get it?
I could increase existing capabilities. Another triangular bandage would be a really, really good thing to have for my first aid capability. Another trash bag would be an awesome thing to have for my shelter capability. Or I could add new capabilities: a multi-tool would be an awesome addition to this kit, as would a flashlight to supplement my first line, EDC light. I'm not sure at the moment, but I'm sure I'll spend a ton of time thinking about it. When I make a decision I'll update this post and plop it back at the top of the feed.
The Role of the Minimum Survival Kit
For the past several years I've been doing all my hiking (and just about everything else) with a backpack on my back. I like carrying a pack, and I like being well-prepared. This makes me really question what a minimalist kit like this would be good for. And here's what I've come up with.
First, this thing is awesome for short hikes on well-traveled trails. Sometimes we hike in areas where the trails are exceptionally well-marked, well-worn, and nearly impossible to lose. Still, I don't like being out without a little something. This is awesome for hikes like that. It's also cool to have in the car for unexpected hikes. I've been on some work trips when I decided to do a solo hike but didn't have a ton of gear with me. Having a small kit like this in the car would definitely increase my margin-for-error a bit.

Second, I've come to re-discover that hiking light is kind of liberating. I like wearing a pack for several reasons: the gear/capability, the extra exercise, and the familiarity - I've spent a lot of my adult life under a rucksack. But it's nice to travel light sometimes. If you're a hunter, casual hiker, or other outdoorsperson who normally doesn't wear a backpack, something like this might be for you. It's unobtrusive, lightweight, but with some accompanying skill packs a serious punch.
I think this is still just a little light for winter hikes in my area (we're already in the 20s with some early snow here) but this pack isn't going away. It'll be around for shorter, three-season hiking and those impromptu little jaunts into the woods.

