In our last post we covered recce team insertion. Today we are going to cover some basic patrolling skills. Patrolling is nothing more than moving through the woods, but there is some technique to it. This post will mainly focus on team techniques and SOPs.
The Recce Team | Recce Gear Loadout | Recce Weapons | Recce Insertion | Patrolling Skills | Individual Skills | Patrol Base Ops
This article contains affiliate links.
If you’re enjoying this series please consider supporting Swift | Silent | Deadly on Patreon. Each one of these recce articles represents somewhere between 8 and 20 hours of hard work. You support is greatly appreciated!
This post will diverge a little bit from the recce series. In most of these articles I have begun by explaining what the military does, then offering what I see as realistic for civilian recce teams and operations. Basic patrolling skills are universal, however. The same basic patrolling skills used by top-tier military units are also used by infantry units and can be used by you. There’s nothing “high speed” about them.
I’ll say it several more times in this article but patrolling is basically moving through the woods. Patrolling is what gets you from the insert point to the observation point, the place where you actually do the recce. It is critical to master basic patrolling skills because, like insertion skills, they get you to and from work. Sometimes patrolling can be the mission itself, in the case of an area reconnaissance, but often it will just get you to the specific point that you’re there to get eyes on.
Post Insertion Procedures
In our last post on insertion we covered what needs to happen to get the team to the patrol location. In that article I left our recce team on the side of the road, immediately post-insert. Once the team gets out of the vehicle (the presumed insert platform for civilian recce ops) there are some procedures they should perform. Maybe I should have addressed this stuff in the insertion article, but I didn’t so we are. There are a few basic patrolling skills that should happen immediately on insert.
Seek Concealment
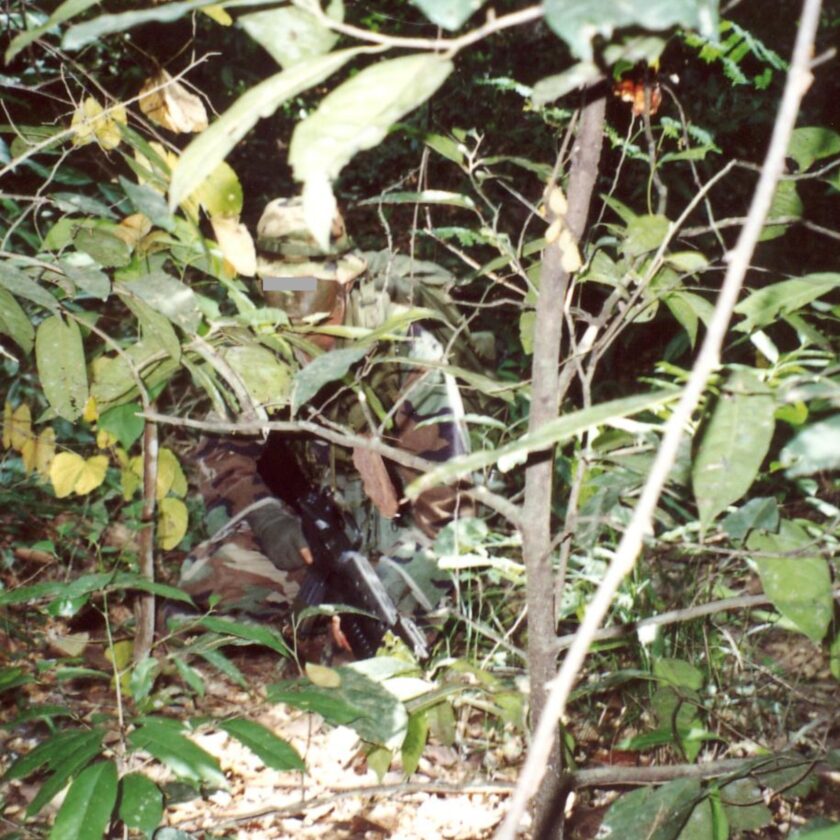
First, the team should punch into the brush 25 – 50 yards/meters. The road is completely exposed and the team should spend as little time there as possible. It doesn’t too much matter where as long as it provides good concealment. There is one caveat to this: ideally the team should go to the correct side of the road to avoid having to cross it later.
If possible you want to get into some reasonably thick vegetation that will mask your presence. Try to avoid diving right into stuff so thick that it will slow your getting off the road, but do prioritize concealment. In open terrain this might necessitate moving quite a bit further away from the road. In the desert, for instance, the team may have to move several hundred meters and use distance as their concealment. The point is the team should quickly get somewhere that isn’t visible to the next car that just happens by.
Security Halt
Once in the brush the team should circle up providing 360-degree security and conduct a security halt. Security halts are a big part of patrolling. There are two types of security halt: short and long. I will discuss each further down the page. The security halt conducted after insertion is sort of a hybrid. It has elements of both short- and long security halts.
The team should form a tight circle with just a meter or two between members. . Then you want to quickly settle into a position you can maintain for 10-15 minutes. Ideally this is a high knee with all gear still on your body so you can stand and fight or move immediately if necessary. Remember, you’ve just inserted into hostile territory – you have no clue who or what is around you.
Fifteen minutes seems like a long time but it gives you time to adjust. You’ve just gone from a loud, high-speed mechanical conveyance. All your senses need time to adjust to your new surroundings. This is also time for that random person that thought they heard something to get bored and move along. Once you’ve punched into the brush and circled up on a high knee, conduct SLLS.
Conduct SLLS
During the security halt you will conduct SLLS (pronounced “sills”). SLLS stands for Stop, Look, Listen, and Smell. Conducted with intent SLLS can provide you with very valuable information about your new surroundings. Here’s how it goes.
- Stop: cease all movement. Quit fiddling with your gear, stop shifting around, stop doing anything but breathing and moving your head and eyes.
- Look: look around in a concerted effort. Look left to right starting at 25-50 meters out, then repeat that same sweep right to left. Then range out further, from 50-75 meters (terrain permitting) and repeat. Look for any sign of enemy presence. Don’t forget to look at your feet for things like trash, brass, etc.
- Listen: listen intently for any sound that may reveal the enemy’s location, like running vehicles or generators, voices, or movement.
- Smell: Smell for signs of enemy presence. This might include vehicle exhaust smells, cooking fires, food smells, latrines, or fuel oils.
If there is one time to do a good SLLS it is upon insert. You know next-to-nothing about the area you are in. This is the way to gather some quickly knowledge about your immediate surroundings before moving on. The team should spend 15 minutes here in stillness and perfect quiet. This allows the woods to return to normal after your vehicle passed through, and after the team crashed through the brush.
Remember, insert should occur during darkness. This will limit your ability to Look if you don’t have night vision equipment, but do what you can. You can still listen and smell. Hopefully your eyes were adjusting to darkness during the insert ride, but if that got screwed up by a headlight or something this is also your time to readjust.
Map Check
After SLLS is conducted and the team is somewhat confident in its immediate surroundings the TL and Point Man should make sure they know where they are. They should ascertain that the team was dropped at the intended insertion point, and ensure they know where the team is going before setting off. This can be done via GPS or terrain association and is a critical step before the team begins patrolling.
This doesn’t have to be a 20-minute conference, just a quick verification that the team is where they intended to be dropped off. Of course this can take some time if the team isn’t where they wanted to be. If the team does have to bust out paper maps here’s how they’ll do it.
The team members conducting the map check – probably the Point Man and TL – will move to the middle of the circle. They will get in the prone and cover their heads with a poncho liner (a blanket will work, too). This will keep light from spilling out and prevent noise from traveling. Once under the blanket they’ll unfold the map and use whatever tools they need to use to find the team’s location.
Use minimal light – you don’t need a 6,000-lumen Surefire to do a map check. It will ruin your night vision and probably light up the blanket, too. Use minimal noise, too. Noise carries, even from under the blanket. When the map check is finished, pack everything back up, and ensure packs and gear are secure.
Pro-Tip: Pointing at the Map
Here is a pro-tip for use during map check, route planning, or any other time you’re referencing a map. This also happens to be something that drives me crazy to this day: never point to a spot on the map with your fingertip! Your fingertip is huge in relation to features on the map. It is also rounded making your pointing really, really imprecise. No one really has a clue what you’re pointing to.
Instead of pointing with your fingertip use something sharp. The tip of a knife is OK but really the best tool for pointing at a spot on the map is a pine needle. If you have a pine-needle handy pick on up. You now have the world’s best map pointer!
Once the team has conducted SLLS and the TL and Point Man have confirmed location and direction of travel, the team is ready to begin patrolling.
Basic Patrolling Skills
At this point we come to the first of our basic patrolling skills: moving out from a short security halt. From a short security halt the team will stand up, one person at a time. Let me restate that in case you missed it: the team will stand up, one person at a time. The whole team won’t stand up at once, for a couple reasons.
First, you don’t want six people starting to move, all at once, out of nowhere. With gear rustling and leaves crunching they’re invariably going to be much louder than a single dude standing up. Second, if everyone is standing up at once, no one is keeping an ear on the team to make sure no one is making any extraordinarily loud noises. Most importantly, if the entire team is standing up at once, who is holding security? One dude stands up while everyone else maintains their security posture and sector of fire.
The first dude to stand up is obviously going to be the point man. Once he’s up he’s going to start moving in the desired direction of travel. He’s already shot an azimuth during the map check he conducted after SLLS, so he knows which direction he’s moving. He’ll go ahead and start slowly and quietly stepping out.
At this point the next member the team, generally the Team Leader will stand up. He’ll give the Point Man enough distance to maintain effective dispersion without creating a break in contact. Let’s define those terms.
Patrol Formations
At this point we should talk about the formation the patrol assumes when they move out. There are a number of esoteric patrol formations like echelons and skirmishers and whatnot. But for most patrols on wooded terrain with a small recce team of 4 to 6 will use one of two formations: the Ranger file and the staggered column.
The Ranger file just means everyone is in line, one after the other. This formation is excellent for very dense woods/jungle. This formation has some benefits and disadvantages. On the plus side it is very easy to master and control. The patrol makes only one path through the woods instead of 2, 3, or 6. On the downside the patrol and get pretty strung out, and this formation doesn’t give very much firepower to the front or rear.
The staggered column is staggered like a double-stack magazine. The team sorts itself into two columns, approximately 5-10 meters apart, and staggered with each other. This formation cuts two trails through the woods, but because it is shorter almost by half, it is very easy to control. It still provides good firepower to the sides, and doubles the number of instantly-available guns to the front and rear from one to two.
OK, I said there were only two, but I also really like the wedge formation so I’ll talk about it, too. This is a really useful formation for open terrain or very open woods. It puts the team into an arrowhead or diamond shape with the team leader in the middle. It provides equal firepower to all sides (front, back, right, left) and is really easy to control.
The team should master these three formations, and moving from one to another based on terrain changes.
Dispersion
Dispersion is the distance between each team member when the team is moving on foot. It is intended to keep the team separated by some distance to keep them safe. You don’t want a single grenade or machine gun burst taking out half the team. You want them spread out; maybe the most commonly cited dispersion distance is 5 meters, the kill radius of a hand grenade.
Effective dispersion will depend on terrain and other visibility factors. For example, when patrolling in darkness (whether with night vision or not) most teams will tighten up their dispersion a bit. In jungle terrain the team might struggle to maintain five meters between each member, while in open desert terrain the team may disperse two or three times that distance.
Too much dispersion can be a bad thing. Once the team can’t observe hand and arm signals from each other, dispersion has become ineffective. Too far apart and team members aren’t able to support one another effectively with fire or maneuver together as an element. There is an art and balance to effective dispersion. I say shoot for 5 meters, and open it up or tighten it up based on terrain and visibility. After your team has done a lot of practice and gained some experience together then you can modify.
Breaks in Contact
The dead-nuts giveaway that your dispersion is out of control is when your patrol suffers a break in contact. This means that members of the patrol become separated from other members, i.e. the first three dudes keep walking, the last three missing, and the patrol gets separated from itself. It sounds really silly, but it happens! It usually happens in reduced visibility, i.e. at night.
Usually it goes something like this: the TL calls short halt to do a map check or consult with the Point Man. The team all takes a knee. The team starts moving again, but somewhere along the line one member doesn’t ensure that the member behind him got the word. That member, and everyone behind him, stay put. The team moves some distance before the moving portion realizes they are alone.
This can also happen at obstacles that take a moment to negotiate. Let’s say the team is moving through a series of cow pastures and has to negotiate a barbed-wire fence. If one member takes a bit longer than the ones before him he can look up after crossing the fence and not see the team. Now he and the team member in front of him have created a break in contact.
Resolving a break in contact may be difficult. You can’t exactly run around calling each others’ names. Avoiding a break in contact is so much more efficient than recovering from one. It is on each team member to ensure good contact with the member behind him, and call for a slow down or short halt as needed.
Pro-Tip: Movement at Night
Most recce insertion and patrolling should be conducted at night. Without a night vision capability this can be daunting but remember, your body comes with some natural night vision and you aren’t completely helpless in the dark. Until recently many, many generations of soldiers successfully moved at nighttime without the benefit of NVGs.
Moving at night requires the team close up its dispersion. Your dispersion may be reduced from 5 meters to 5 feet (or less) at night so you can maintain contact with the person in front of and behind you. Effective movement at night also requires well-adjusted night vision. During your insertion transit each team member should be doing everything possible to avoid ruining his or night vision. You should also seek to improve and maintain your night vision by eating a healthy diet and avoiding tobacco.

An external factor is the moon. In 2009/2010 I spent about 120 days in a very remote, completely uninhabited desert. I worked mainly at night and every night I got to watch the moon rise and set and I learned how much available illumination the moon can provide. Very few people get to see this change first-hand in such a remote environment, but it can be a huge factor. On bright nights you could literally read by the moonlight. On dark nights you could barely see your hand in front of your face.
Pro-Tip: To Night Vision or No?
Without high-quality, military-grade night vision, you will probably be dependent on the calibrated, Mk1 Mod 0 eyeball. Use the moon to your advantage. This doesn’t mean you automatically want to plan a patrol for a full moon; too much illumination can be a bad thing. On the other hand, if your patrol is in very dense vegetation like the jungle, periods of full illumination may be the only time the moon helps at all. Get out and understand the moon’s illumination in your area, and understand it during different times of the year, i.e. when leaves are on the trees or not. This will require actually getting outside a little bit.
Night vision can be a tremendous asset but it is extremely costly. As I said in my post on recce weapons, I would wait until you are completely debt-free and have a strong savings account before dropping the coin on night vision equipment. It’s expensive, and low-quality, budget equipment is probably going to fail you when you really need it.
One other note of caution on night vision equipment: there are a lot of IR floodlights and lasers and the like out there. Keep in mind that most nation-state adversaries have night vision. Your IR laser can quickly become a beacon directly to your position. I predict that the military will struggle with this in future conflicts because of how careless we operate in IZ/AFG against non-state actors without a robust and universal night vision capability.
With that out of the way, let’s get to the next of our basic patrolling skills: how to walk in the woods.
How to Walk in the Woods
As your team has all stood up from its security halt it will begin walking. One of the most important basic patrolling skills to master is how to simply walk in the woods. It isn’t that complicated, but it’s also not a leisurely stroll. Remember, your team will be actively avoiding trails and you’ll be loaded down with a rifle, load-bearing gear, and a patrol ruck. Let’s take a closer look at how to walk in the woods.
Move Forward, Stay Upright
Task one is to make decent forward progress and not fall down. So, you want to watch where you are going without constantly looking at the ground. The woods is not a paved path and there is a lot of stuff to trip you up including rocks, depressions, sticks, stumps, vines, etc. You want to try to select good, solid footfalls to ensure what you’re stepping on is stable and to the extent possible, quiet.
Obviously there may also some threat of booby traps, landmines, and that sort of thing. The team should look for that sort of thing…if they know what to look for. I hate to go back to the non-sexy stuff now that we’re finally in the woods, but hopefully you’ve developed an intel section that can brief the team on potential booby traps and countermeasures. Don’t go looking for ghosts. You’ll bog the team down too much and no forward progress will be made (you’ll make little enough progress anyway).
Come to terms with the fact now that you will make some noise – you’re not some woods-ninja that moves with the wind. You will snap twigs, rustle leaves, and cause limbs to snap back. Still, try your best. Try to avoid stepping on sticks that will snap, or rocks that will shift underfoot. Pick up your feet rather than shuffling them through the leaves.
360-Degree Security
In addition to keeping an eye on where your feet go, you also need to be constantly scanning your surroundings. You need to look left and right, near and far, being alert of the presence of the enemy. Security is one of the biggest responsibilities you have while patrolling, and it is shared by each and ever team member.
Obviously the Point Man is “in charge” of forward security, but in open terrain everyone should be glancing forward periodically. The TL, RTO, ARTO, and Slack Man are looking left and right. The Assistant Team Leader is responsible for rear security. This means he will spend some time looking backward.
Which brings me to an important note: don’t walk backwards in the woods. It may look cool in the movies but trust me, it’s not cool when you fall ass-over-teakettle or break an ankle. Rather than walk backwards, take a quick pause and turn to the rear. This creates a bit more workload for the ATL, but the ATL is about the hardest-working man on the patrol anyway, so it comes with the territory.
Maintain Contact
Each team member is also responsible for maintaining contact with team members to the front and rear. Breaks in contact are the responsibility of two team members – the one who moved on without ensuring the next member was moving, and one who missed the rest of the team’s departure. Ultimately this means that each team member needs to be regularly checking in with the person in front and behind him.
This doesn’t require a conversation. All that is necessary when moving is just visually verifying that the person behind you is still there and the person in front of you is checking for you occasionally. When passing hand and arm signals this requires a bit more – you should make eye contact and ensure the person behind you has received the signal. When picking up from a halt this requires ensuring the signal has been seen (this can be difficult at night), and double-checking to make sure that team member is moving.
Navigation
As we discussed in the recce team article, navigation is the responsibility of the Point Man and ultimately the Team Leader. However, every member of the team should maintain situational awareness of the team’s rough location and general direction of travel. Should the team contact the enemy, have a break in contact, or some other problem, it’s going to be very difficult to recover if no one but the Point and TL know where the team is. Every single member of the team should have strong land navigation training and experience. If the team makes contact patrol members are going to have to rally at designated rally points. Finding them is really, really hard if you don’t know where you are or where you’re going.
This doesn’t mean that everyone walks heads-down with a map in front of them. At long security halts, however, the TL should be updating the team on their position. Each member of the patrol should also endeavor to keep a rough pace-count of how far the team has traveled. I get it – this is a lot to keep up with in addition to holding security, keeping eyes on the dudes in front of and behind you, but no one said this was easy. It’s not.
Adding it All Up
That sounds like a lot of things to be looking for and it is. You need to be watching where you are going, scanning around you for threats, and checking in visually with your teammates. This does require “keeping your head on a swivel” (I hate that term but it works pretty well here).
Rather than just randomly trying to look around at everything I always tried to have pattern. It was something like this: step, look left, step, look down, step, look right, step, look forward, step, look back. This sounds like your head is spinning wildly, but patrol movement generally goes pretty slowly.
Remember, you aren’t on a trail – you’re breaking brush and walking over tough, uneven terrain. You’re not going to be moving in a hurry, but if this pace of scanning is too fast for you you can double it up: look left for a couple steps, look right for a couple steps, etc. Experience is going to be the best teacher. Get out there with a ruck on, a rifle in your hands, and cover some kilometers over unimproved terrain and see what works.
Pro-Tip: There’s No Talking in Patrolling
This is one of the most amazing things you’ll ever see: a patrol that can go out, spend six days in the woods, and never utter a single word to one another. This doesn’t happen often, but every now and again a team will come along with right mix of discipline and experience together to spend this much time together without uttering a word. Trust me, you’re going to need a lot of time together to develop this level of “know what the other team members are doing” kind of rapport. It’s rarely accomplished but it’s a worthy goal to shoot for.
If you do have to talk, don’t whisper. Instead talk very quietly. Certain sounds, like “s” sounds tend to be amplified when whispering. Instead talk in a very low murmur. It seems totally counterintuitive but I’m a firm believer. Regardless, keep the talking to a minimum. You aren’t going on a camp-out, you’re patrolling.
Rally Points & Security Halts
Two features common to all patrols, and two of the most basic patrolling skills are rally points and the security halt. Rally points are designated places the patrol can meet up if something bad happens. The patrol has to stop from time to time to rest, drink water, make comm, conduct map check, or any of dozens of other tasks. These tasks are done during security halts. There are two types of security halt, the short security halt and the long security halt. I’ll discuss rally points, then we’ll get into security halts.
Rally Points
While patrolling the TL will designate some rally points. Rally points are places where the team will meet back up, or rally, should they become separated or come into contact with the enemy. Rally point should have some common features. First, they should be easily identifiable to the team. The team should be able to know when they are at the rally point. This means it shouldn’t just be some patch of ground – it should be some identifiable terrain feature like a small hill, a rock outcropping, or something else recognizable.
Secondly it should be at least somewhat defensible. Rally points are fallen back to when the team makes contact. This means there may be enemy trailing the team. You certainly don’t want to lead the enemy back to a location that puts you at a tactical disadvantage.
The team will create any number of semi-permanent and temporary rally points during the patrol. There will be rally points designated during the movement from insert to objective. These may have been pre-planned via map study prior to insertion; if so they will be confirmed on the ground. These rally points will be active for the duration of the patrol. There are also very temporary rally points like those on each side of a danger are. I haven’t covered danger areas yet, but whenever a danger are is crossed a near-side and far-side rally point should be set.
Short Security Halts
Short security halts are, as the name implies, very brief. They last no more than five minutes. These halts are conducted when the team needs to take a quick break for some reason. When a short security halt is conducted the team will take a knee, in place. the team does not move into a circle, they just slowly and carefully drop to a knee where they are. The Point Man faces forward, successive team members alternate facing right and left, and the Assistant Team Leader faces the rear.
Team members will not do the “rucksack flop” and sit down during a short security halt. They will instead maintain a high kneeling position and be ready to move out on short notice. If team members need to drink water and take care of other small tasks during a short security halt this needs to be coordinated with other team members so not everyone is drinking at the same time.
Though not as secure, the short security halt is very fast to get into and out of. Generally these are used to give the team a quick breather, stop and look/listen to what is going on in the immediate area, or to conduct very brief tasks, like a quick navigation check between the PT and TL. If a longer halt is necessary, the team should conduct a long security halt.
Long Security Halts
When the team needs to stop for a longer period of time, longer than about 5-10 minutes, it will conduct a long security halt. Long security halts are more secure but they are also more time-consuming and noisy to get in and out of. The first order of business will be selecting a site. Ideally the TL and PT should choose a site that is at least somewhat concealed and defensible, but you don’t have to have the perfect site for a 30-minute halt.
Once the site has been chose the team will circle up. The Point Man will walk into his location and take a knee. Everyone else will circle around, and take a knee. One at a time the team members will lower themselves into a sit, or drop rucks and get into a prone position facing outward.
The circle needs to be big enough to accommodate a couple dudes. Usually the TL will be in the middle, conferring with the Point Man, huddling with the ATL, or pulling members in one-at-a-time to brief them on where the patrol is and if the original plan has been modified. Long security halts may also be taken when the radio operator needs to make comm. While already in a long security halt, team members should take care of things like drinking water, removing/adding warming layers, and things like that.
When the long security halt is over and the team is ready to move on things will proceed slowly and methodically. One at a time team members will rise to a kneeling position with rucksacks on. Then, again one at a time each team member will stand and begin moving out. The ATL will do a good sweep of the site to ensure no gear was left behind.
Recce Patrolling
And that’s pretty much it – that is the basics of conducting a recce patrol…or really any other kind of patrol. This is the basics of moving through the woods between insert and objective.
- Insert procedures, including punching into the brush, security, conducing SLLS, and a map check,
- Patrolling in an appropriate formation with good dispersion and without breaks in contact,
- The individual skills of walking in the woods,
- Setting rally points and utilizing short and long security halts.
There is a lot more to patrolling than just this – patrol base operations, immediate action drills, and of course there are the actions on the objective…but I’ll get to those things. In my next post I will cover some individual skills that are important for the recce team. Stay tuned!