The next stove up in the Survival Cooking series is the Ohuhu camp stove (also available under other brand names). This is a unique stove in that it is designed to burn wood. With very non-specific fuel this is a very, very flexible option. It does, however, have it downsides. Let’s get into it.
This article contains affiliate links.
In the last post of this nature, I reviewed the Jetboil Flash. The Jetboil is best-in-class but has some strikes against it. At around $110, it is expensive. It also requires pre-filled fuel canisters. The fuel cans are expensive, subject to damage, and eventually run out. They also produce a ton of waste. I am going in the opposite direction in this post. The Ohuhu camp stove will burn almost anything you put in it and costs (at time of writing) around $22.
The Ohuhu Camp Stove
When I initially ran across the Ohuhu camp stove the most interesting thing was the low price coupled with excellent reviews. How could a stove that costs $20 be that good? I had to find out, so I ordered one.
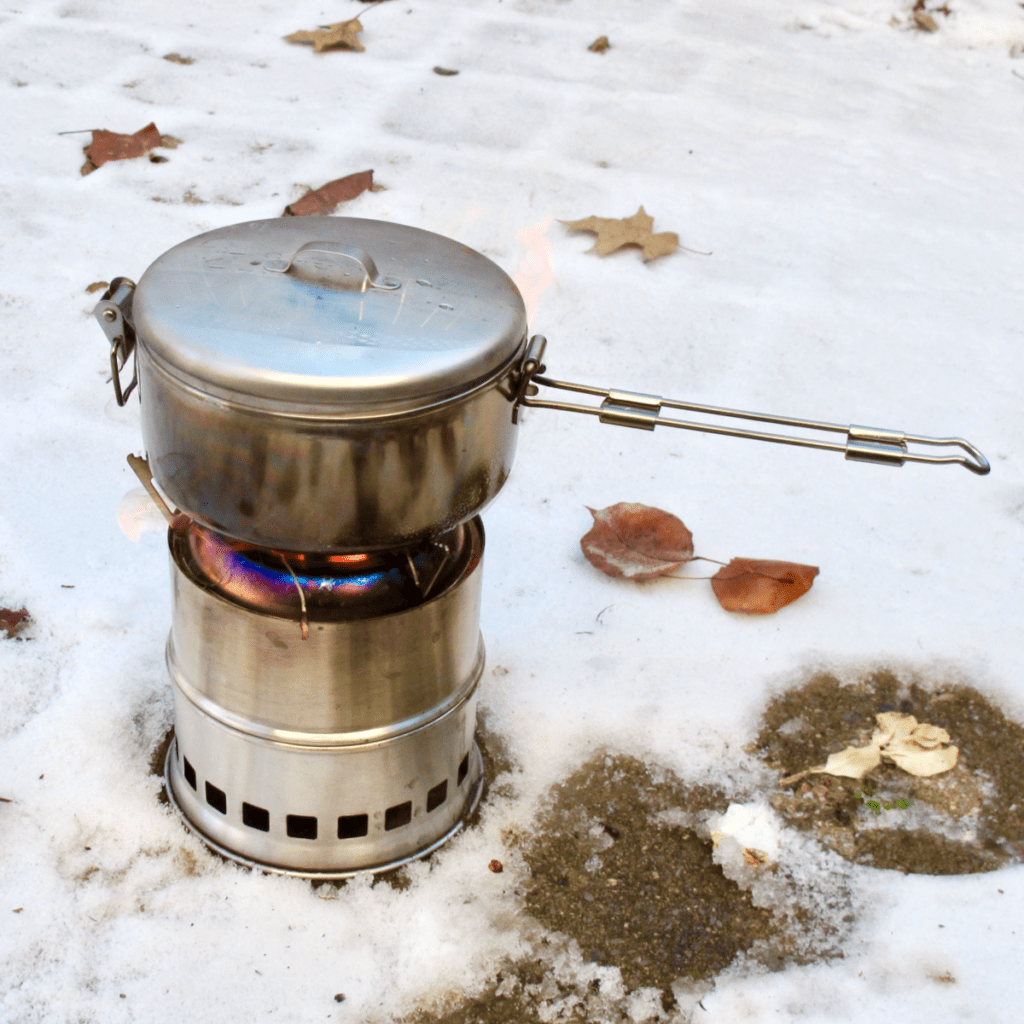
Construction is all stainless steel. Overall, the stove feels a bit flimsy. On the other hand, beefing it up would add weight and bulk, so quality seems in line with the stove’s intended purpose. Despite the cheap feel to some of the parts, fit between all parts is precise. This stove should last a long time if cared for.
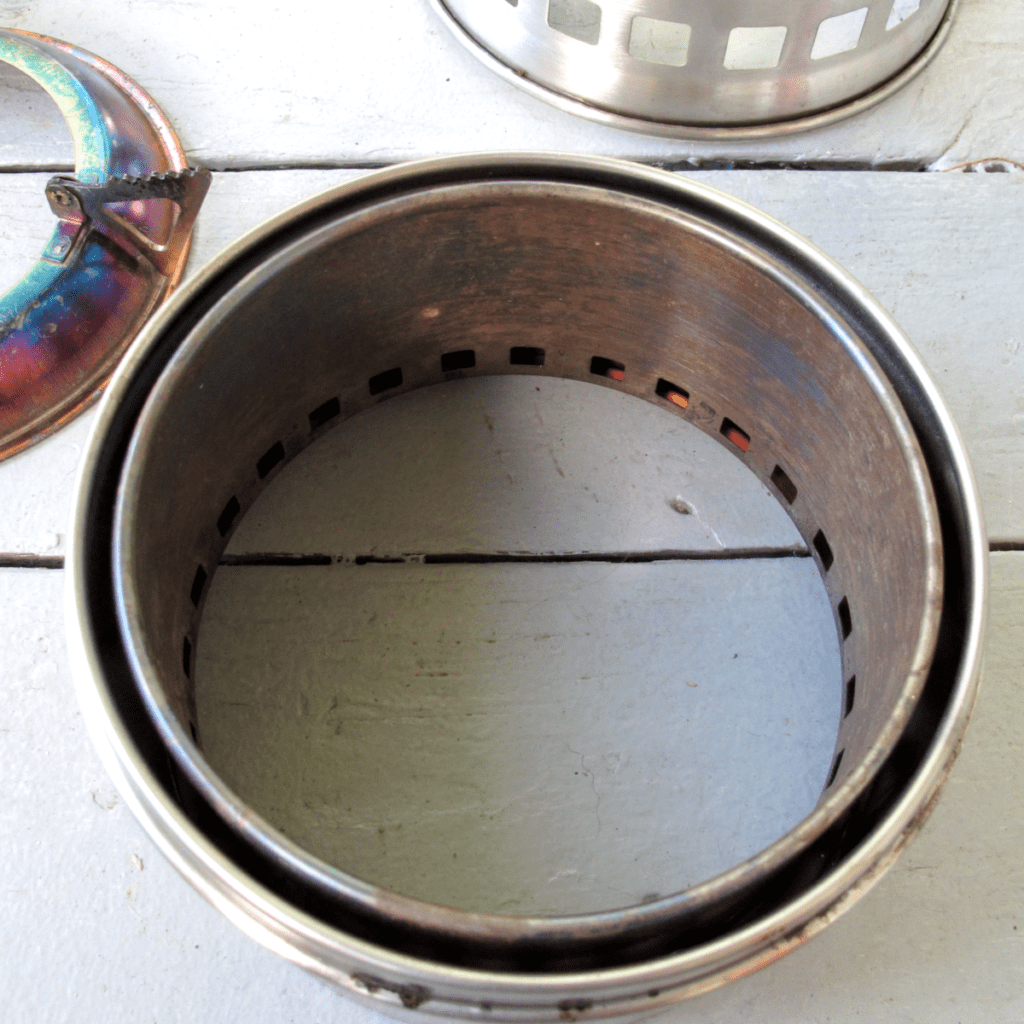
The stove consists of five pieces that fit together intuitively. The bottom-most piece is a stand that holds it off the ground. The second piece is a double-walled combustion chamber. A basket fits within the chamber to hold your fuel and coals in. Finally, a ring goes over the top that holds your pot or cup. For those of you who are counting, that is only four pieces. I will address the fifth further down the page.
Note: newer Ohuhu stoves than mine appear to come with a grill grate, as well.
Fueling the Ohuhu Camp Stove
Assembly only takes a few seconds. After the stove is assembled, add some fuel. My favorite part about this stove is that it will burn almost anything. The primary fuel I have used is twigs. This thing will create a ridiculously hot fire on nothing more than tiny sticks. And I do mean tiny. This is both a blessing and curse. Blessing because you can probably scrounge up enough fuel to burn this thing anywhere on the planet. Curse because with such tiny sticks, you have to keep feeding it. This creates a bit of a tedious process because you have to either remove your pot from the burner (letting it cool in the process), or attempt to slide fuel in between the pot and the burner ring.
With wood you can create an extremely hot fire and boil water in just a few short minutes. The downside is that is about all you can do when fueling the Ohuhu camp stove with wood. Dashed are your dreams of cooking a nice Parmesan-and-basil risotto trail-side; controlling temperature is nigh impossible, as is keeping this thing going for an extended cooking session. Again, though, considering the purpose of this stove, it gets the job done.
As I mentioned it will burn all sorts of other stuff. You can fill it with charcoal briquets, or real charcoal. The little Ohuhu will also burn wood pellets if you happen to have any. The fifth part of the stove that I mentioned is a little concave tray that sits on the burner ring. This tray allows you to use denatured alcohol or Esbit fuel tabs as fuel. These burn for quite a bit longer and don’t produce the insane heat that wood does.
Firing the Ohuhu Camp Stove
I have primarily used sticks and twigs to fuel my Ohuhu stove. The stove is able to burn these extremely efficiently because of the double-walled combustion chamber. There is a slight gap between the two walls. When the stove really gets going, cool air is pulled down from the top of the stove. Hot air is then forced up between the two walls. This very hot gas escapes from holes near the top of the combustion chamber that burn bright blue. This rocket-stove style reburn process produces a very hot fire indeed. Though the stove can be fairly smokey when starting, it also produces almost zero smoke once your fire is going.
With all the fuel sitting at the bottom of the combustion chamber, getting the stove lit can be a a trick. I have found that the best way to do it is to full load the stove with fuel. Pack some tinder at the bottom like a wadded up bit of paper. Layer on very small twigs, working your way up to larger stuff. I generally try to keep my fuel no larger than the diameter of a .38 Special case. When the stove is fully laden with fuel, let it reach maximum burn before putting the pot on. This will let plenty of air circulate through the stove. When it is burning at full force, top it off with fuel, then throw the pot on.
Outfitting the Ohuhu Camp Stove
This stove has a lot going for it. The only thing it is missing is a pot or cup for cooking. I initially used it with a stainless steel cup that fits over a 32-ounce water bottle. I found that cup to be just a tad too small; it barely fit on the three pot supports. Fortunately, there is an awesome fix for this. The 775ml MSR Stowaway pot might as well have been designed for the Ohuhu camp stove (or maybe it was the other way around?).
![]()
![]()
The MSR Stowaway is an excellent size for camp duties like boiling water for coffee or backpacking meals. It is also large enough for more general-purpose cooking if needed. The handle is sturdy, allowing you to pick up the pot when hot. It also folds over the lid and clamps, making an excellent storage container. It pairs so well with the Ohuhu camp stove because the stove fits inside the pot.
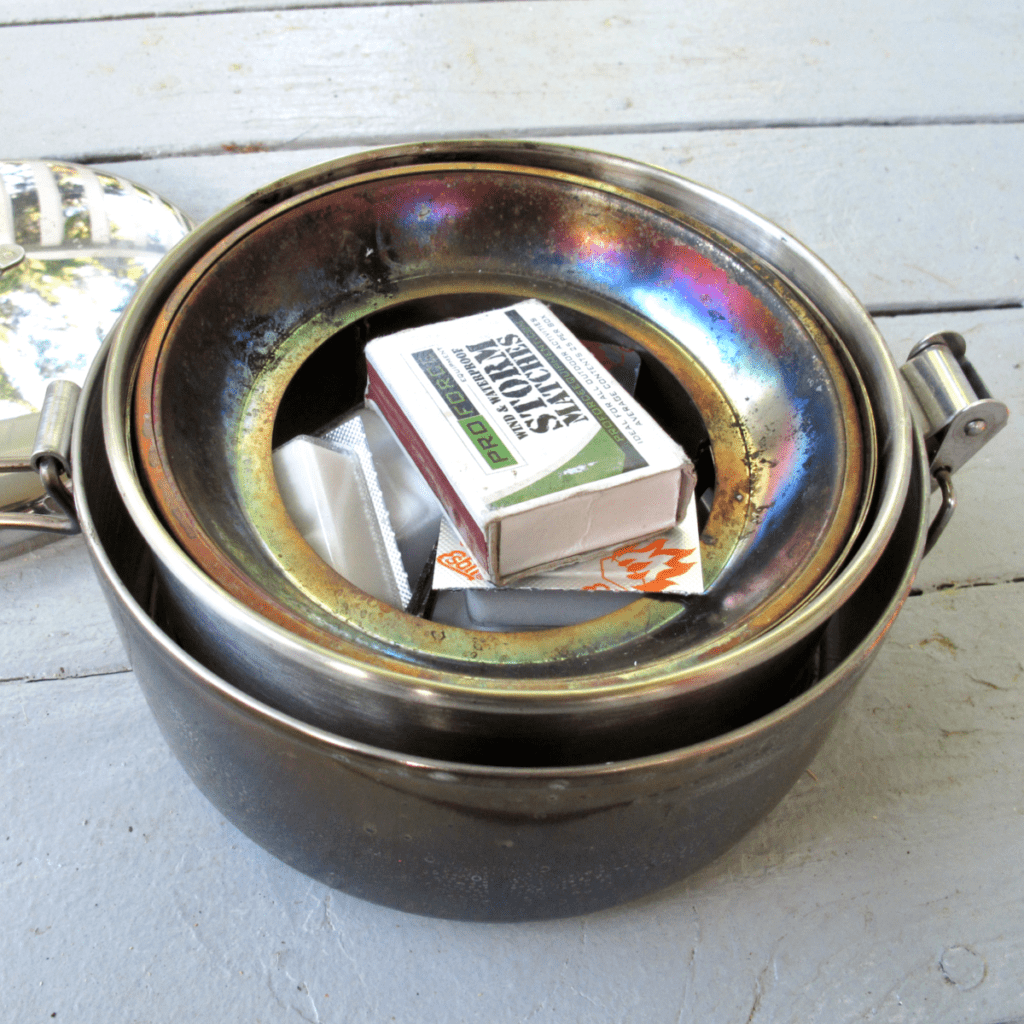
With the stove stowed inside the pot, there is still some empty space. I use this space to store some Esbit fuel tabs and matches. Even though I don’t use the Esbit fuel much, it is nice to have some fuel immediately handy. This makes for a really elegant, self-contained solution. Of note – and I wasn’t sure where else to stick this – some other rocket-style stoves similar to the Ohuhu, but that are square instead of round. Most of these have the benefit of folding flat. Most are also more easily fed when burning, and lighter in weight. The most prolific example is the Stoker Flatpack from Überleben. The cost has kept me from testing it but I may soon.
The Bottom Line
The Ohuhu camp stove is an awesome piece of gear. When combined with an MSR Stowaway pot and some Esbit fuel tabs, you have an self-contained cooking solution for about half the cost of a Jetboil. There are a couple of negative considerations for this stove. First, it is a bit more difficult to fire up, and even harder to keep going than the Jetboil. This can be negated somewhat by using Esbit fuel tabs or denatured alcohol. The second downside is that the stove takes longer to cool than the Jetboil. If you’re on the go this might be an issue.
Overall though, I really like this stove and think it should be among anyone’s outdoor options. It’s inexpensive, lightweight, and works like a charm. If you don’t have a good reason to own an Ohuhu camp stove might I suggest you find one? Summer is upon us. Get outside! Go camping! Cook stuff in the yard!