Last week I gave you guys some insight into what I looked for when I purchased my home and land. Today I’m going to give you a progress report on what I’ve done in the roughly one year since moving there.
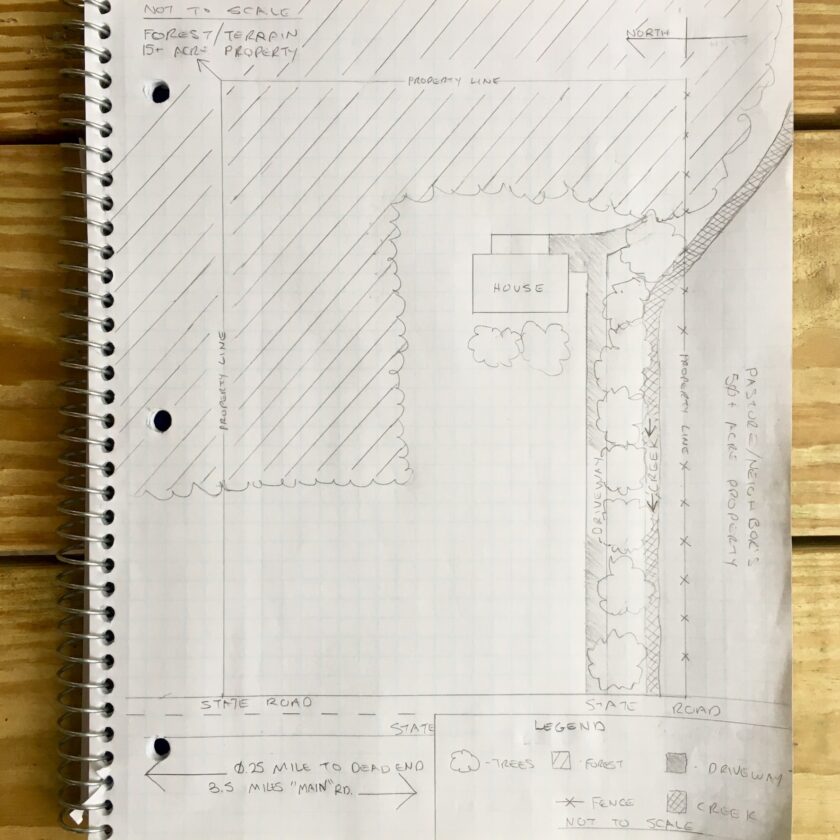
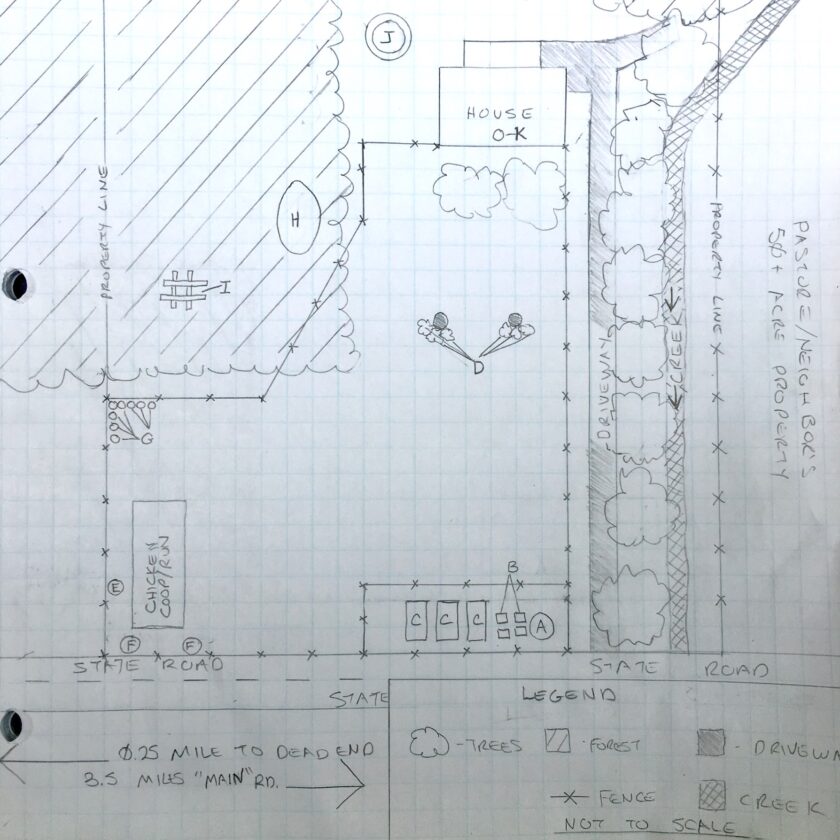
Last week I provided a rough property map. I have updated my map to include most of these changes I’m going to talk about, and most changes are designated with a letter. We have also made considerable progress in the local human terrain, but I will address that next week. Below is a picture of the original map, and an update including areas we have modified.
The first and biggest change we made is the fence. This was a rather costly investment (in money and time/effort) but absolutely, 100% worth it. Estimates to have this fence but in ranged from 2.5 to 4 times as much, so we decided to DIY it. We completed it within the first month of being here. The fence encompasses the front of our yard (~ 3/4 acre) and gives the dogs an awesome area and protects our garden and chickens. It’s only a 4′ chain-link fence but it’s a much stronger barrier than nothing.
Garden Area
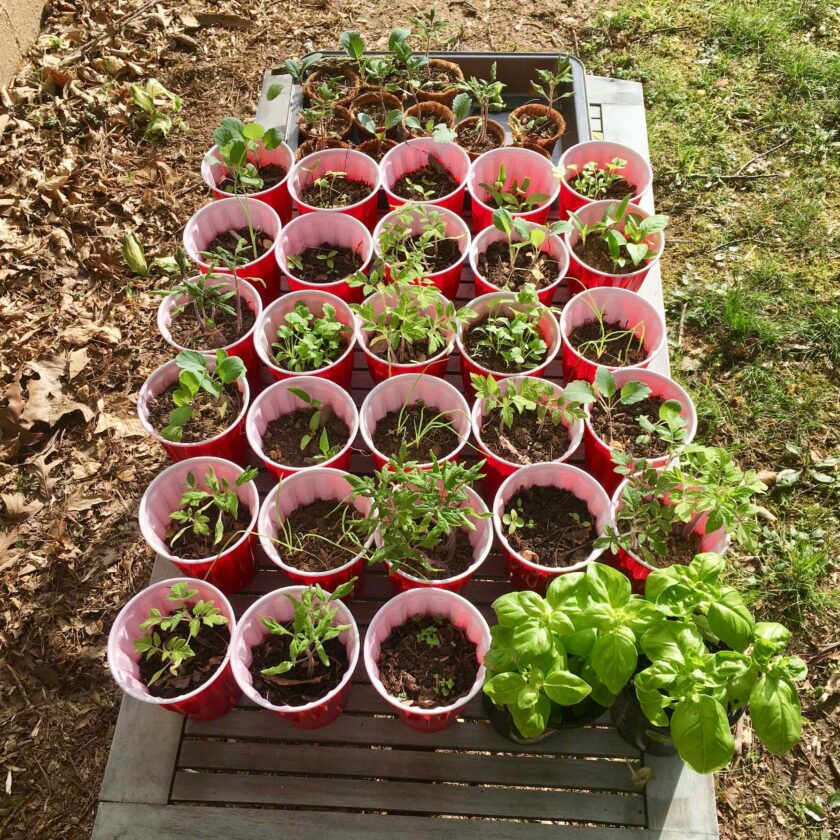
The garden area is along the western border of the property and includes letters A, B, and C. We’ve done quite a bit of work there. We sprouted a bunch of plants from seed. It’s a little harder than buying seedlings but so worth it. All it really required was taking the plants in and out each day which wasn’t that big a deal. The plants also give us a form of currency; all of our neighbors and some of our friends are getting seedlings next week. Let’s look at the other stuff in the garden area.
A – Herb Spiral: I have wanted to build an herb spiral for a long time. This is a permaculture technique and while I’m not sure it actually works the way it’s intended (we haven’t had long enough with it) I really dig the way it looks. The idea is that your most sun- and wind-tolerant plants, like rosemary and sage, can go at the very top. Your spiral can accommodate more shade-loving herbs by placing the low side of the spiral to the north. Again, I’m very new to actually using an herb spiral, so we’ll see how it goes.
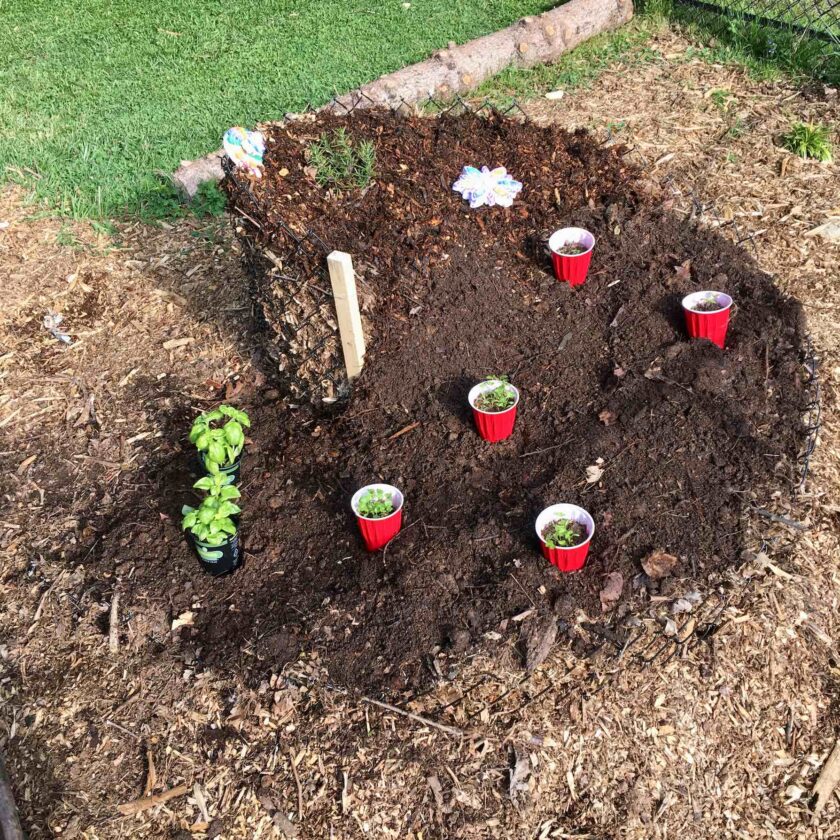
The spiral itself is built out of nothing more than approximately 8′ of scrap chain-link fencing and some wooden stakes. So far we have planted (top to bottom) rosemary, sage, oregano, thyme, parsley, cilantro/coriander, and basil. I may add some garlic here and there, as well. We raised everything except the rosemary and basil from seed.
B – Straw Bales: I recently read an article on ISG about straw bale gardening. The concept is simple: drop a bale of straw, put some dirt on top of it, plant seeds in the dirt. The straw bales will hold water well and give the roots a place to go. At first I brushed the idea off because my raised beds were already built. Then I realized this was a very fast, (relatively) inexpensive way to expand capacity.
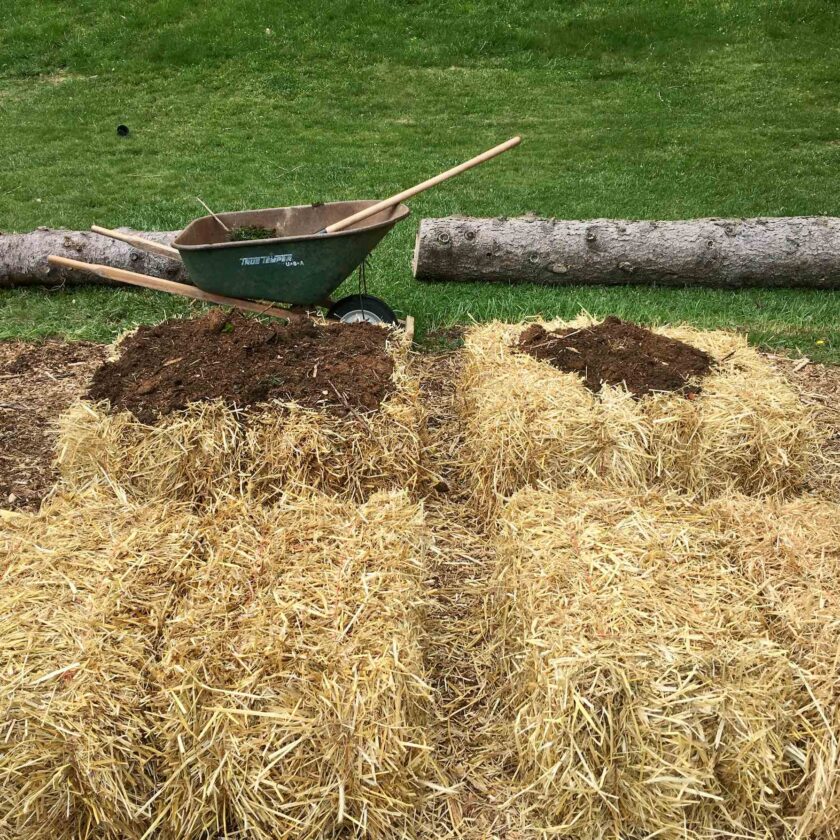
We threw down eight bales of straw. Now that I’m really thinking about it, we may double or even triple that. We could then reserve the raised beds for root vegetables (potatoes, beets, carrots, onions, etc.) and us the straw bales for tomatoes, squashes and cucumbers, lettuce/greens, etc.
C – Raised Beds: I built the raised beds in February/March. They are fairly simple, consisting of a lumber frame and galvanized metal sides. I lined the bottom with 1/4″ hardware cloth to prevent moles from digging up from underneath. We filled the bottom half with mulch made as the result of trimming the two big deciduous trees right in from of the house. The top half we filled with the huge of amount of finished compost I’ve made of the past year.
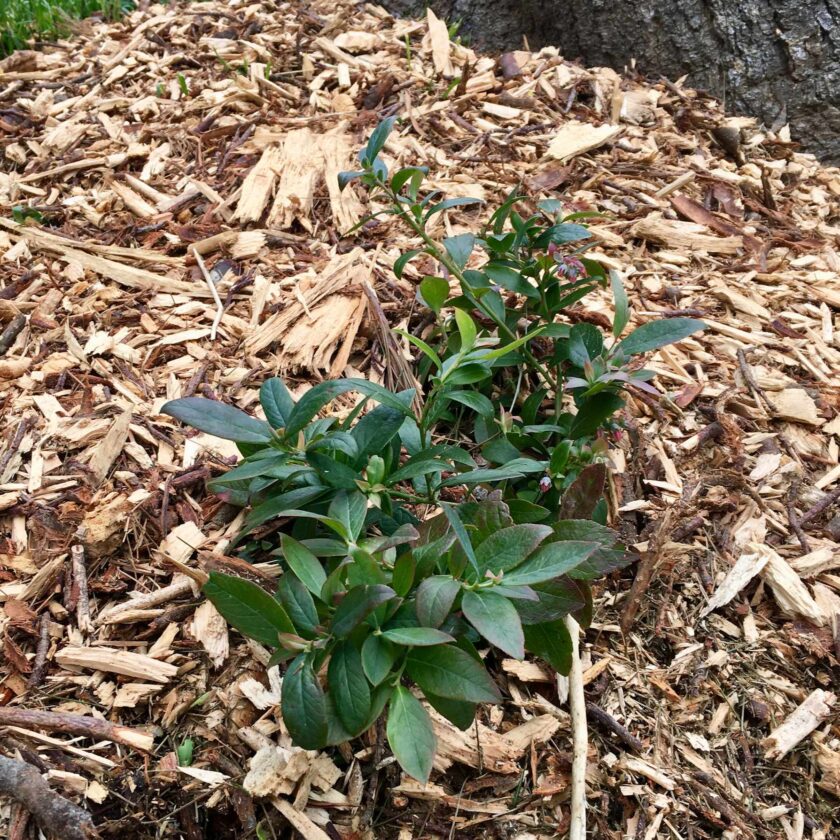
D – Blueberries bushes: from the garden, going up toward the house are two stumps. These are from spruce trees that I cut down last year. Both of them were nearly dead and cutting also gave us logs with which to border our garden. They also gave us a great spot for blueberries. The decomposing evergreen stumps seem to have made quite the happy home for the blueberries which love acidic soil. We planted three plants beside each stump. We don’t expect to get any berries this year or possibly even next year; these are a longer-term investment.
Chicken Coop Area
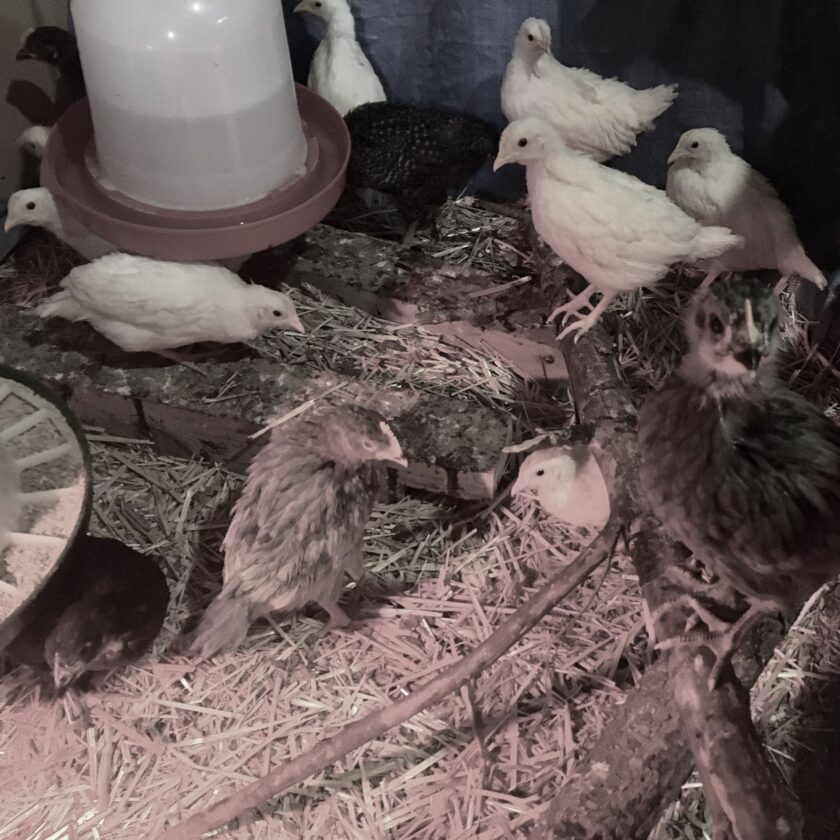
Obviously the biggest feature in the chicken coop area is the chicken coop itself. The run is 8′ x 10′ and I’m already wishing I’d made it larger. The coop is at the western end of the run has sufficient roost and nesting space for 15 or so chickens. At 3 eggs per week per bird, a dozen hens should put us at 35-40 eggs a week – plenty to keep ourselves, our friends, and our neighbors in good supply, and account for some attrition, which is bound to happen sooner or later.
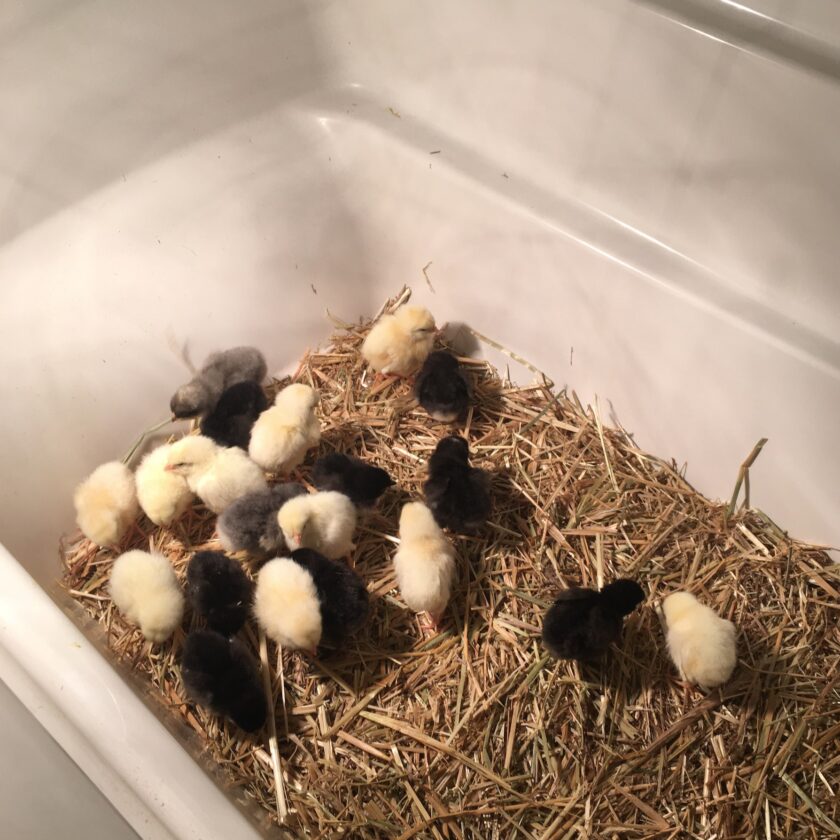
We raised the chickens from chicks, 10 female white leghorns and 10 unsexed, random breed birds. This isn’t my first time having chickens but it is my first time raising chicks. I’ll be honest – it wasn’t bad at all. The biggest demand is space for them. After you have space covered, you simply keep them warm, keep them fed, and keep them watered. With a heat lamp (make SURE it has a ceramic element rather than a plastic one) or pad, a chicken feeder, and a chicken waterer you can accomplish all three, and they don’t require much more than a daily check-in. Next year I very well may raise chicks to sell as adults. I may write an after-action or raising the chicks if there’s any interest.
There are also a couple other items out near the chicken coop worth mentioning.
E and F – Hops (Cascade and Chinook): We’ve also planted some hop rhizomes. Hops grow along a very large vine (actually called a bine) and can grow as much as a foot per day. We plan to train them horizontally along the fence. It might work, or it might not; we’ll see. This is something I have absolutely zero experience with.
G – Raspberries: We have raspberries all over our property. Last year we picked a gallon or more, on a whim, one Saturday when we noticed they were ripe. This year we have taken a much, much bigger interest in them. We are mostly leaving them in place in the woods, but I’m using the weedeater to keep the brambles themselves clear to permit us access this fall. We also had a few stray plants that have been in the way of other projects. These (eight so far) we moved to a corner of the fence and planted. So far six of the eight are still alive. These may do something and we’d definitely prefer to have more berries that we don’t have two work as hard for. But if they don’t do anything, we always have a metric ton of wild berries.
House Area: H, I, J, and K
Moving east, up the hill toward the house there are a handful of good projects.
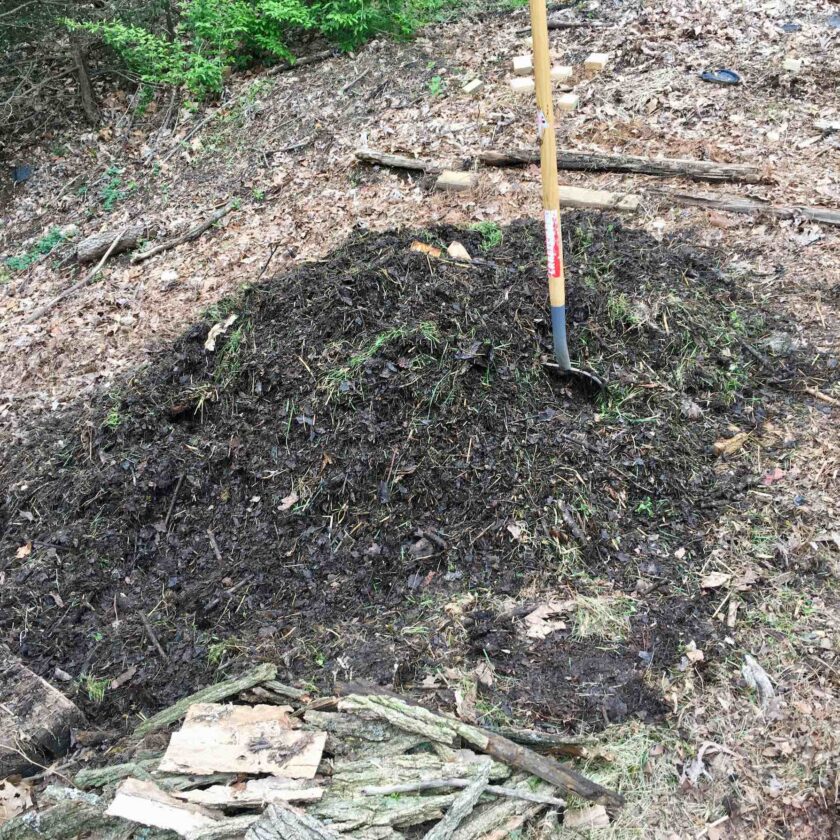
H – Compost: I have written about my compost pile before. If you don’t have a compost pile you should! I used 95% of the compost made over the previous year to fill the raised beds. With constant raking, mowing, etc. we already have another huge compost pile that is close to being finished.
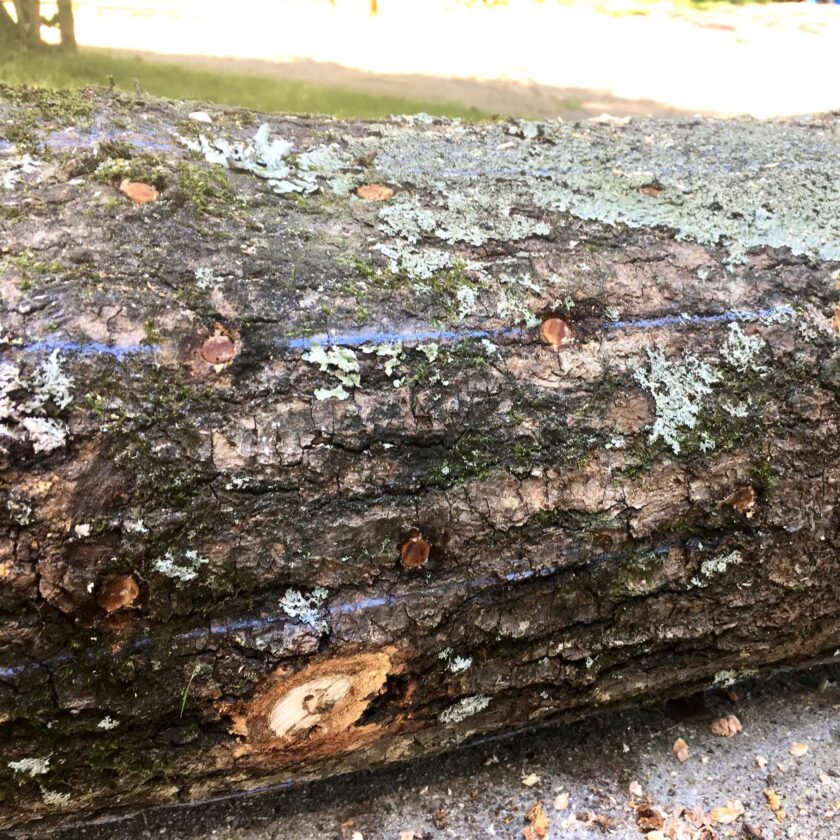
I – Mushroom Logs: Mushroom logs are another thing I’ve never done, but for which I have high hopes. Basically you cut yourself an oak log. You let it lay for a couple weeks, then you drill holes all over it, pound in dowels soaked in mushroom spores (oysters and shitaakes seem to be the most common), then cover them with wax. Then you wait, 1 to 3 years as the mycelium colonize the log. At some point mushrooms should start appearing. A mushroom log is said to produce fruit for 3 – 5 years.
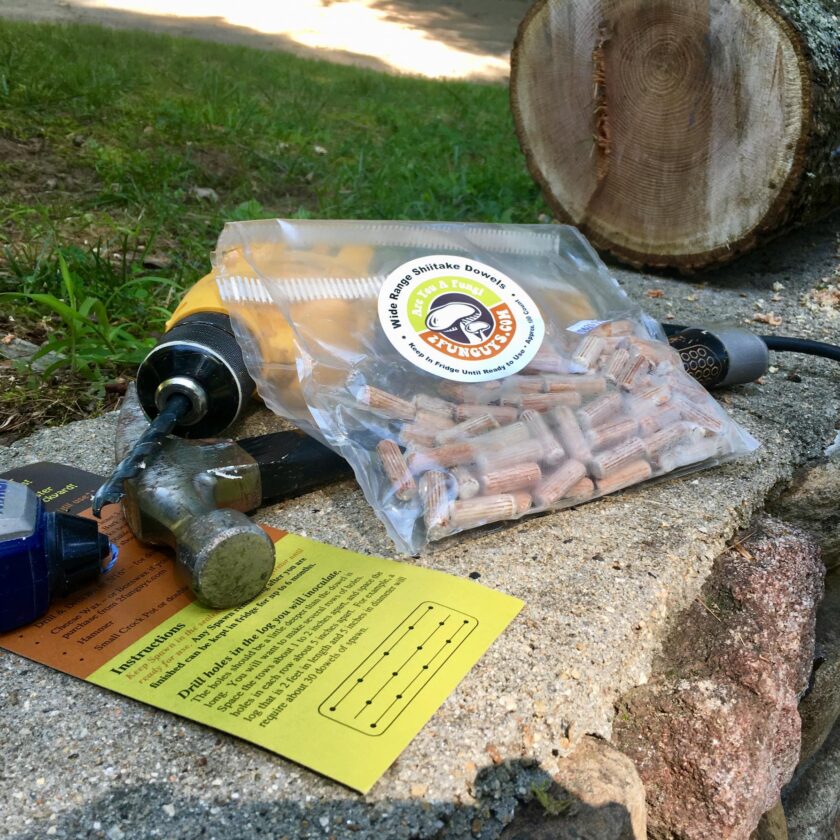
This is my first time making mushroom logs. It seems like a very, very easy way to set up some passive food reserves. A little up-front work and there’s not much you have to do to maintain it. I will add another log or two every year just to keep the supply going.
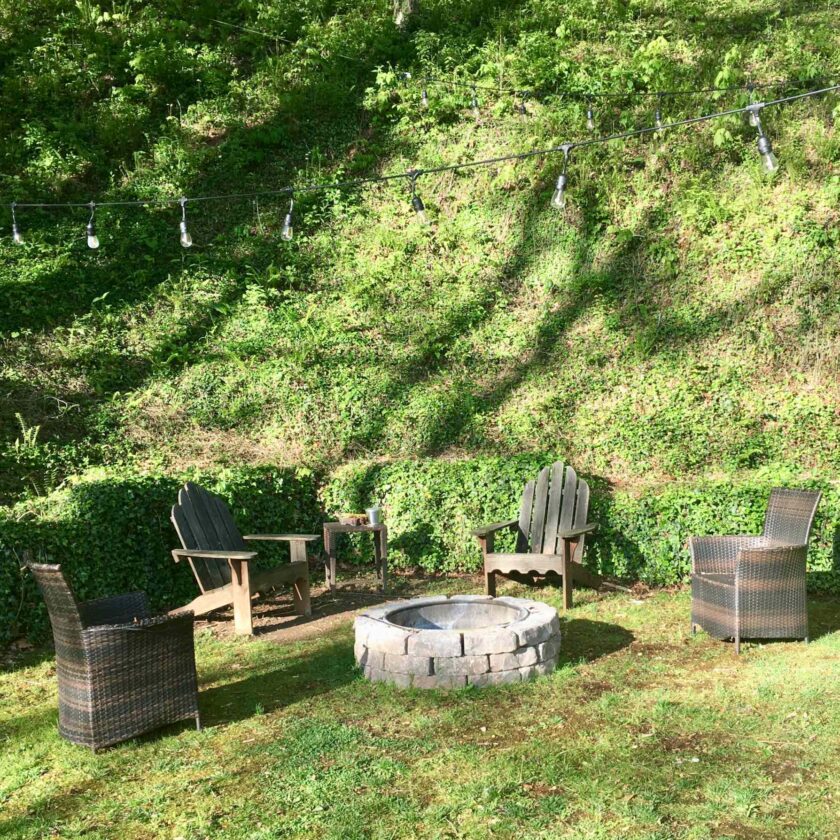
J – Fire Pit: We put a fire pit in the backyard. This is our sitting and reading area, hangout with friends area, outdoor cooking/grilling area, and generally cool place to be.
K – Wood heater: I was trying to represent a chimney on the house and I think I made it and it’s designating letter look like “OK”. I literally cannot imagine how the previous homeowner did not have a wood stove. The house has a furnace which we run occasionally to keep it in good working order. Having to heat 100% with that would be miserable. We burned about a cord and a half of wood this winter, and have about two cords left. I definitely want to lay in some more wood this year.
A couple lessons learned: if you buy a truckload of seasoned wood, be standing there with a moisture meter when the truck shows up. If it’s not seasoned, have him load it up and take it back, or give you a lower price. The best bet is to season wood yourself by cutting this year what you need for next year. Bottom line: we absolutely LOVE our wood stove and couldn’t do without it.
Future Projects
In some ways it seems like we have done so much. In others it seems like we have a long way to go as there are always projects on the horizon. We have some projects that are for our aesthetics or comfort; we’d love to get rid of the carpet in the bedrooms and extend the hardwood, for instance. I’ll try to limit myself to things that are preparedness related.
Wood shed: So far we’ve used a tarp to keep our wood dry. This has some serious downsides. First, it’s almost counterproductive, sometimes. Moisture is trapped under the tarp and condenses on the wood. So I try to take the tarp completely off for a couple days a week, especially breezy and/or sunny days when a lot of the moisture can be dried off. I also have to pull the tarp back every time I need to haul in wood, and it holds water, etc…it’s just a pain. I plan to build a wood shed this year. Ideally it will be nothing more than a roof to keep the rain and snow off the wood, with the open sides allowing airflow.
Fruit Trees: We will have fruit trees. They will go just south of the chicken coop, a good, open area where the will get full sun all day. Nearly all of our neighbors have an apple tree or two, so I’d like to do something different, but I’m not exactly sure what. There are good reasons for apples (cider and apples are durable enough to store for a while on their own…) but having something different would also be a good bargaining chip in the neighborhood. I don’t know yet; we’ll see.
Bees: Adding a couple of beehives is a huge priority for next spring. We had so much going on this spring with just getting set up that bees sort of got away from us (and aren’t inexpensive on the startup side of things). My girlfriend is planting flowers all over the property (mostly native, perennial wildflowers) and I am 100% in favor – in my view we are establishing food for the bees next year.
Fencing: we intend to fence the rest of the property with welded wire fencing material and T-posts, and put a gate at the end of the driveway. This would give us two fenced areas – one for the dogs and one for the chickens, and maybe even allow us to have a couple pigs (maybe, I’m not totally sold on pigs yet).
Rainwater catchment: we have the creek as water supply, but as I mentioned before, it runs through the neighbor’s pasture. I would love a cistern to collect rainwater from the room and hold several hundred gallons in reserve. Holding it up at the house would allow us to gravity-feed it to the garden, too. Since that will be fairly involved and expensive it is probably several years down the road.
Closing Thoughts
That’s the results of our first year here. We have big plans for next year, and probably will for a long time to come. Again, our property isn’t and probably never will be 100% self-sustaining, but I am really proud of the huge steps forward we have made in just a year. No doubt progress will be measured in smaller increments in years to come.