Welcome back to Know a Knot! It’s been a while, but you asked for it! This time we’re talking about the Swiss seat. The Swiss seat is a knot that is tied around your body to form an expedient rappelling harness. It’s not exactly a knot, but knowing how to tie one is pretty important if you’re a serious outdoorsman. Let’s get into it.
This article contains affiliate links.
Disclaimer: this article demonstrates an emergency technique. I do not recommend doing any recreational rappelling using the seat found here in lieu of a professionally manufactured harness. Again, this is an technique to know and have in the back of your head for emergency situations.
The Swiss Seat
I have a lot of history with this knot. I used it quite often in the military. Now that I am a volunteer on a Search & Rescue (SAR) team, I use a slight variation to secure patients into a Stokes basket. This is a legitimate knot for use as a rappelling harness, though as I said in the disclaimer, you should reserve it for emergency use.
To tie this knot you will need a piece of rope sized for your body. For life-safety purposes it should be static, Kernmantle climbing rope. You will need approximately 10-12 feet. I recommend buying a couple extra feet, tying the knot a few times, then cutting off excess rope. For this purpose it isn’t a bad idea to get fairly thick rope. Though 8mm line will hold your weight, 10mm or thicker will be more comfortable.
You can purchase climbing rope from Amazon…but I would be very cautious about using it. The better option would be going to a climbing store in person and buying rope. These stores generally allow you to buy rope by the foot. Explain your purpose to the sales person, and I’m sure he or she will be glad to assist. This way you know you’re getting legit, high-quality, life-safety rated rope.
A piece of static climbing rope, cut to length to tie a Swiss seat around one’s body is called a “sling rope” by Recon Marines. If you’re following my recce series, a sling rope is something you may want to keep in your fighting load. Let’s get into tying the knot!
Step 1
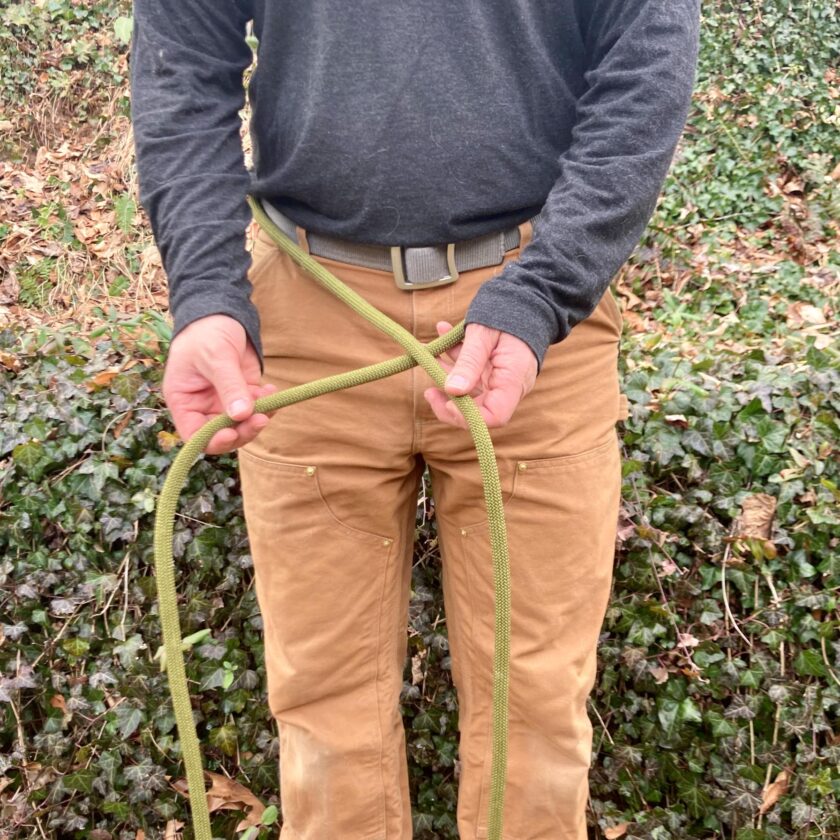
The first step is to loop the rope around your waist. This step sets the rope up for everything to come. It may take a few times tying the Swiss seat to refine how you like the rope. You want it low around your waist, in roughly the area as your belt.
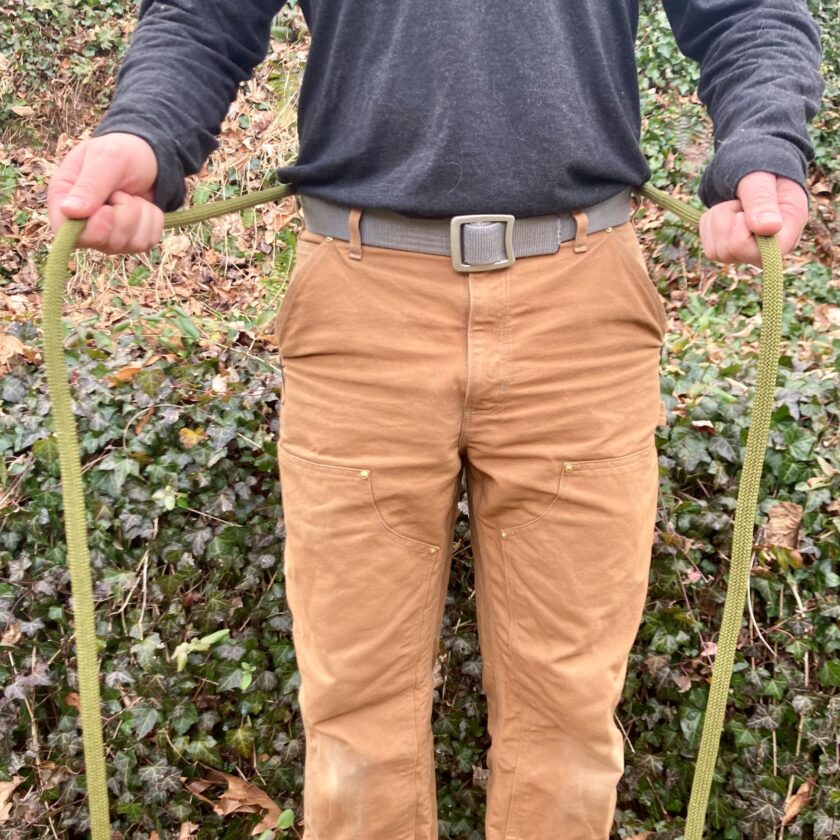
You want the rope longer by about a foot and half on one side. In this photo series the rope in my left hand was longer. This resulted in the finishing knot being on my right side. The knot should be opposite of the brake hand so as to avoid interacting with the rappelling line. If you want the finishing knot(s) to be on your left side, make the rope in your right hand longer. Some trial and error may be necessary. I recommend you practice this knot extensively before relying on it.
Step 2
Step two involves creating the waist belt of the harness. Using the two ends of the line, cross the lines over each other.
Repeat. Cross the lines over again. If you started by passing right-over-left, pass right-over-left again.
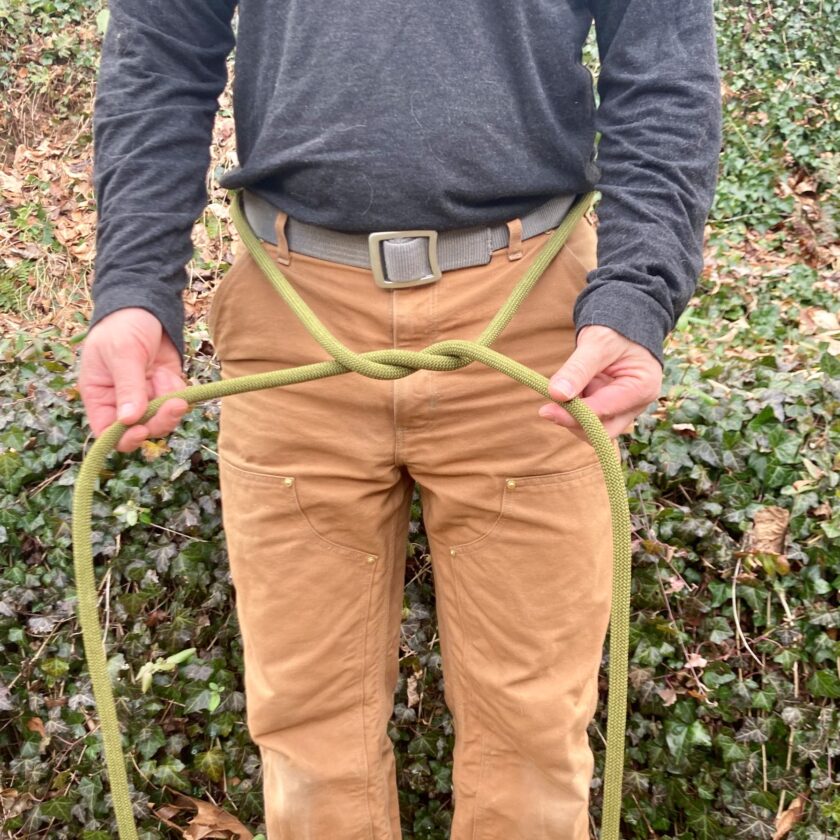
Repeat once more.

You will end up with your rope like the photo above. What we have created is some friction on the two ends of the rope. Now cinch this down tight around your waist.
This creates the waistband and the main tie-in point for the harness.
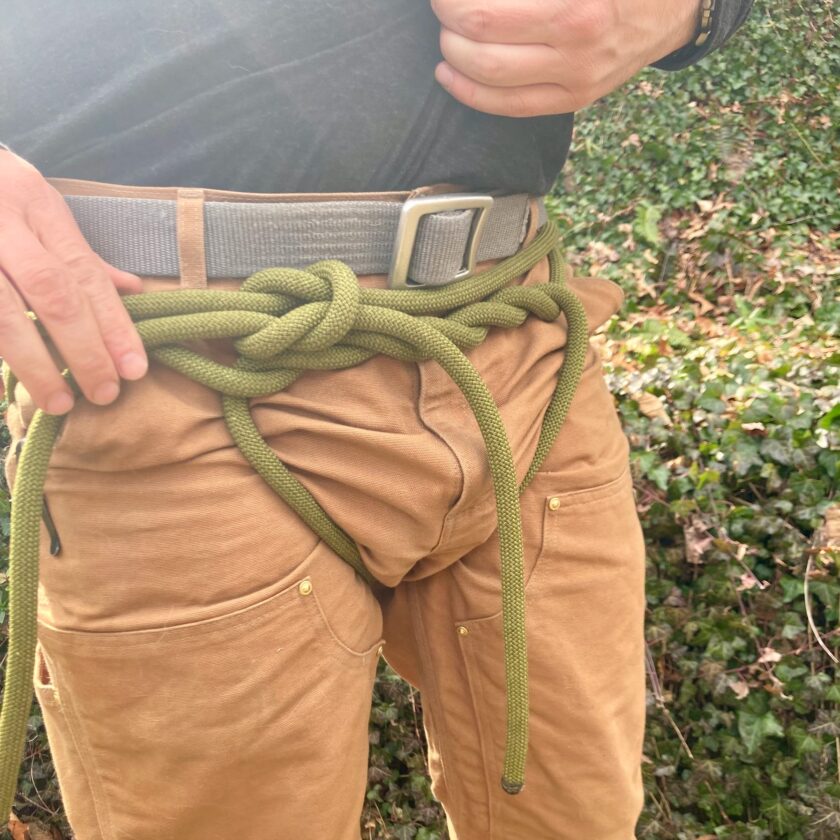
Step 3
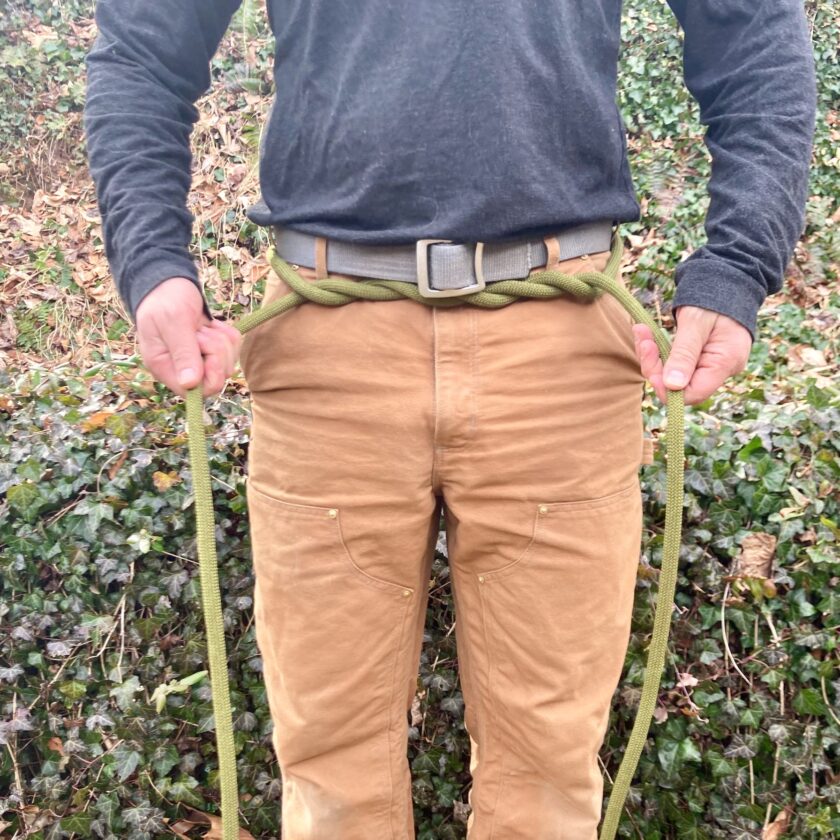
In this step we will create the leg loops. Pass the tail ends of the rope through your legs. These will wrap around your legs to secure you in the seat.
Reach around behind your legs and pull those ends forward. DO NOT cross them over each other. Be sure to keep the right tail on the right and the left tail on the left.
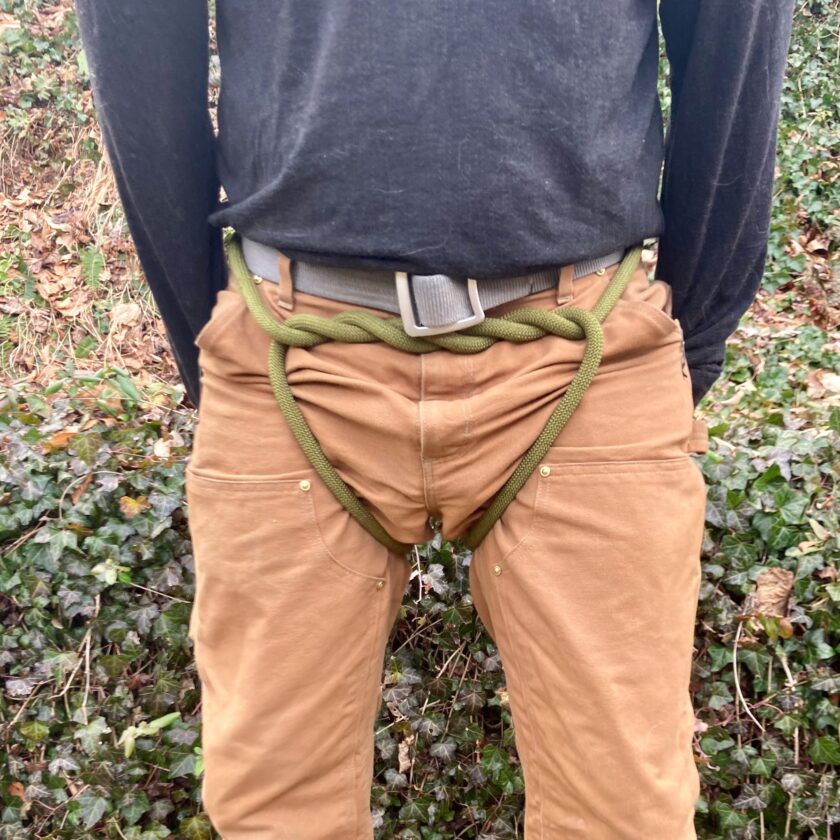
Pull these up nice and tight. You want them to support you, so get them high up in your inguinal (groin) area. This may require a bit of squatting to get them nice and snug. Next, secure them into the waistband as shown below.
Make sure that you pass the rope through the waistband and the running end is to your back. This allows the rope to pass back over itself, creating enough friction to hold the leg straps in place.
The photo below shows the correct configuration.
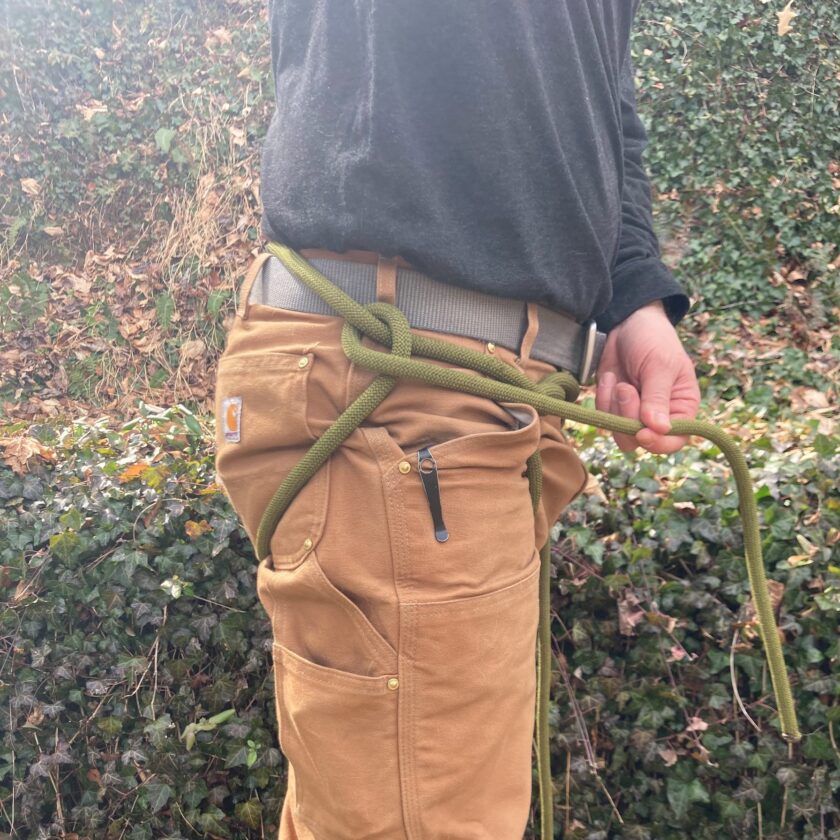
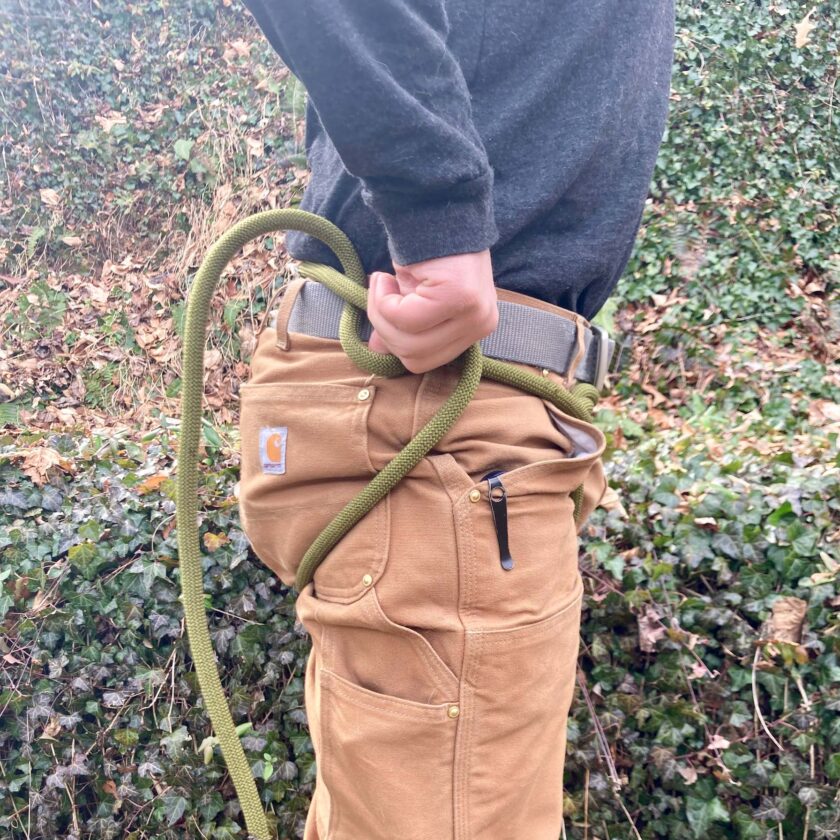
Step 4
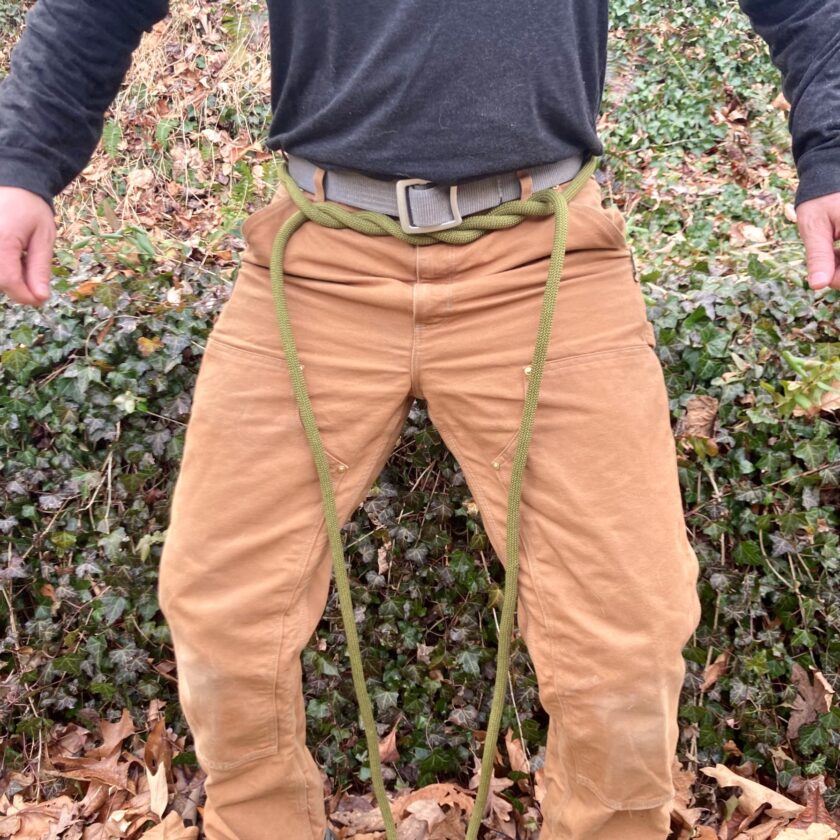
Pull the two running ends together. If you began with one end slightly longer than the other, they should meet to one side of your body. Now we will secure them. You should already know how to tie a square knot.
Now, secure the square knot with a safety on each side. Again, my article on the square knot explained how to tie safeties.
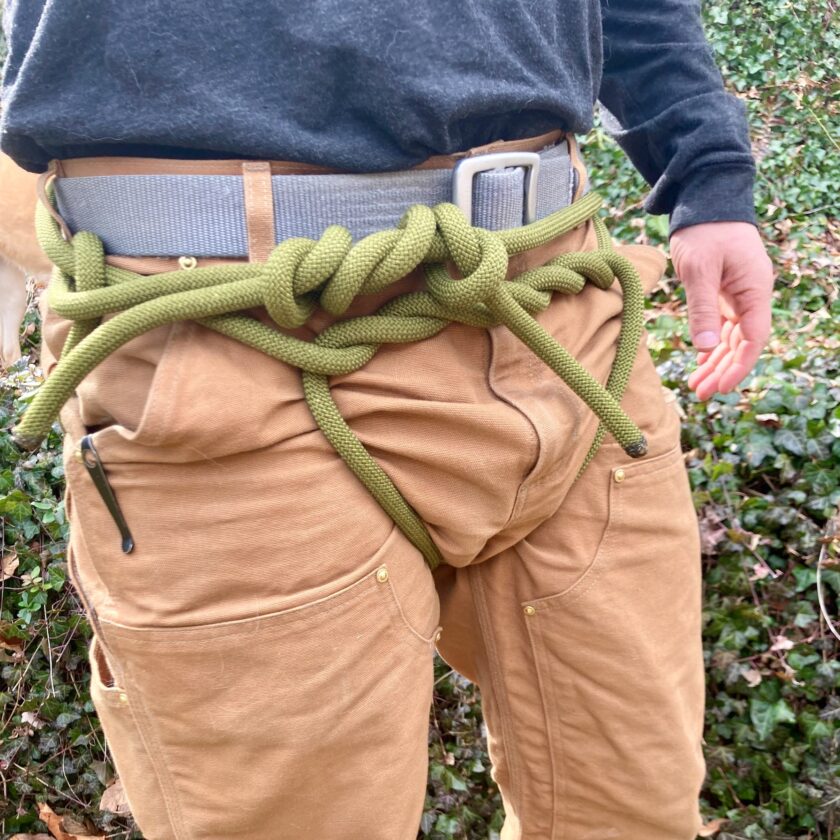
Now you have a completed Swiss seat. If you have enough tail left you can tuck it in your pocket.
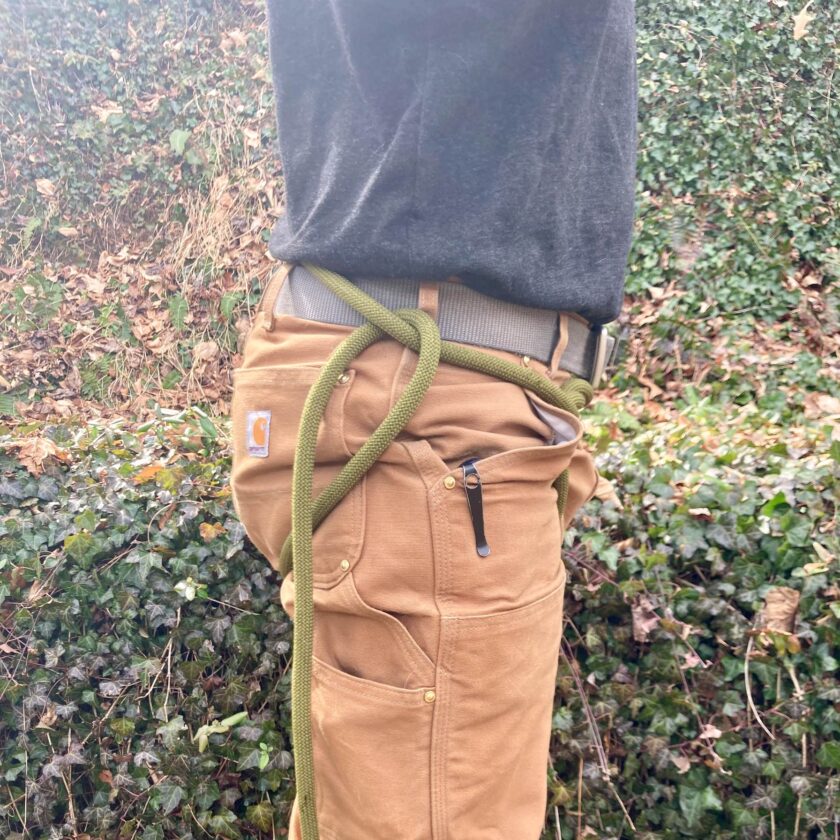
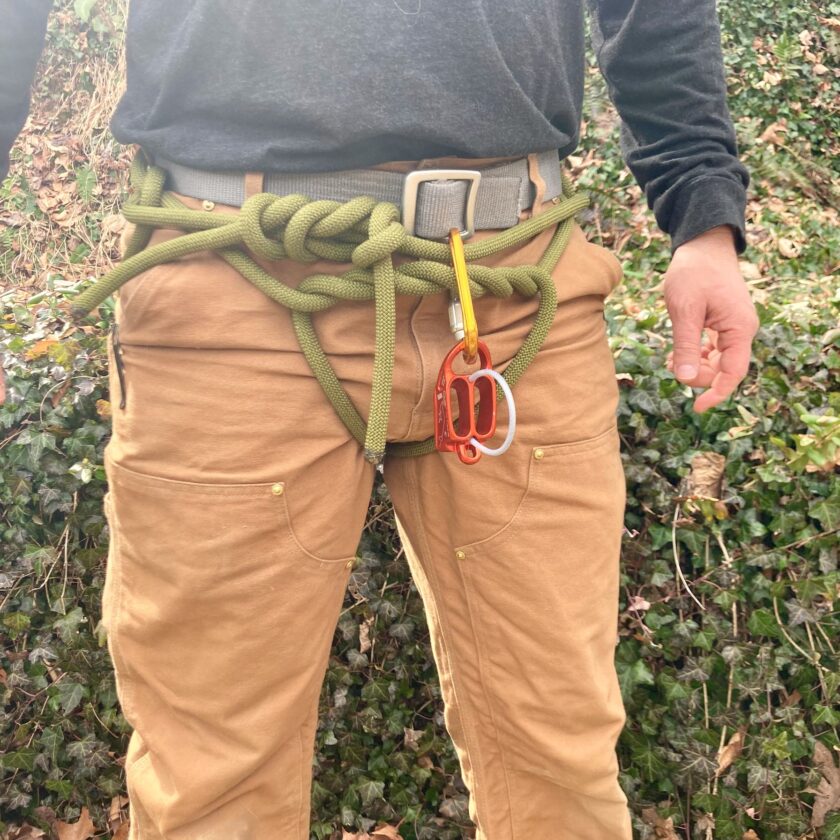
Using the Swiss Seat
Now that the Swiss seat is tied you can connect a descent device to it. Connect the device to the front, going through all the rope passing in front of the body, as shown below. This harness will work, and I’ve used it quite a few times. It’s not the sexiest or most comfortable rig, but it will get you down safely.
Unless you have some expert supervision to verify that it is tied correctly I would reserve this for emergency use only, however. Learn this knot and anytime you have rope, you also have a harness.