Welcome back to Know a Knot! Today we’re going to talk about the square or reef knot, usually just known as the square knot. I came up calling it the square knot so that’s what I call it, but if you prefer reef knot, go for it!
The JAMS Mnemonic
When I was actually on active duty a million years ago I went through a course called “RIP” (Reconnaissance Indoctrination Program). One of the things we had to do in RIP was tie a ton of knots. There was a little mnemonic used to remember the knots: JAMS. JAMS stood for Joining, Anchoring, Middle-of-the-Line, and “Special”. Joining knots are bends, used to join two lines, and we’ve looked at some of those, including the Double Fisherman’s bend and the Double Sheet Bend. We’ve also looked at some anchoring knots, most notably the Figure Eight Loop and the Figure Eight Retrace. Finally, we’ve looked at some Middle-of-the-Line knots, like the Alpine Butterfly and Directional Figure Eights.
The Square or Reef Knot
Today we’re going to do a “Special” knot because the square knot is kind of, well, special. To be honest it’s not a great knot. But it is an ancient knot, and evidence indicates it existed thousands of years ago. Unfortunately it isn’t a very strong knot. pulling on one of the “pig tails” can make the knot collapse (more technically, “capsize”). The square knot is sometimes mistakenly used as a joining knot, but is prone to slipping. According to internet lore this has cost more than one climber his life.
This knot should absolutely never be used as a bend for life-support purposes! The square knot is a utility knot. Even though it’s not very secure, it won’t win you any kudos in a knot-tying contest, it’s probably a knot you’ll use more than any other.
Today you will get a bit of a bonus! Not only am I going to show you the square knot, I’ll also show you how to tie a safety on your square knot, and how to tie a thief’s knot. There are several ways to tie this knot, but I’ll show you the way I was taught. Let’s get into it.
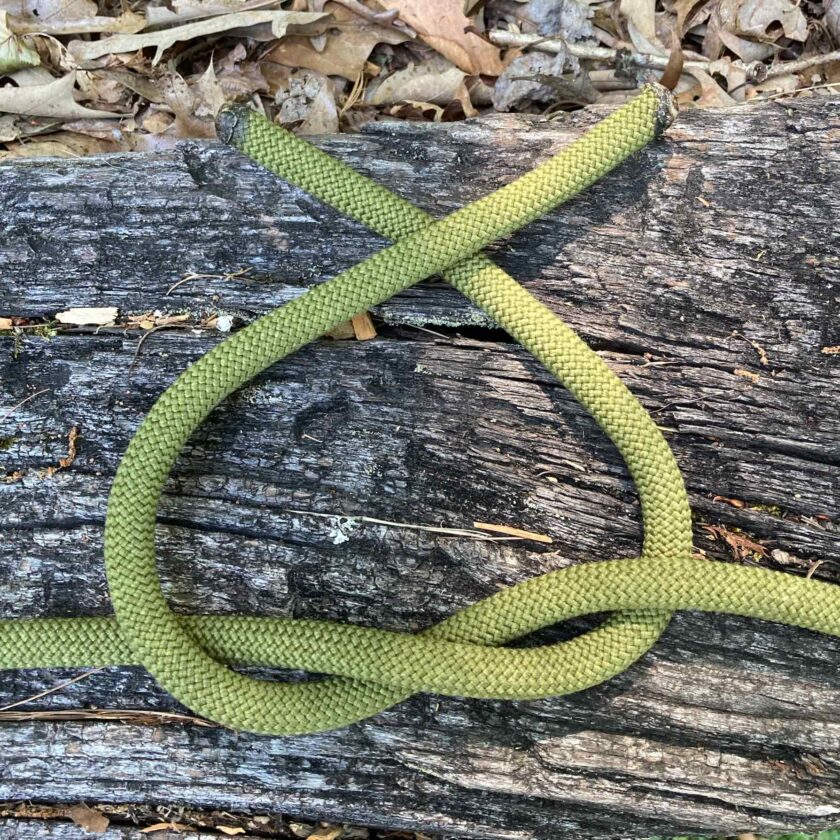
Square Knot Step 1
The first step is to cross the two ends of your line over each other. Whether you choose to pass right over left or left over right doesn’t matter, as long as you do the opposite later. For simplicity sake, let’s all do right-over-left.
Square Knot Step 2
Next, cross the lines over each other to form a half-knot.
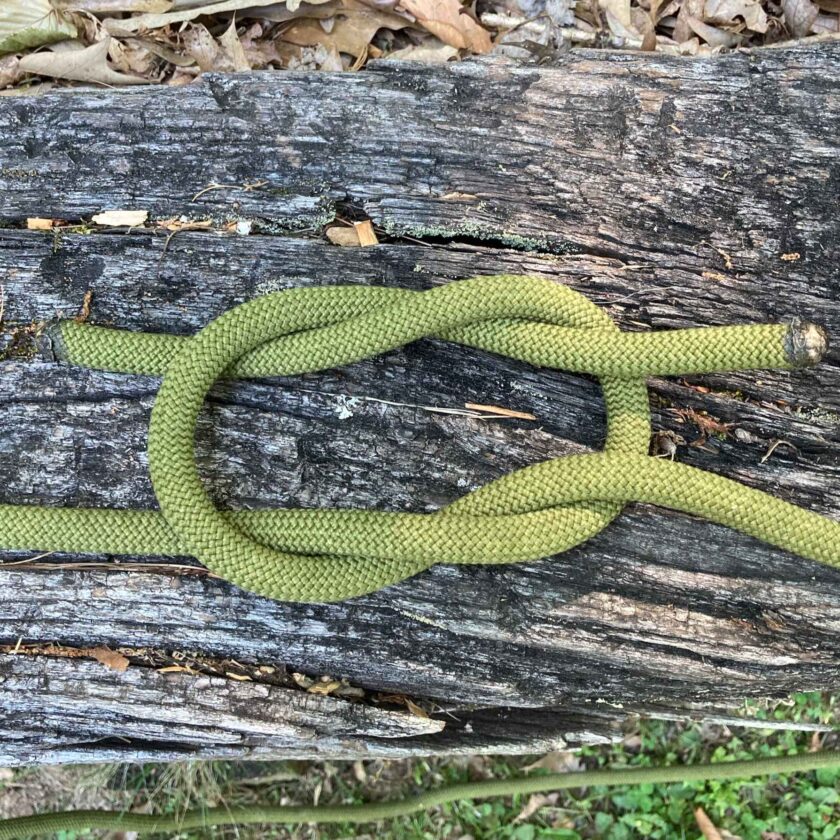
Square Knot Step 3
Cross the lines over each other again, but this time in the opposite order. Since we crossed right over left in the last step, we will not cross left over right.
Square Knot Step 4
Cross the lines over each other again. Now we have a square knot!
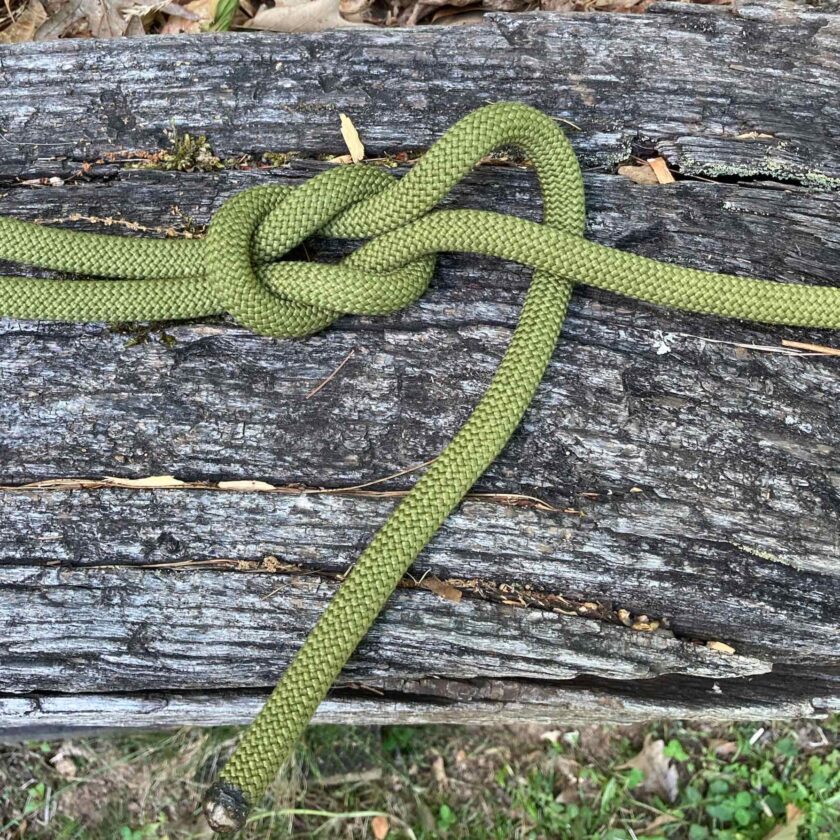
Square Knot Step 5
Clean it up! At this point we might be done. If all we need is a simple square knot, we are done. Later in this article I will show you how to determine if your knot is tied correctly.

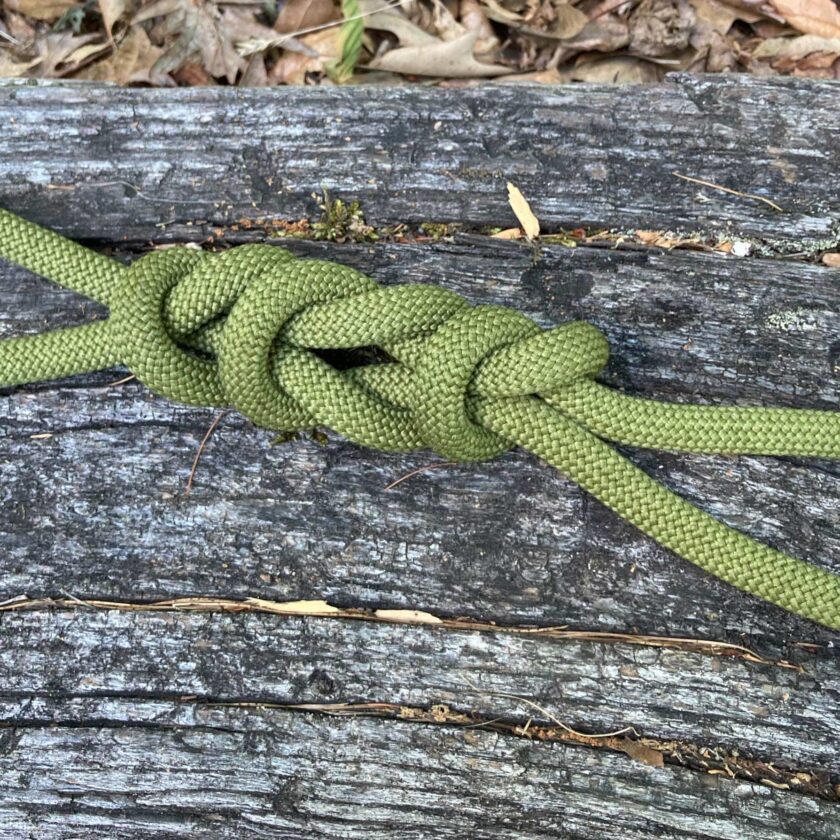
Square Knot Safeties
Sometimes you may want a little extra security on your square knot. Let’s say you’ve lashed some stuff down to the roof of your car. You’re finishing off that lashing and close the two ends of the line together with a square knot. You might want a little extra insurance that the knot isn’t going to undo itself, so you add a “safety” to each side of the knot.
To be clear, adding a “safety” doesn’t make the square knot “safe” for life-support activities – don’t let the name mislead you. But it does make the knot a bit less likely to come undone. It secures those pigtails, reducing the likelihood of the knot capsizing. Safeties are created out of the “pigtails” of the rope, but tying an overhand knot around the standing end of the line. If you know you’re going to use safeties, leave yourself some extra pigtail. Check out the photos below.
Start by passing the pigtail under the standing end.
Next, pass it back through the loop that was formed.
Tighten it down and clean it up. Now tie a safety on the other side.
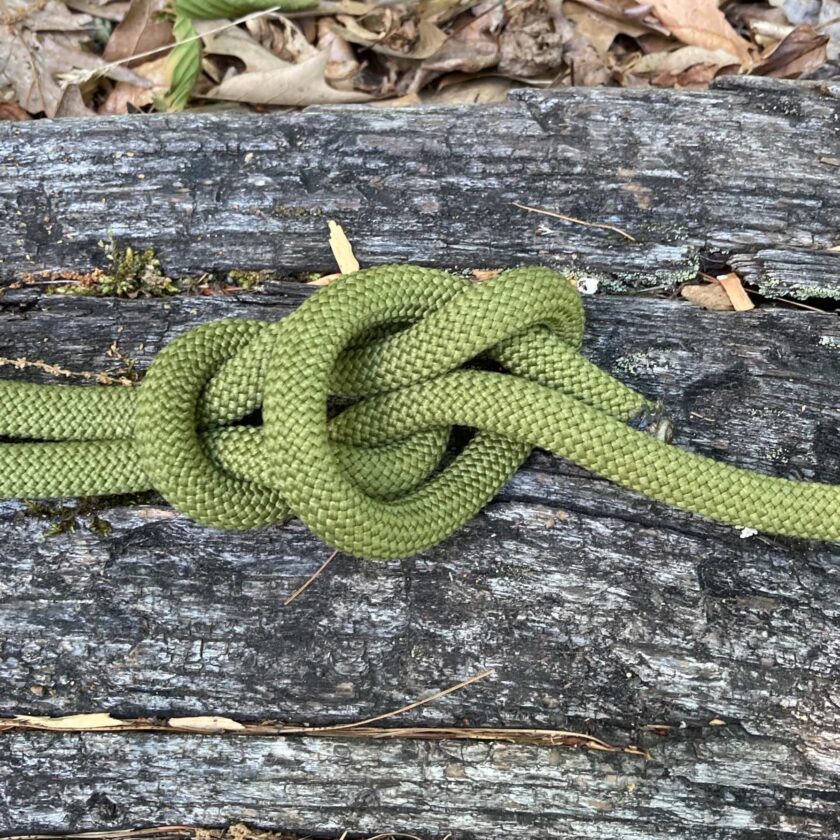
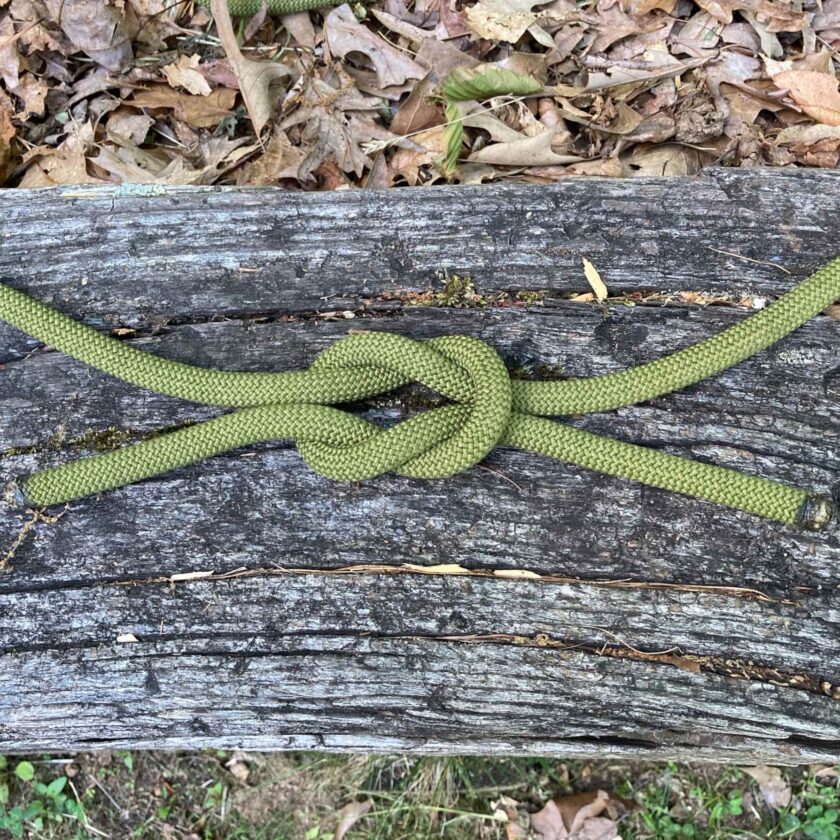
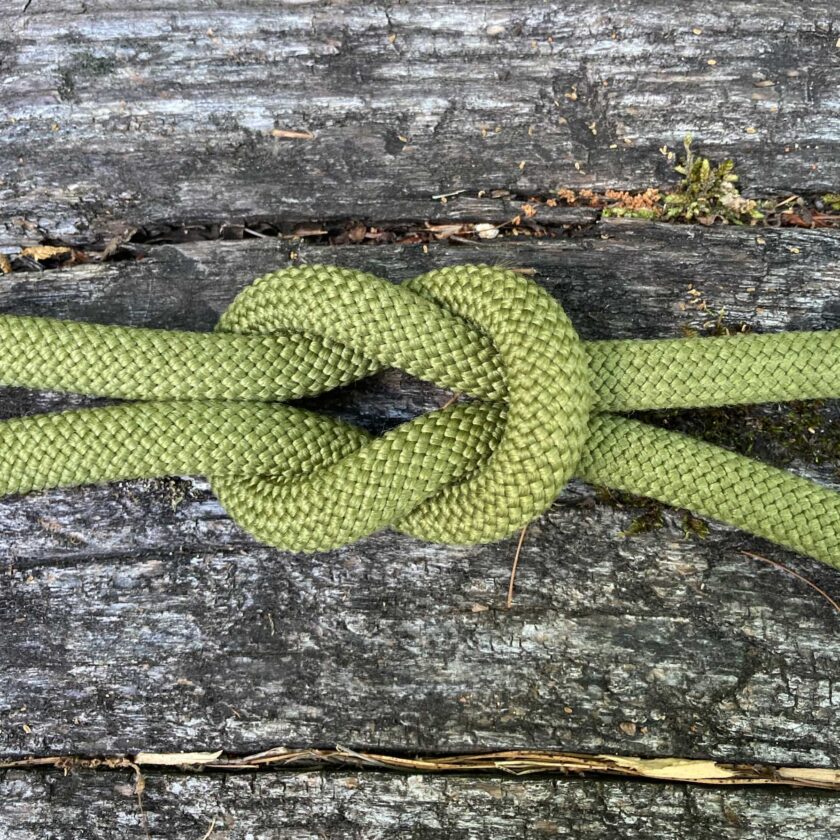
A True Square Knot vs. The Thief’s Knot
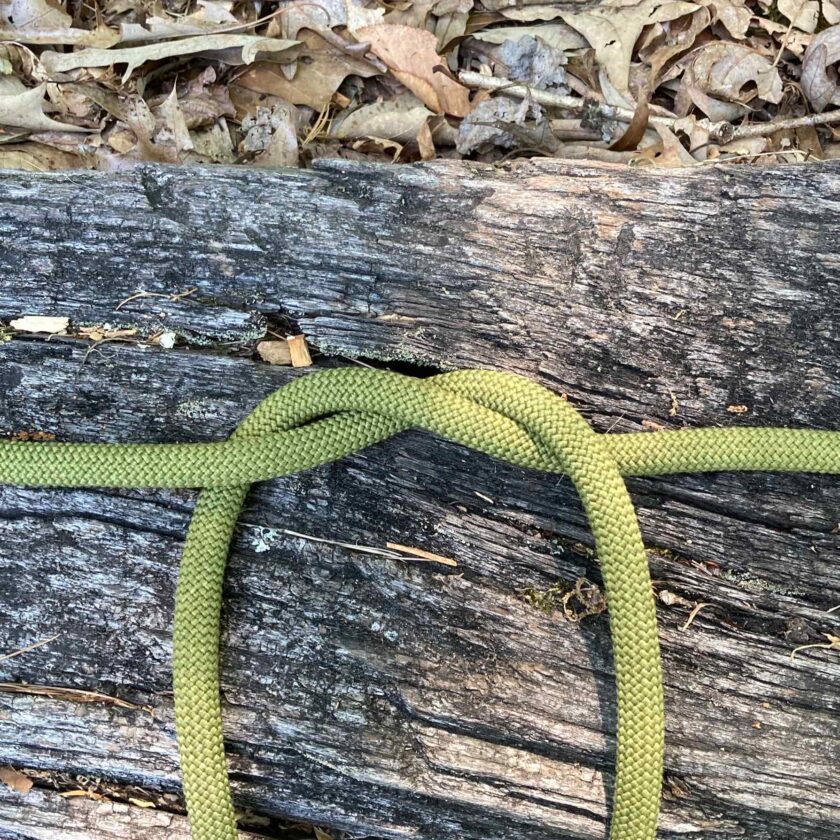
You can tell if your square knot is correct by looking at the pigtails. They should both be on the same side of the knot, as shown below. This knot is less likely to slip under load.
If your pigtails end up on opposite sides of the knot, you have tied a thief’s or captain’s knot. Unfortunately, a thief’s knot is very prone to slippage.
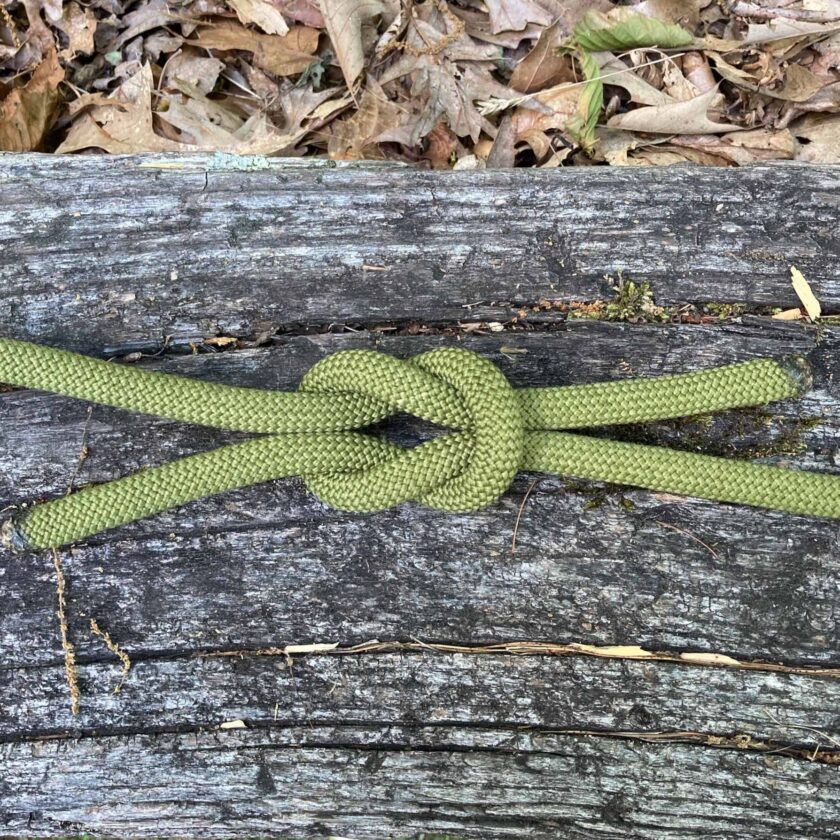
In this photo I am just applying a few pounds of tension to each end of the line and this thief’s knot is readily giving way.
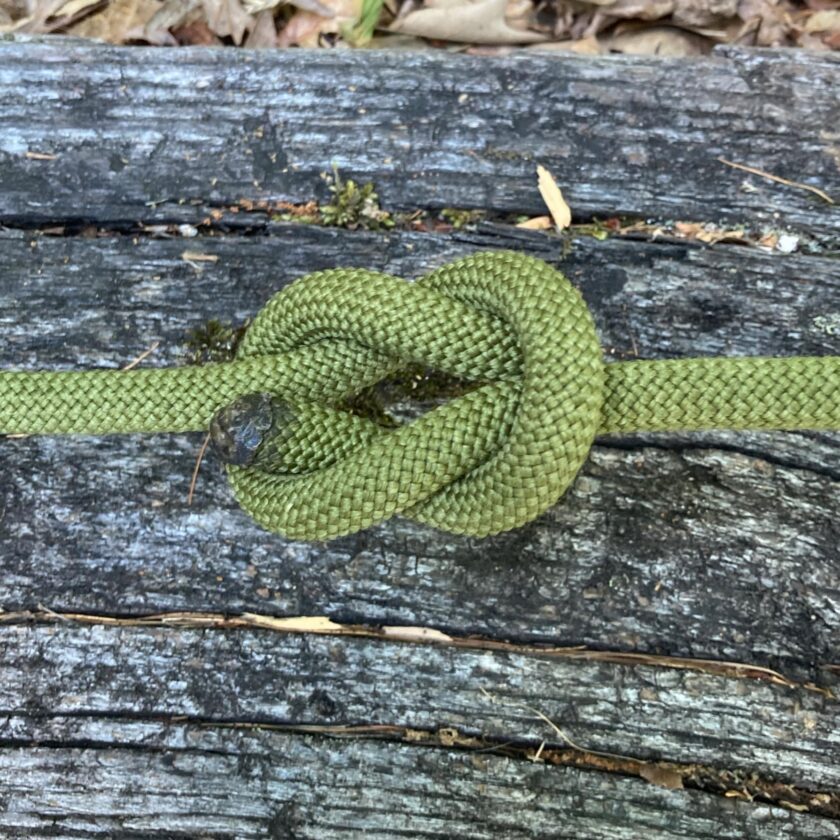
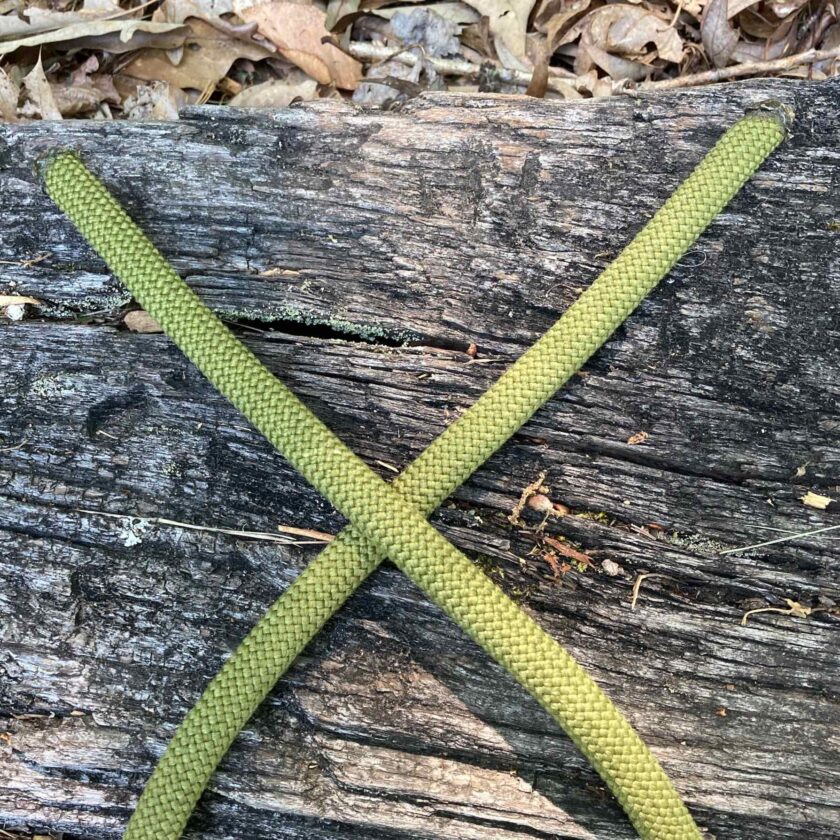
Why is it called a thief’s knot? The sea-story I was told is that the captain of a vessel would secure a rope around anything he didn’t want messed with, like the liquor chest, for instance. A thief, wanting some liquor, would examine the knot and think, “well that’s just a square knot – I can untie it, grab a bottle of rum, and tie it back! If you look at the image below can you tell whether that is a square knot or a thief’s knot?
Without seeing the pigtails you can’t (and obviously RIP instructors would walk up with this knot in hand, pigtails covered asking innocently, “what kind of knot is this?” You can imagine the penalty for an incorrect answer.)
So that’s the square (or reef) knot, the square knot with overhand safeties, and the thief’s knot. Stay tuned next week for more knotty goodness!