Knowing how to change your own oil is a very basic step in becoming more mechanically proficient. I’m not a mechanic by any means, but I have changed my own oil for a long time now. If your car’s hood is a sealed mystery box and you want to get a little more familiar, learning how to change your own oil is a really approachable first step.
This article contains affiliate links.
Disclaimer: I’m not a mechanic, just some dude from the internet. I am reporting to you what I routinely do to my own car. Obviously if you use this information you do so at your own risk. Before trying to change your own oil I highly recommend reading your owner’s manual and maybe having someone help you out your first time. Fair enough?
Reading and owning Auto Repair for Dummies by Deanna Sclar is highly recommended if you’re thinking of getting started with some auto maintenance.
Why Change Your Own Oil
You may be asking, “why bother changing my oil?” First, as a resident of an extremely vehicle-centric culture, you should probably know a thing or two about your car. It vexes me a little to see guys with lifted SUVs bristling with lightbars, roof racks, and fuel cans waiting in line at Jiffy Lube.
Changing your oil is a step in the direction of getting to know your car. It’s a great opportunity to keep an eye on other things – it forces you to crawl around under it and look under the hood. It forces you to learn a little bit about your car – what size oil filter and what type of oil it takes, for instance. It also makes you just a tad more self-reliant.
Another great reason to learn how to change your own oil: it’s cheaper. This isn’t the main reason I do it, but it is a reason. I can change my own oil – with a premium filter and full synthetic oil – for about $42. That’s a $20-25 savings over the local oil change place, and about $30-40 over the dealer. Not a fortune, but with two cars in the drive way, that’s six to eight oil changes per year, so it’s also not nothing, especially when extrapolated out a few years.
Really I like doing it because I know it’s done correctly. I know what has been done and what hasn’t and what components were used. I know the right oil was put in, and exactly what kind in case I have to add oil later. Changing your own oil takes you from a spectator to an active participant in the care of the second-most expensive object you’ll ever own.
Finally, though it seems like a hassle, I’d rather change my own oil on my own timeline than wait in line an an oil change shop. Time is precious!
How to Check Your Oil
First, we should talk about how to check your oil. Hopefully this is something you’re doing on a regular basis anyhow. Checking your oil regularly ensures it’s not low and keeps an eye on the condition of the oil. This is a huge step in prolonging the life and performance of your car. This step requires nothing more than a paper towel.
First, open your hood. If you don’t know how to open your hood, Google it! Make sure the car is turned off. If the car has been running, make sure it has been off for at least a couple minutes to let the oil settle back in the crank case.
Once the hood is open look for the dipstick. It normally likes something like the one shown below. Once you’ve found it, go ahead and pull it out. With your paper towel, wipe it clean and reinsert it.
Now, examine the oil level on the dipstick. Different cars’ dipsticks are different – some have a cross-hatched area that indicates sufficient oil. Others, like mine, have a small hole near the end of the dipstick. The oil should be up to this hole. If you don’t know how to read your car’s dipstick, look it up in the owner’s manual.
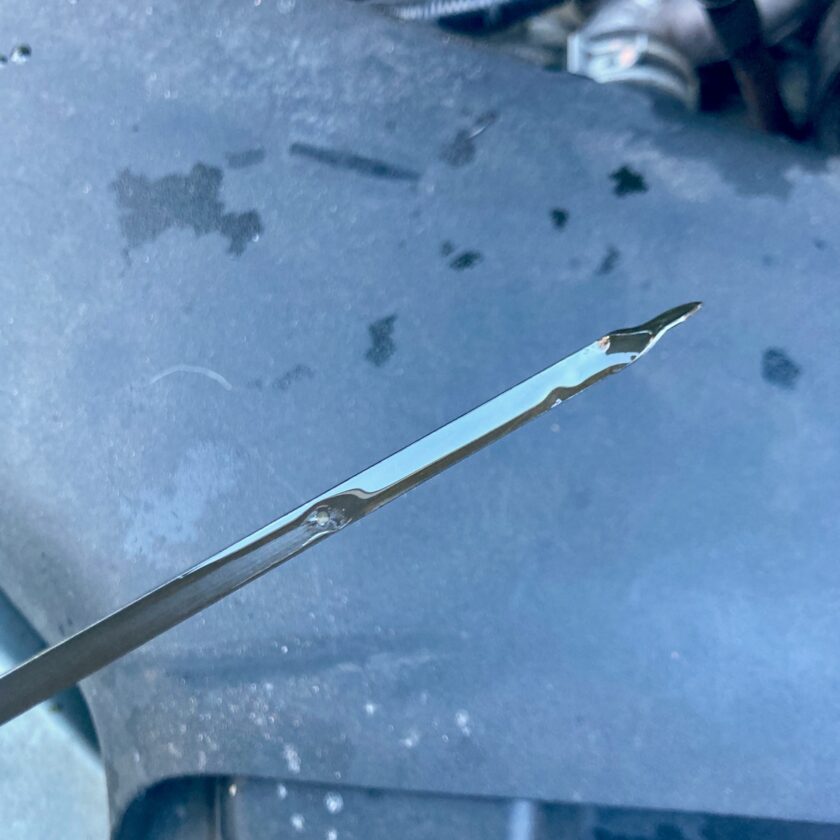
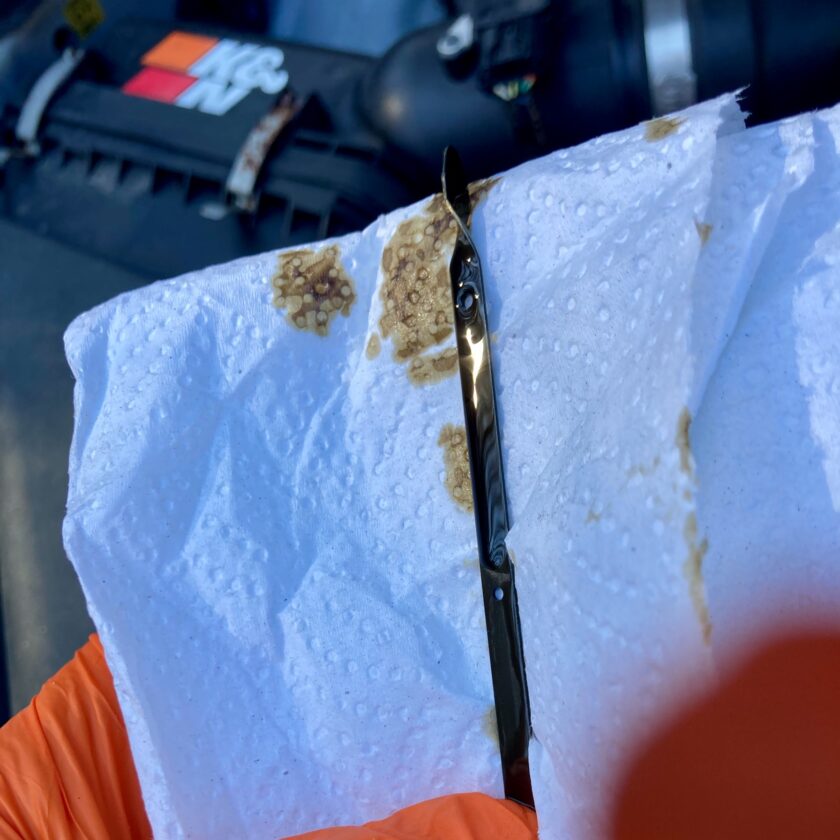
You can also tell something about the quality of the oil. Notice the oil above is translucent. If wiped on a rag it would be honey colored. This is clean, fresh oil. Look at the oil below. It is black and opaque, indicating it needs to be changed.
If the dipstick indicates your car is low on oil or needs an oil change, you should correct that deficiency ASAP. As a general rule your car’s oil should be changed about ever 5,000 miles. The old “every 3 months or 3,000 miles” is has been pretty well debunked. Though some experts recommend 6,000 and as many as 7,500 between oil changes, I change mine every 5,000 miles, but feel free to do your own research and make your own decision around that.
1. Gather Your Consumables
Once you’ve determined that your car needs an oil change you’ll need to gather your consumables. Importantly, you’ll need new oil and a new oil filter. I’m a big believer in full synthetic oil. It’s a bit more expensive than conventional oil, but I keep my cars in good shape for a long time.
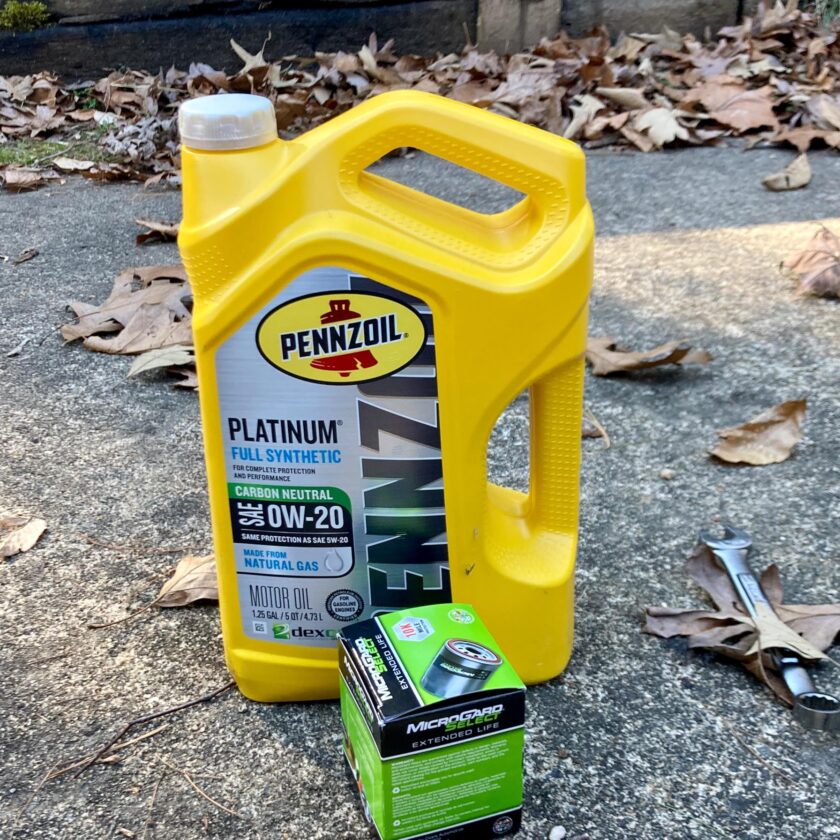
You need to determine a few things. First, you’ll need to know the weight of the oil your car takes. It’ll look something like “0W-20” or “5W-30”. You can Google your car’s make and model and find this online, or look in the owner’s manual. Along with weight you’ll need to know how many quarts your car takes. Most cars take 4 or 5 quarts of oil.
You’ll also need to know the size of oil filter your car takes. You can Google it, or ask at the auto parts store when you’re buying it. If you car has been leaking oil from the oil drain plug you’ll also want one more thing. There is a gasket that goes around the plug; you’ll want to replace this. I keep one on hand in case I notice leaking when I’m changing my oil. Once you’ve got your consumables, you’ll need just a couple tools
2. Gather Your Tools
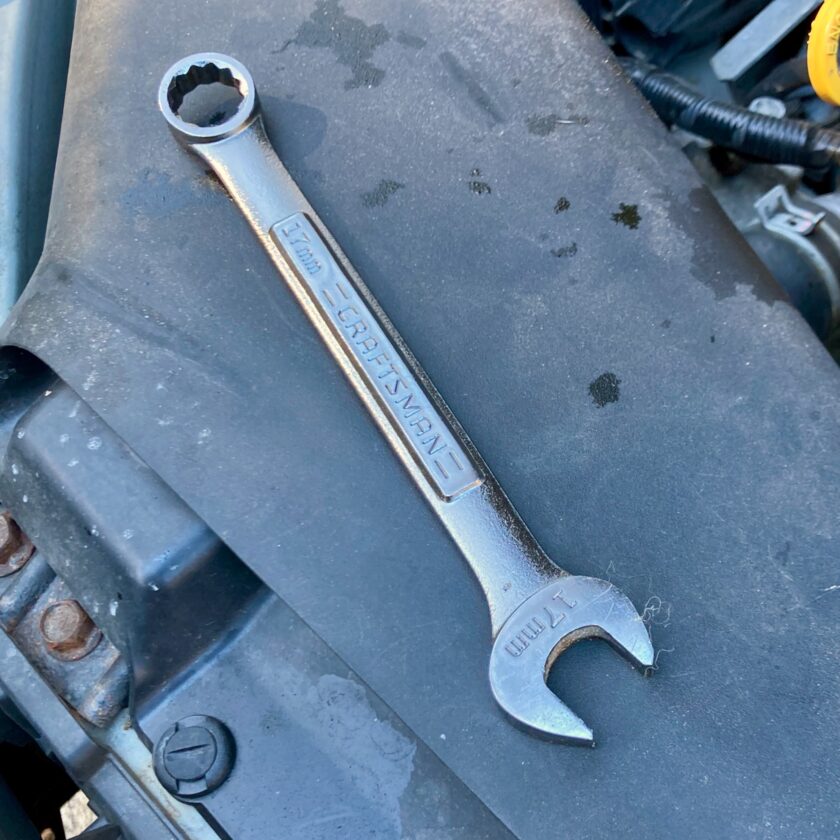
You only need a couple tools to do an oil change. You need a wrench to remove the drain plug, something to catch the oil in, and possibly an oil filter wrench. I like a combination wrench to remove the drain plug. Sometimes quite a bit of force is needed to break it free, and a combination wrench works well.
Personally I don’t need an oil filter wrench due to where my filter is located. It’s easy to grasp and unscrew. Yours might not be so easy to reach. An oil filter wrench can really make a difference.
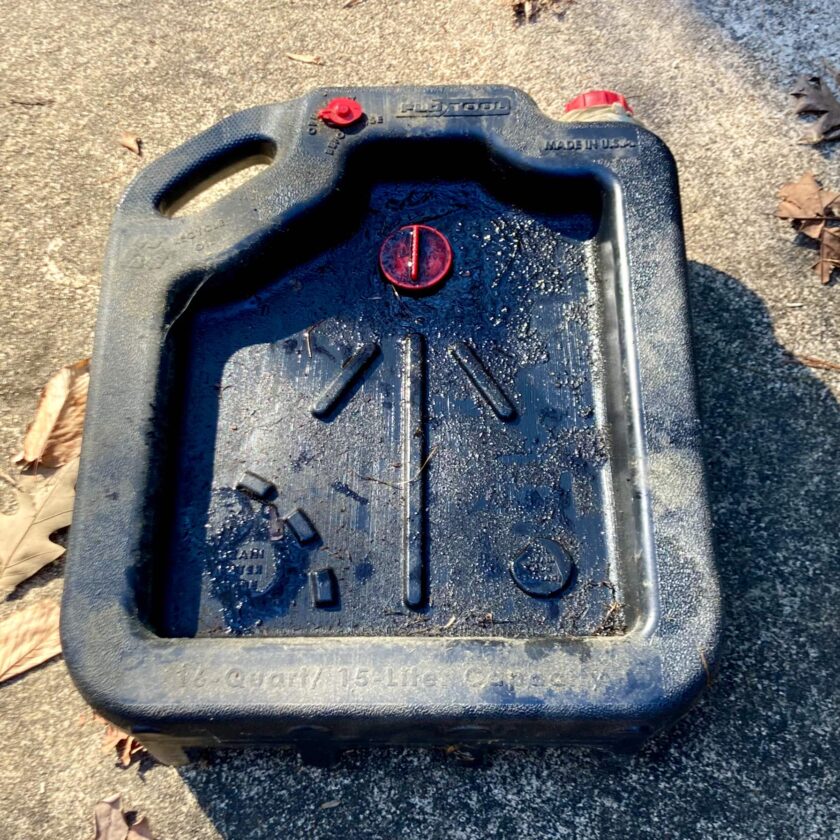
Finally you’ll need something to catch the oil in. I have this plastic drain pan that I bought at O’Reilly’s Auto Parts about three years ago. It holds several changes worth of oil. When it’s full I take it to the dump and empty it in the oil recycling container. It’s a super simple, worry-free way to handle used oil.
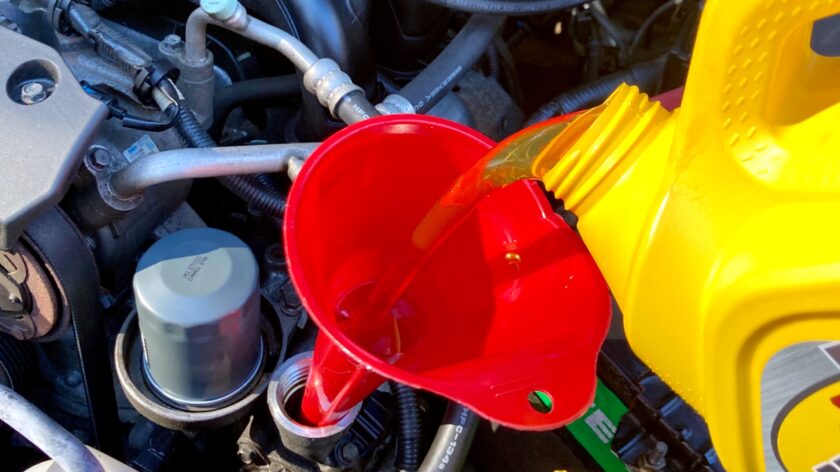
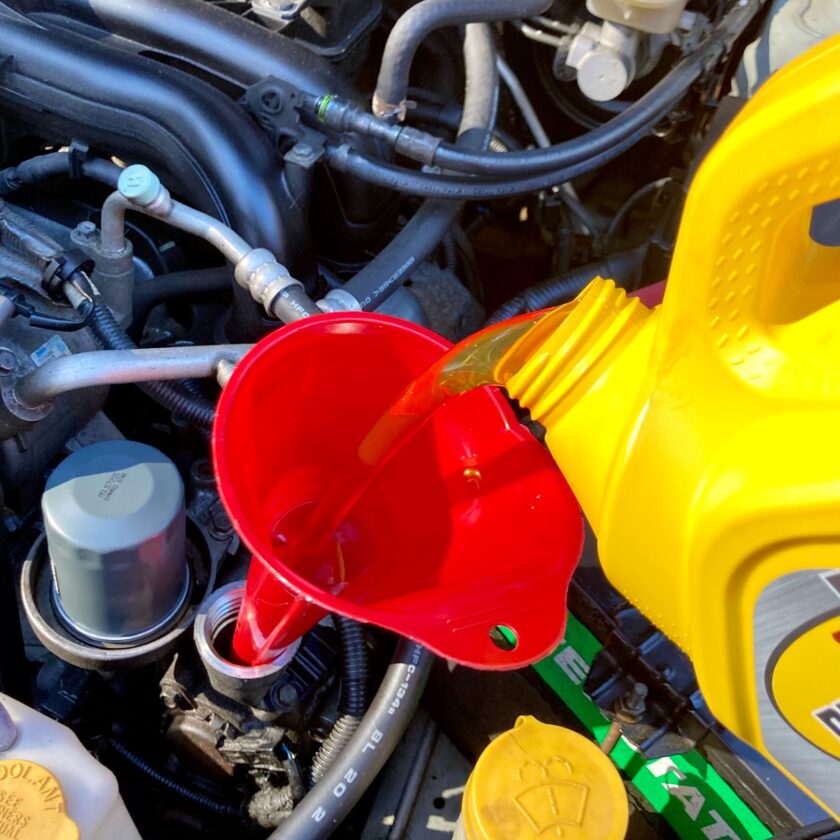
At the end of the job you’ll also need a funnel to put oil back in the engine. They’re cheap and last a long time, so it’s hard to justify not having one. I keep mine in my car.
3. Safety First
Before you actually get to work there are a few safety considerations you should attend to.
First your car should be turned off before attempting to change the oil, and during the entire process. Sounds silly, but I’m sure it has been tried. Almost as importantly, you need to make absolutely sure you don’t turn the car back on until the process is 100% complete. Turning your car on without oil in it could cause serious damage and a huge, negative impact on the life of the car. I like to take the keys out, put them inside in the care of my girlfriend so I don’t thoughtlessly hop in the driver’s seat and turn the key.
Next, take precautions to prevent your car from rolling. It should be on a level surface. This prevents it from rolling, and ensures all the old oil drains out. The car should be in gear and the emergency brake should be engaged.
Finally, make sure the oil isn’t hot and wear some gloves. Motor oil can get very hot in a running engine. If your car has been running (i.e. you just ran to the store to get oil and a filter) let it cool down before attempting to change the oil. You may have to let the car sit for half an hour or so. You also probably want to wear some heavy duty nitrile gloves, too. Engine oil is nasty stuff, and you don’t want it on your skin.
4. Drain the Old Oil
Once you’ve gathered your tools and consumables, and your car is safely parked, it’s time to drain the oil out of the engine. This is going to require getting under the car and finding the drain plug. Before you do anything else you’ll want to ensure that whatever is catching the oil is positioned under the drain plug. Keep in mind that oil doesn’t flow straight down – it may shoot out 6 inches or more to the side because it is under the weight of five quarts.
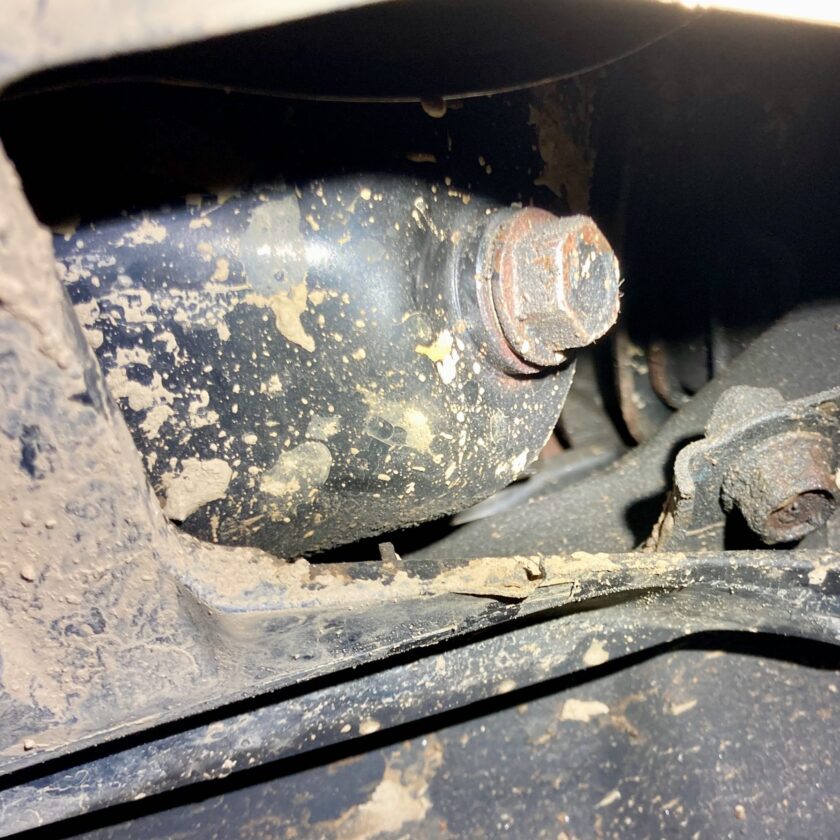
Once the pan is positioned, start loosening the drain plug. Again, it may take some force to initially break it free, but once it’s free it should loosen easily. Slowly unscrew it while maintaining pressure inward, toward the oil pan. Keep doing this until the drain plug is fully unscrewed. When it is fully unscrewed, remove it rapidly to keep from getting oil on your hand and to keep from splashing oil everywhere, like I did taking the photo below.
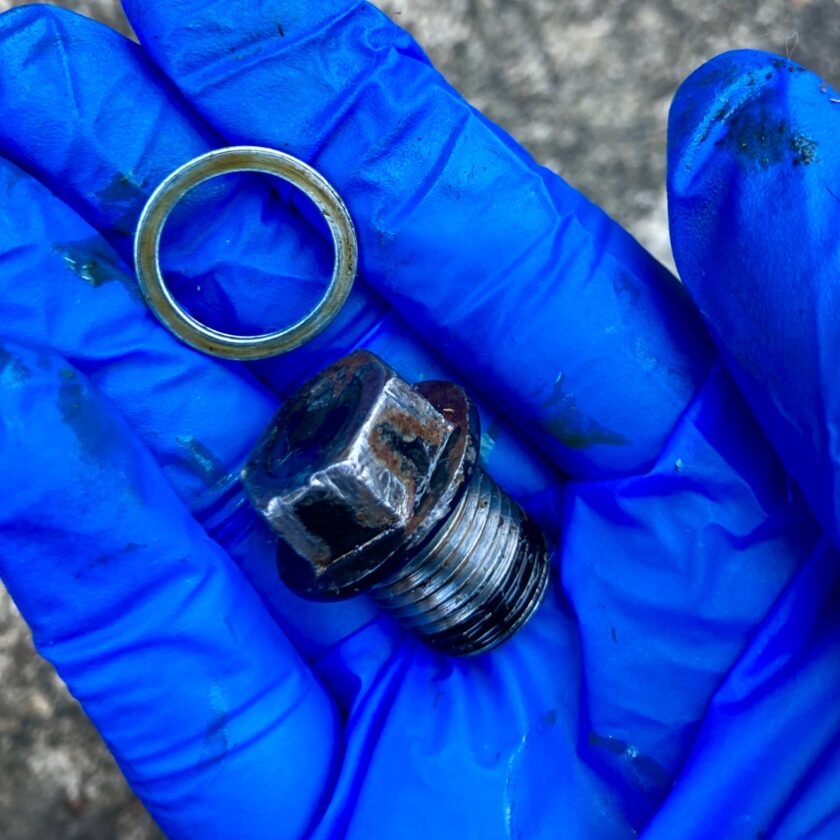
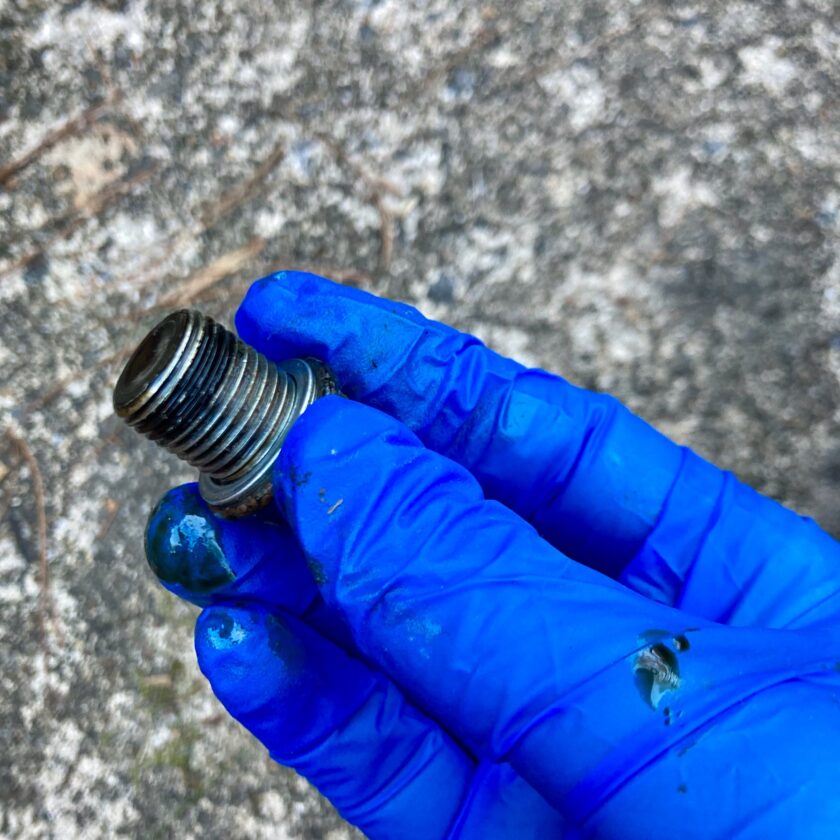
Try to retain the oil drain plug. If it falls into an oil catchment pan like mine it’ll be fine, and will be there when the oil all drains away. If you’re using a random container you’ll have to fish around for it at the bottom – not a fun job. The drain plug also has a gasket that you MUST REPLACE when you put the drain plug back. It’s not a bad idea to have an extra because once the oil is out of your car you can’t run get a new one if you lose it.
Note: there are tool-free, easy-drain plugs that make this part of the process easier. I haven’t bought one yet, but I’m strongly considering it.
Let the oil drain for 10 minutes or so. When it has slowed to a very slow drip you’re good to go. Again, during this time be sure not to become distracted and start the car!
5. Remove the Old Filter
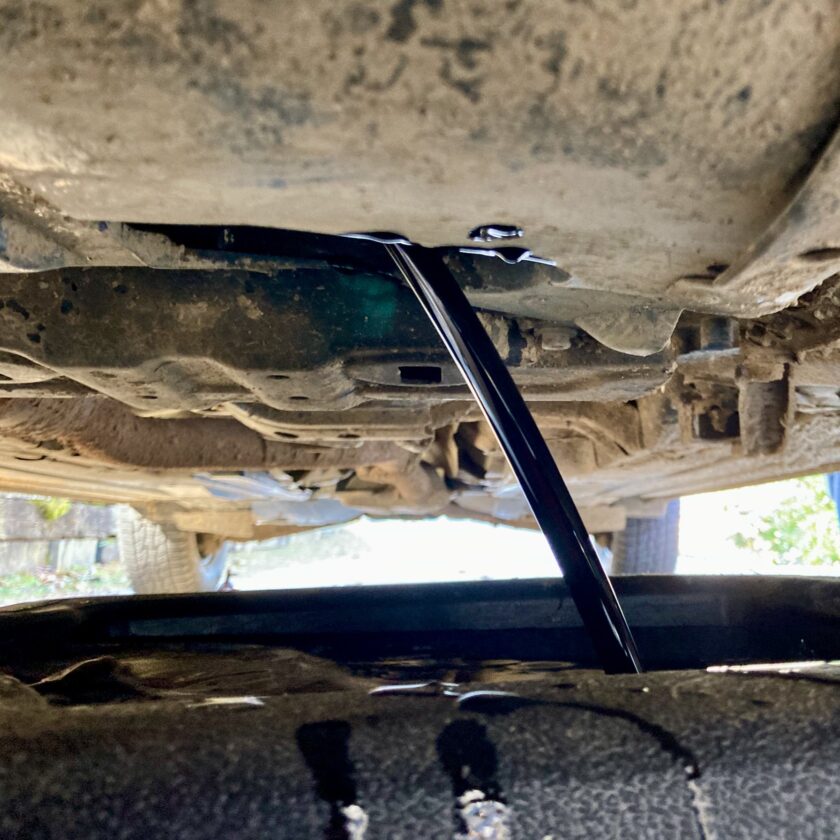
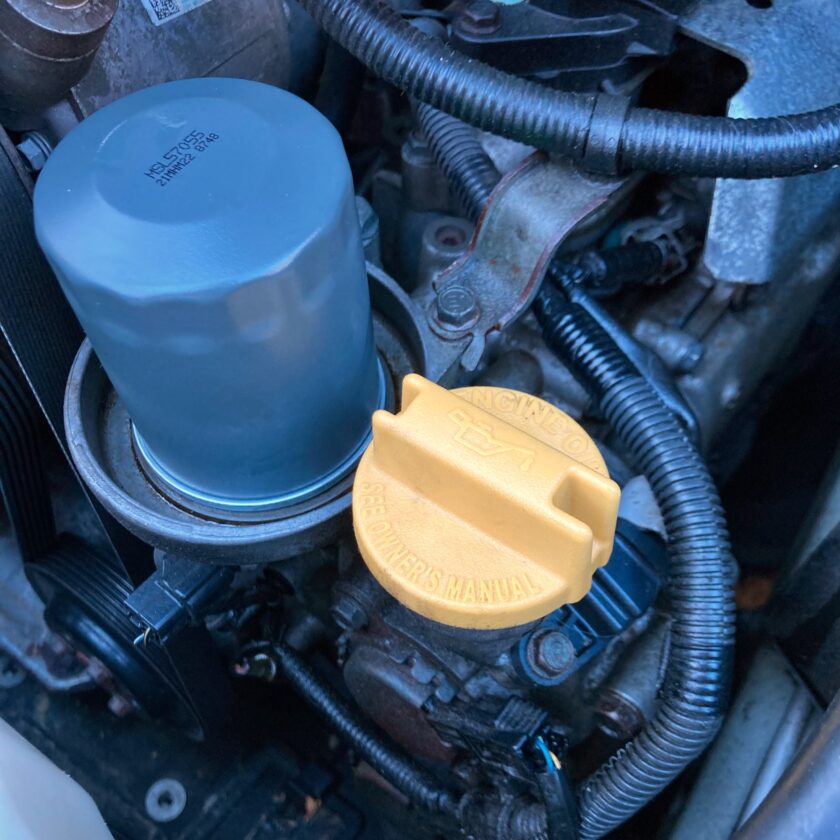
While the oil is draining you can remove the old filter. The old filter contains quite a bit of oil so you want to handle it carefully to avoid spilling oil all over the place. My car, shown in the picture below, has a perfectly placed filter. All the oil drains out when the car is at rest. Not all cars have filters in such accessible, convenient locations.
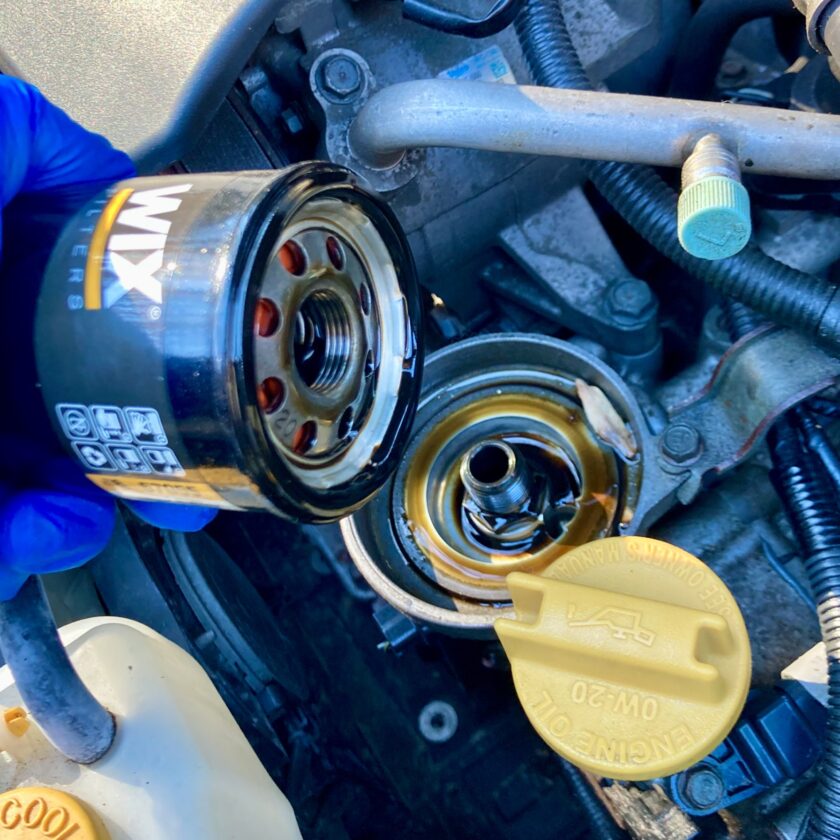
You’ll want to remove the filter quickly, and turn the open side up ASAP. If you have an oil drain pan like min, it has a spot to set the filter, open side down, to let the oil drain out of it before disposal.
6. Replace the Filter and Drain Plug
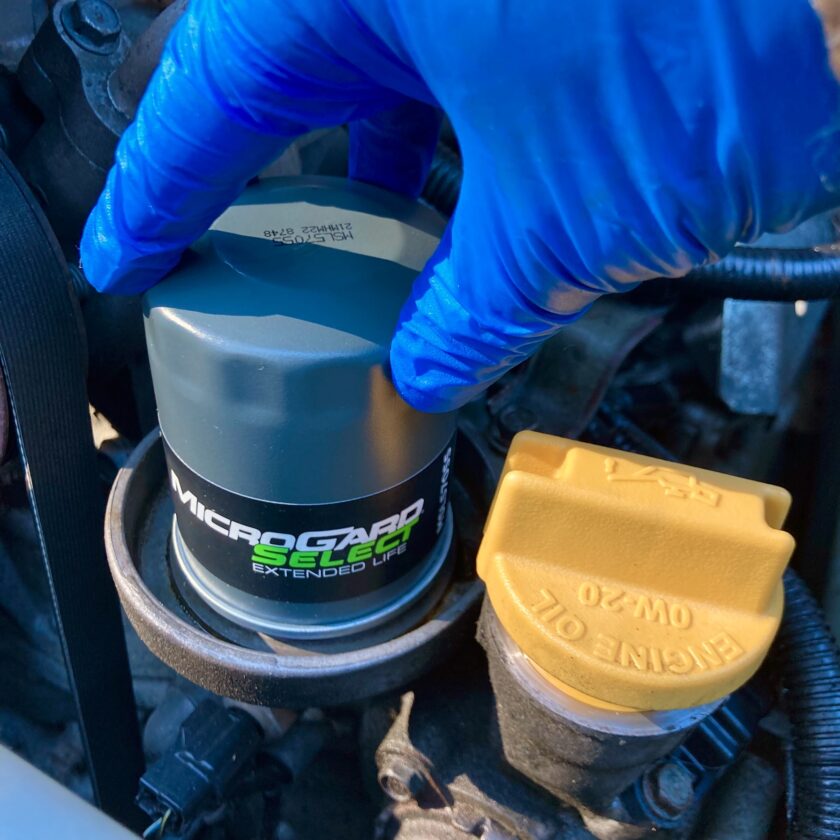
Once all the oil has drained from the car and you’ve removed the old filter, it’s time to put new oil and a new filter on your ride. Let’s start with the filter. You’ll want to put it on quickly to avoid leaving its spot open to the environment for very long. Remove it from the package. Lightly lubricate the gasket around the open end with some clean motor oil.
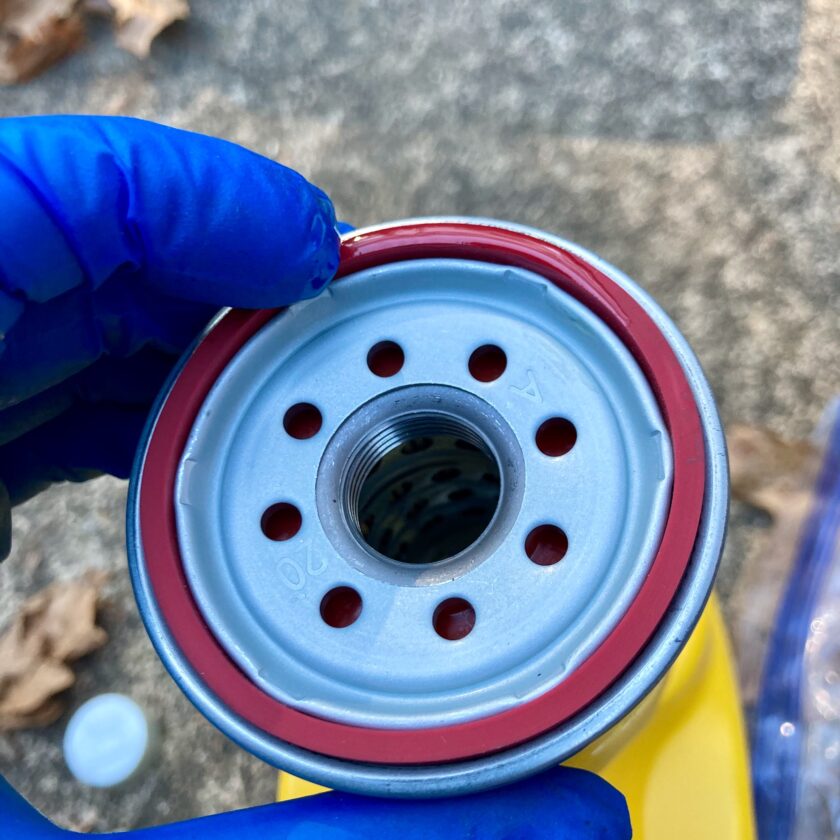
Once the gasket is lubricated, screw the filter into place. You don’t need to tighten it like your life depends on it – snug it down, then tighten it just a bit more.
Once the oil filter is in place, wipe off the the oil drain plug and replace it. Ensure the gasket is on the plug, otherwise it will leak. You want it tight, but over-tightening can strip out the threads in the oil pan, which is definitely not ideal. It’s very hard to describe how tight you want it. The best description I’ve see is to tighten it until it is snug, then turn it 1/4 of a turn more.
Once you are sure the filter and drain plug are in place, move on the the next step.
7. Refilling the Oil
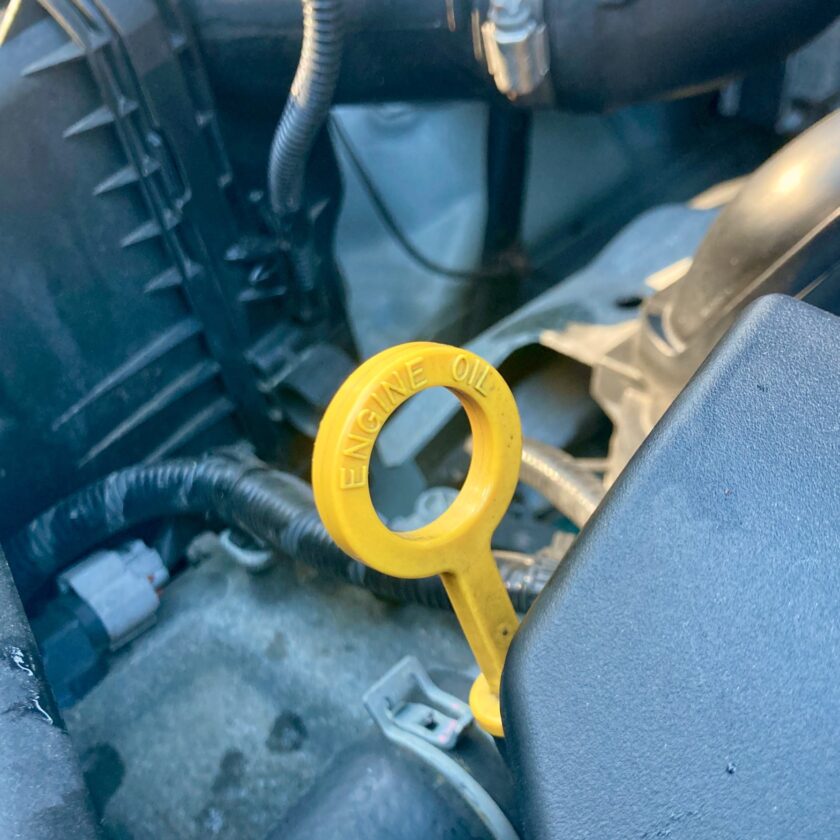
Remove your vehicle’s oil fill cap. Using a clean funnel, fill with the correct amount of oil (again, check your owner’s manual). Importantly, DO NOT OVERFILL! Overfilling can be very damaging to the engine. Once you have replaced the oil, remove the filter and replace the oil fill cap.
Again, be sure to replace the oil fill cap NOW. First, leaving it off creates the opportunity for debris to find its way into the engine. Second, and this is the voice of experience speaking, it’s too easy to forget to replace it. Then, when you start the car and drive oil goes all over your engine compartment. Ask me how I know. Replace the oil fill cap as soon as you’re finished filling the oil.
Let the oil settle for a few minutes, then check the oil from the dipstick. At this point the oil should be clean and translucent. It should be filled to the appropriate indicator.
And That’s It!
And that’s it – at this point you’ve changed your own oil. This might seem like it takes a long time. Trust me – it takes much less time than going to Jiffy Lube (or whatever) and waiting in line. You gather your tools, throw the oil catchment container under the car, and remove the plug. You go do whatever you want for 10-15 while the oil drains. Then you come back, reinstall the plug and filter, and refill the oil. Simple.
That’s it. You save a few bucks and half an hour, learn a thing or two about your car, and have a sense of satisfaction at the end. If you’re paying for someone else to change your oil, you need to do it at least a couple times to find out what you’re missing out on.