Heating and cooling in the absence of “the grid” is a subject that seems to get addressed only rarely in preparedness literature. Most of the recommendations are short-term in nature, anyway. This posts is going to cover the most important parts of my long-term heating and cooling system, in hopes that you can learn something and make yourself more resilient on what I feel is an overlooked topic.
This article contains affiliate links.
Note: I originally published this article in September of 2019. Though the summertime stuff may seem out of place, you should be planning ahead. Not only will you save money and beat the rush, you’ll also become more resilient in the process. Right now I am planning heat for next winter (2021/2022). Get ahead. If you’re always ready you don’t have to get ready.
I have updated this article slightly and close it out with some after-action notes from a year of heating with wood. Enjoy!
Short-Term Vs. Long-Term
Most of the recommendations for heating I see in survival/preparedness literature is short-term in duration. Items like kerosene and propane heaters are frequently recommended. Don’t get me wrong – these can be fantastic tools, but they aren’t long-term solutions. You can only store so much kerosene and propane, and a cold winter will go through a lot of it.
Long-term heating a cooling systems would perhaps be better described as resilient systems or sustainable systems. These are systems that have renewable or sustainable fuel sources, or require no fuel. Some of these are truly “long-term” both in that they will provide heating and cooling in the long term, and in that they may require some long-term planning to implement. Put another way, they are not, “go out and buy this” solutions, they are “plan your home around this” solutions.
The good news about these “long-term” solutions; they offer benefits whether a disaster happens or not. They reduce my power consumption, reduce my reliance on a utility provider, and reduce the amount of money I spend each month. The make me far less dependent on fragile, artificial systems that I don’t control, and more reliant on simple, robust systems I do control. We’ll explore both cooling and heating options, beginning with cooling.
Cooling
Your environment will play a huge role in how important this is to you. In the deep South or the Southwest, cooling may be massively more important than heating. In the Northeast (or Northwest) it may not be a huge concern at all. Still, in every single area of the country, at some point, it gets hot. At the altitude I’m at, we’ve yet to break 90 degrees this summer and it’s doubtful we will at this point. Still, 85 degrees is hot and some planning to deal with the heat is in order.
Preparing for the heat is imperative. Heat is a killer; just search “heat wave deaths” to find incident after incident of several to tens of people being killed by extreme heat events. Even if heat doesn’t kill you, it renders you less effective. Heat makes it difficult to sleep, make you uncomfortable, and cause heat-related injuries. Being hot all the time really sucks.
I’ve spent a lot of time thinking about this, and finding effective cooling solutions seem to be more difficult than heating. There are just fewer options available that don’t require electricity. There are some, though.
Cooling: Opening Windows
Being able to open your windows is perhaps the simplest, easiest, and most important thing you can do to cool your home. It requires no electricity, but it does – obviously – require the ability to open your windows. If you haven’t opened your windows in a while, do so. If your house is old, your windows may be stuck, or may require some repairs (as mine did).
Most homes today are constructed with the assumption that air conditioning will be used. This means the windows are smaller and fewer, and often don’t come with screens. If you don’t have them, GET SCREENS FOR YOUR WINDOWS! If you already have screens, make sure they are in good repair. Further, get screen doors for your doors, as doors are almost certainly the largest potential “windows” in your home, and you’ll probably want to be able to open them, too.
Fortunately, our house came with screens for most windows, but we did have to purchase a couple. This was a little pricey, but well worth it for the amount of money we’ve saved by not using air conditioning this summer. Getting used to living with the windows open and being a little uncomfortable has actually been nice, and a good proof-of-concept for my situation.
Cooling: Passive Solar Planning
Deciduous trees are you friends! Mature, deciduous trees can provide excellent shade to your southern exposure in the summer when shade is needed. Combined with open windows, your home can stay a few degrees cooler than the outside temperature all day long. My southern exposure sits in the shade all summer long thanks to a couple mature maples and poplars. In fact, we have only resorted to turning on the air conditioning once – for one, single day – this entire summer.
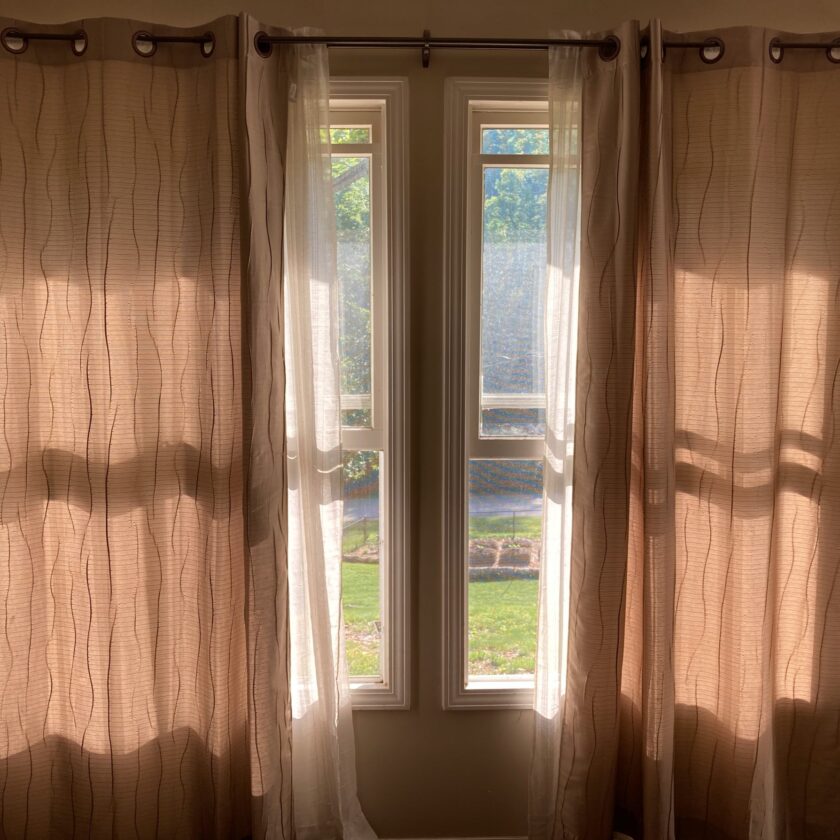
You can also use curtains and blinds to your advantage here. While not as effective as shading the entire house, you can at least keep the sun from shining in the windows and heating your floor, walls, and furniture. Blinds, adjusted correctly, can keep the sun out but still allow good airflow through the windows. With the amount of shade we get on the house this hasn’t been a huge factor, but it can be.
One home I lived in had a storm door that got sun for several hours in the afternoon. If I left that door open, the house would basically turn into a greenhouse; sun would stream through the glass of the storm door, heating the air and the floor with no way to get out. Simply closing the door made the difference of about ten degrees in the entire house for the rest of the day.
Cooling: Fans
Fans can drastically increase the cooling efficiency of a home by pulling cool air into the house in early morning when the air is coolest. The problem with fans: they require power to operate. You can purchase battery-powered fans, but that is inherently unsustainable. Assuming 90 days of hot weather, and assuming each fan takes 4 D-cell batteries, and that each set of batteries lasts five days (which is probably a stretch). . . You’re going to need a ton of batteries, and they aren’t going to last forever.
Energy to power fans could also come from generators but again, fuel demands are high and won’t last forever. Perhaps the most sustainable method of powering fans is a solar system. Fans are relatively low-draw appliances. We don’t have a solar system yet, and it is doubtful we’ll create one large enough to meet our current demand (see again my remarks on the amount of shade we get). When we do set up a solar system it will be designed to cover some critical things like the refrigerator and freezer, water pump, and ceiling fans in the living room and bedroom. Additionally, solar power could be used to recharge batteries for portable fans.
A quick word of caution on fans: in extremely hot, dry environments fans can hurt more than help. By blowing hot air across your body, air flow can actually increase your core temperature and exacerbate heat-related problems. This is another good reason to consider your environment.
Heating
Heat is an absolute essential in almost all areas of the country, at least for some portion of the year. It certainly is for me, at the altitude at which I live.
Heating: Passive Solar
Passive solar should absolutely be part of your heating plan and again, deciduous trees are your friends! The same deciduous trees that provide shade in the summer will drop their leaves and allow to sunlight to warm your house in the winter.
The effectiveness of passive solar heat can be improved by providing energy banks. Energy banks are materials that will absorb heat while the sun is shining and radiate it later. Literally anything can be an energy bank – your furniture, blankets, etc., but some materials work better than others. The denser the material, the better it will absorb, retain, and ultimately radiate heat. Large stones, concrete, etc. (i.e. a stone or brick hearth) are excellent energy banks and can help to your home well after the sun has gone down.
Passive solar can be extremely effective depending on the size of your windows/doors and how much sunlight you can absorb during the day. This heat can be made massively more effective through the thoughtful and effective use of window treatments. Heavy curtains can provide excellent insulative value to your windows. All the heat captured during the day can be retained much longer and more effectively by closing the curtains as soon as the sun is no longer providing warmth to the home.
You probably don’t want to rely solely on passive solar during normal operating conditions. I would strongly recommend considering it as an addendum to your heating/cooling plan. It can potentially save you large amounts of electricity. In an emergency when you don’t have power, passive solar heating can be extremely valuable and should not be discounted.
Heat: Passive Solar & Insulating Windows
Another way to increase the insulative value of windows (especially older, single-pane windows) is to install storm windows. These are another pane of glass that replace your screens during the winter. This creates a layer of dead air space between the storm window and your normal window, providing insulation. These can also cut down on drafts, while not restricting the flow of warming sunlight into your home.
I have not yet made the investment in storm windows, and am considering their cost relative to the cost of replacing the windows themselves with more energy-efficient versions. If we do go with storm windows I will construct them myself, out of wood. This will be cheaper and the job will be done better than pre-fabricated thing I can buy at Lowe’s. Wood frames also conducts heat far less readily than aluminum.
Of course insulation doesn’t just apply to your windows. If you’re home isn’t well insulated, that’s where you need to start.
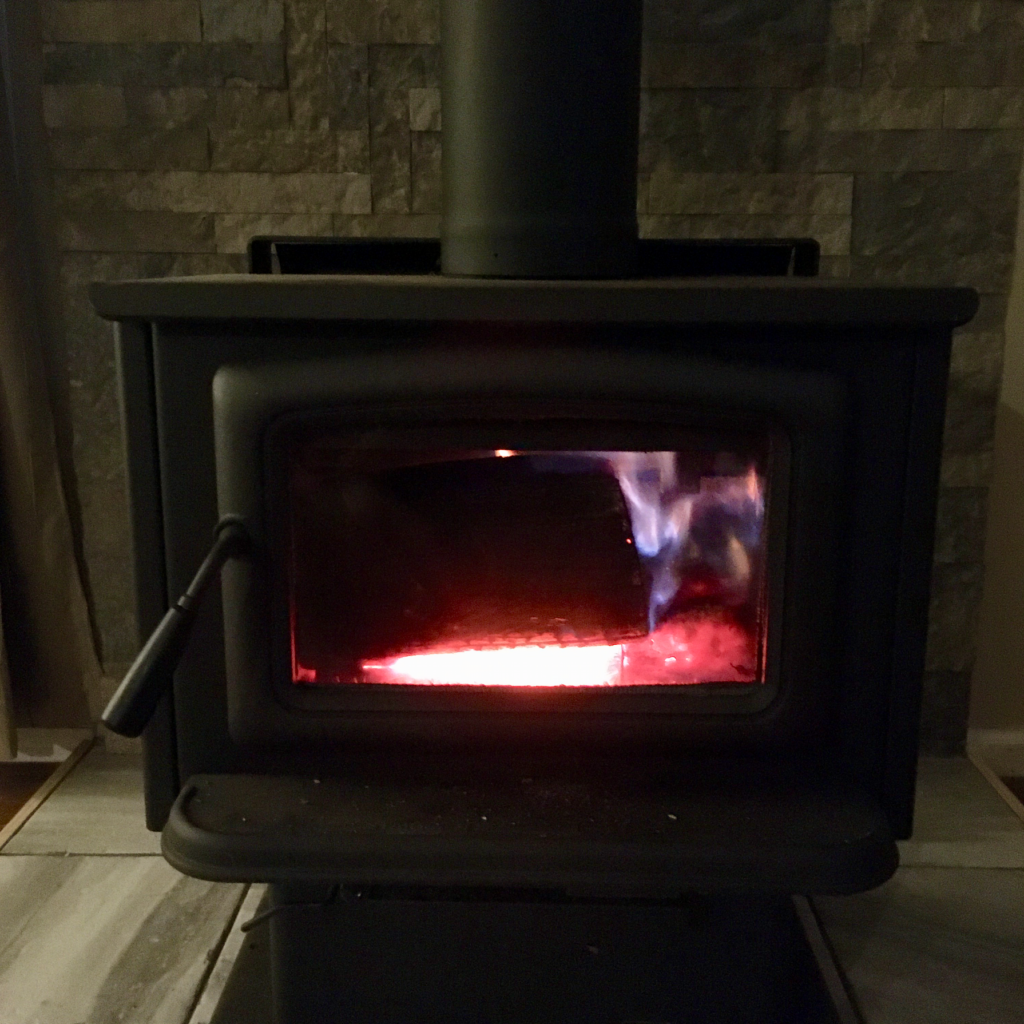
Heating: Wood
Having not actually spent a winter on my property, I honestly have no idea how much heat we’ll get from passive solar. I’m betting it will be a decent amount once the leaves fall. However, I have invested heavily in wood heat. I’ve spent spent a lot of time and some money preparing for it in preparation for winter. Wood heat seems simple, but like most things, requires a good deal of preparation.
First, you’ll need a wood stove. If you live in an apartment you probably don’t have one (though I have seen apartments offer fireplaces). Actually, first you’ll need to prepare a place in your home where your wood stove will go. I have an article on my construction of a hearth and hearth pad. You also need firewood. this year I’ve paid to have a cord of wood hauled, and I’ve cut some myself. Cutting sufficient firewood for the winter requires a lot of work and obviously, a place to store it. It also requires planning; wood has to be seasoned for several months to a year before it’s ready to be burned. Burning green wood causes creosote build-up, which can cause chimney fires.
Wood heat obviously requires fuel inputs. If you’re starting at ground zero, you’ll need tools to be able to harvest your own wood in the long term. When gasoline is available, this is pretty easy; you’ll need a chainsaw to cut logs to length, and a maul for splitting logs. Honestly, that’s about it. When gasoline is not available, you’re going to need a human-powered tool to cut logs to length. Though I have some gasoline stored – enough to run the saw for a while – but a manual, crosscut saw is one of the big shortcomings that I need to fix soon.
Another requirement for heating with wood is safety. There are two big elements to this. The first is preventing a fire from happening. I’ll write more about this later but that basically involves burning seasoned wood and keeping your chimney clean. Chimney cleaning tools are inexpensive and easy to use, though they do require the hazard of getting onto your roof.
You should also invest in some stuff to protect yourself in the event of a fire. New, sealed-battery smoke detectors will last for a decade. That isn’t forever, but it’s something, and smoke detectors save lives. We also keep several fire extinguishers in the house, including a 10 lb extinguisher in the living room – close enough to the wood stove, but not so close we couldn’t get to it in the event of a fire.
Heating: Fans
The awesome thing about fans is this: they work to cool and heat your home. With wood heat, you end up with a lot of heat in a fairly small area if you have a normal house layout. Heat has a hard time making it down hallways and into distant rooms. Ceiling fans can help distribute the awesome amount of heat your wood stove generates.
Most ceiling fans have a switch that will reverse the direction the fan turns. By turning the fan in reverse (to blow air upward) you can move the hot air on your ceiling around and force it down into your living space.
Lessons Learned
Last winter (late-2019/early-2020) was our first winter heating entirely with wood. Though wood heat generates a lot of dust and debris we absolutely love it. I wouldn’t have it any other way now – wood heat is awesome. We have quite a few lessons-learned, though.
First, get your wood well ahead of time. If you buy wood now to burn now, you’ll pay a huge upcharge for it. You’ll also have to take what you can get, and I’ll level with you – it’s probably not the best firewood money can buy. We had a load or two of wood hauled during the winter last year and it was both more expensive and poorer quality than we could have gotten otherwise. Be the ant, not the grasshopper!
Second, never trust anyone who sells you “seasoned” wood. Or maybe a better way to put it would be “trust but verify” with a moisture meter. I can’t tell you how many people try to sell seasoned wood that was cut down a month ago, or has been laying the rain for six months.
Third, you will go through much more wood than you anticipate. We went through about twice the amount of wood I expected to. I am anticipating a relatively cold winter this year, so I expect to go through even more wood. Have plenty; you can always keep it until the next year. The wood in the photo is about 1/5th of what we actually started last winter with, and bout 1/3 of what we have on hand right now.
Finally, you have to clean your chimney/flu/whatever. The tools to clean your chimney with aren’t expensive or complicated to use: they are a flexible rod and some sort of brush. If you’re planning to use your wood stove in the long term I strongly recommend having a non-electric method of cleaning your chimney. Dirty chimneys cause chimney fires which cause house fires. Solve this problem proactively with preventative maintenance or you’ll do 1,000x the problem-solving later in corrective repair.