Back in the fall I wrote about having a wood stove installed. Along with the hearth pad, I would guess that I’m putting about 500 to 600 extra pounds on my floor in a fairly concentrated location. I decided to head off long-term floor and foundation problems by sistering a few of my floor joists.
This post contains affiliate links.
What is “Sistering” and Why Do It?
My guess is that many of you have wood stoves, gun safes, water storage tanks, or some other very heavy object in your home. Safes – and especially loaded gun safes – can weight well over a thousand pounds. Those objects concentrate a lot of weight over a very small portion of your floor. They generally don’t move often, so they exert this stress over a very long period of time. In the short term this probably isn’t much of a problem. But extreme weight over a small area for long periods of time can become hugely problematic and result in a sagging floor.
Your floor is pretty rugged. It can stand up to some serious weight, but it will succumb to enough weight applied to a concentrated area over a long enough period of time. I’m prone to over-engineering things. I like to know things are better than “good enough” (also, with most modern ‘stick-built’ homes construction truly is just barely ‘good enough’ to pass building code. I want to go a little better than that in my house if I can).

“Sistering” a floor joist means putting in a new joist alongside an existing one for supplemental or additional support. This is more typically done as a corrective maintenance step; if a portion of of a joist is rotted out you can “sister” a new joist to it, transferring the load to the new lumber. You can also do this as a preventative maintenance step on those heavy-use sections of your floor.
/// Disclaimer ///
Before we get into this I need to make clear that I’m not a carpenter, general contractor, or anything of the sort. I don’t have any qualifications and I’m not advising you to do what I did. I’m advising you do your own research, consult your own experts, and go your own way. I’m just telling you what I did to my house. With that out of the way, here’s what I did.
What I Did
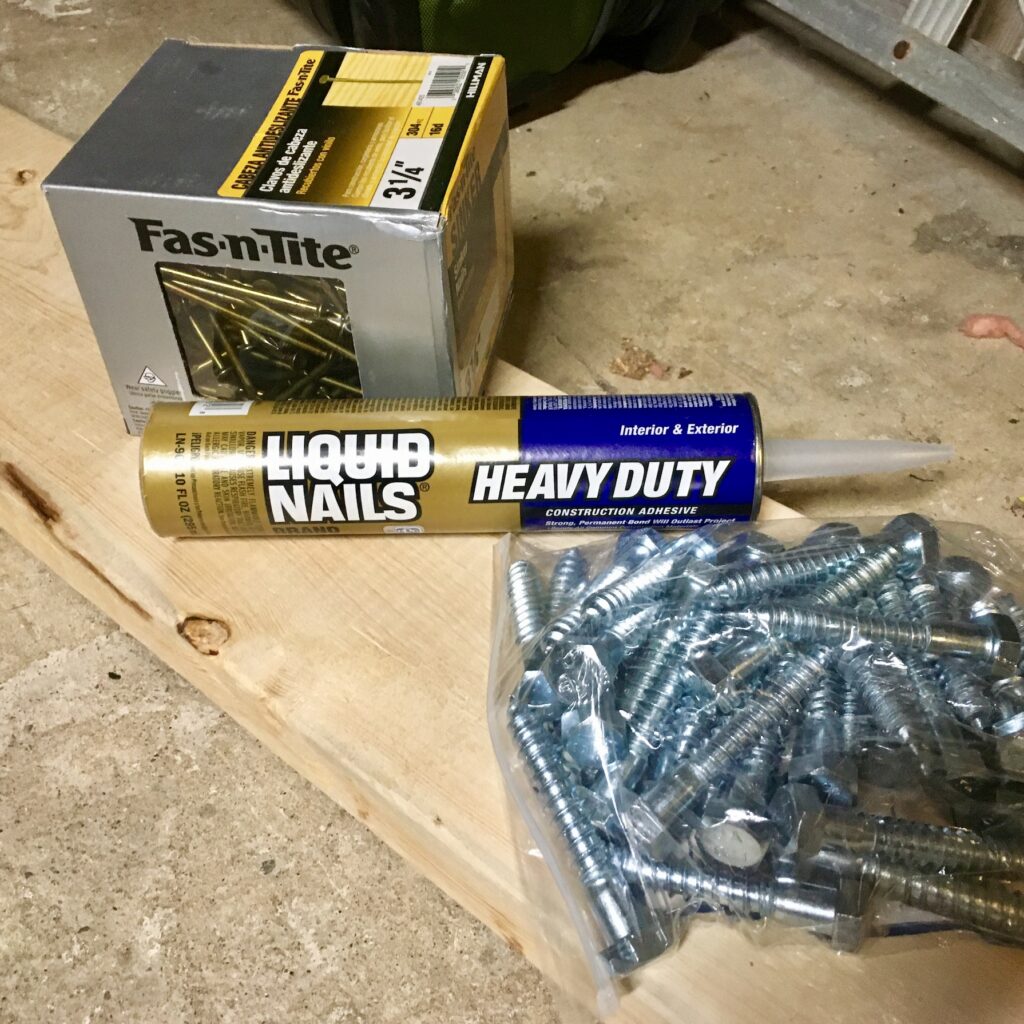
My hearth pad is 48″ wide. Divided by 16″ that means that it covers 3, 16″ on-center floor joists. Since I don’t know exactly which three, I decided to sister four joists. That will definitely get the three underneath it, plus one slightly to the left or right. In any case, a little extra won’t hurt (now that I think about it I probably should have done five…). I purchased 4 10′ 2x8s, some 1/2″x 4″ lag bolts, some 16d nails, and some Liquid Nails. Oh, and a pack of those wire thingies that hold up insulation in your floor.
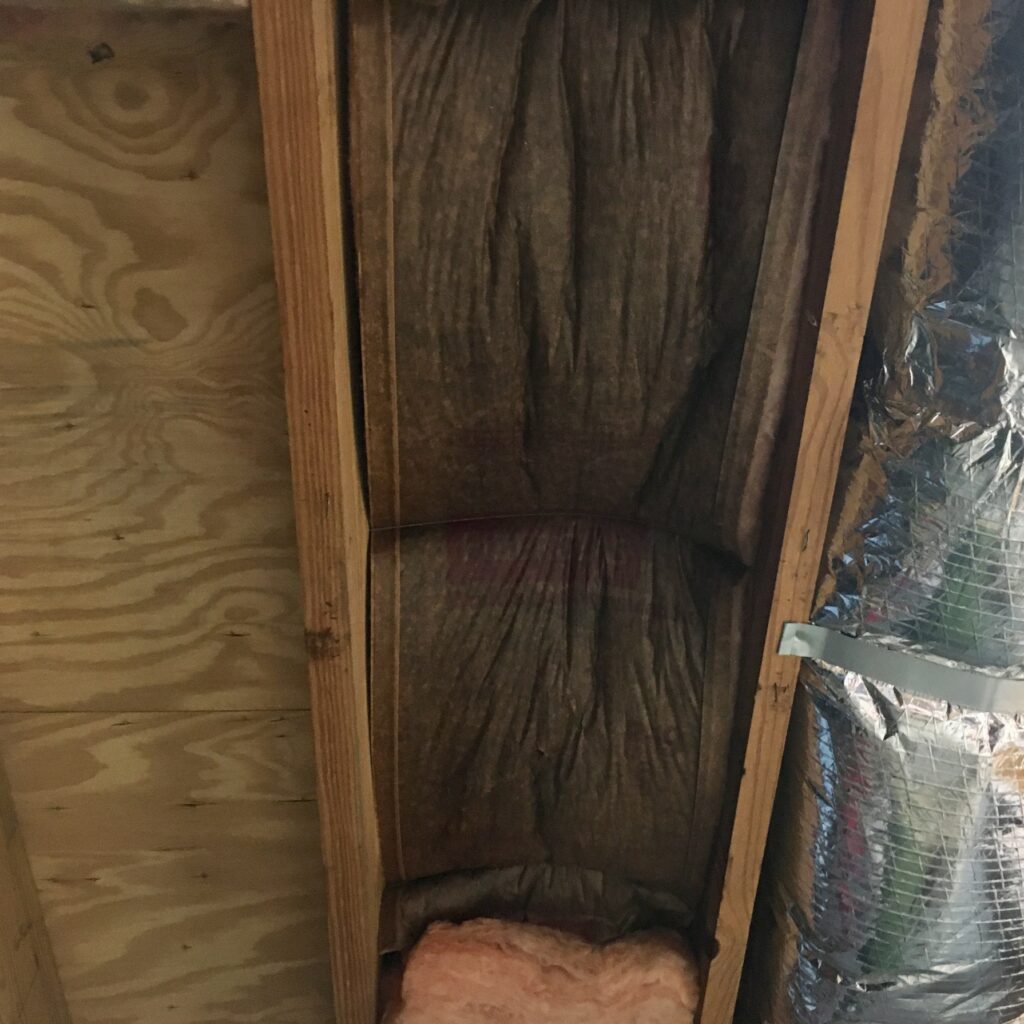
The first step was to identify the appropriate floor joists. This was pretty easy using terrain association, and seeing where nails had come through the floor when I nailed the hearth pad down. The next step was to remove the insulation on at least one side of the the joist I was working on.
I wanted to use the entire 10′ length. This provides the maximum possible strength. This required notching out slightly at the foundation end (sorry, I didn’t get a picture of that). Next, after ensuring the 2×8 would fit, I got my fasteners going. I started by drilling holes every 16″ inches for the lag bolts. This was incredibly important – standing on a ladder, driving those bolts took an insane amount of energy. Once I had the holes for the bolts ready, I started the 16d nails.
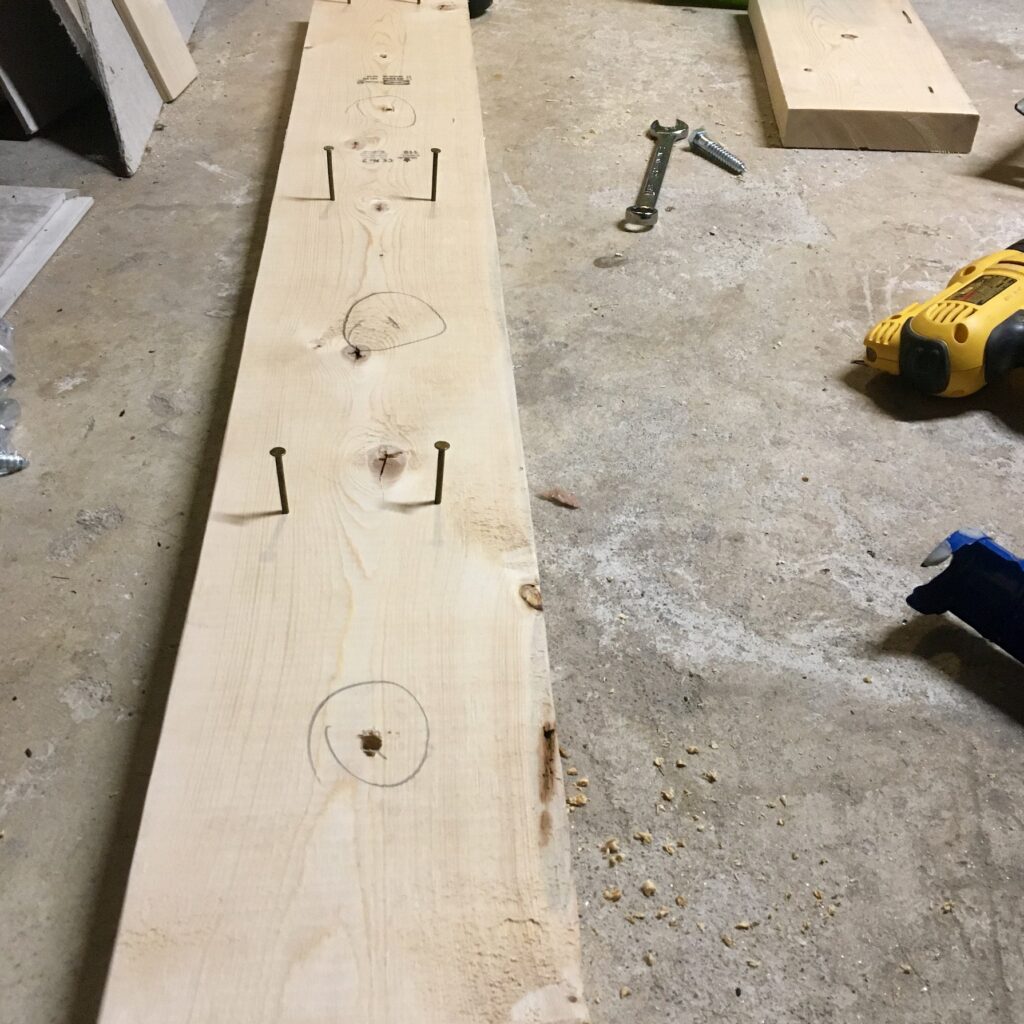
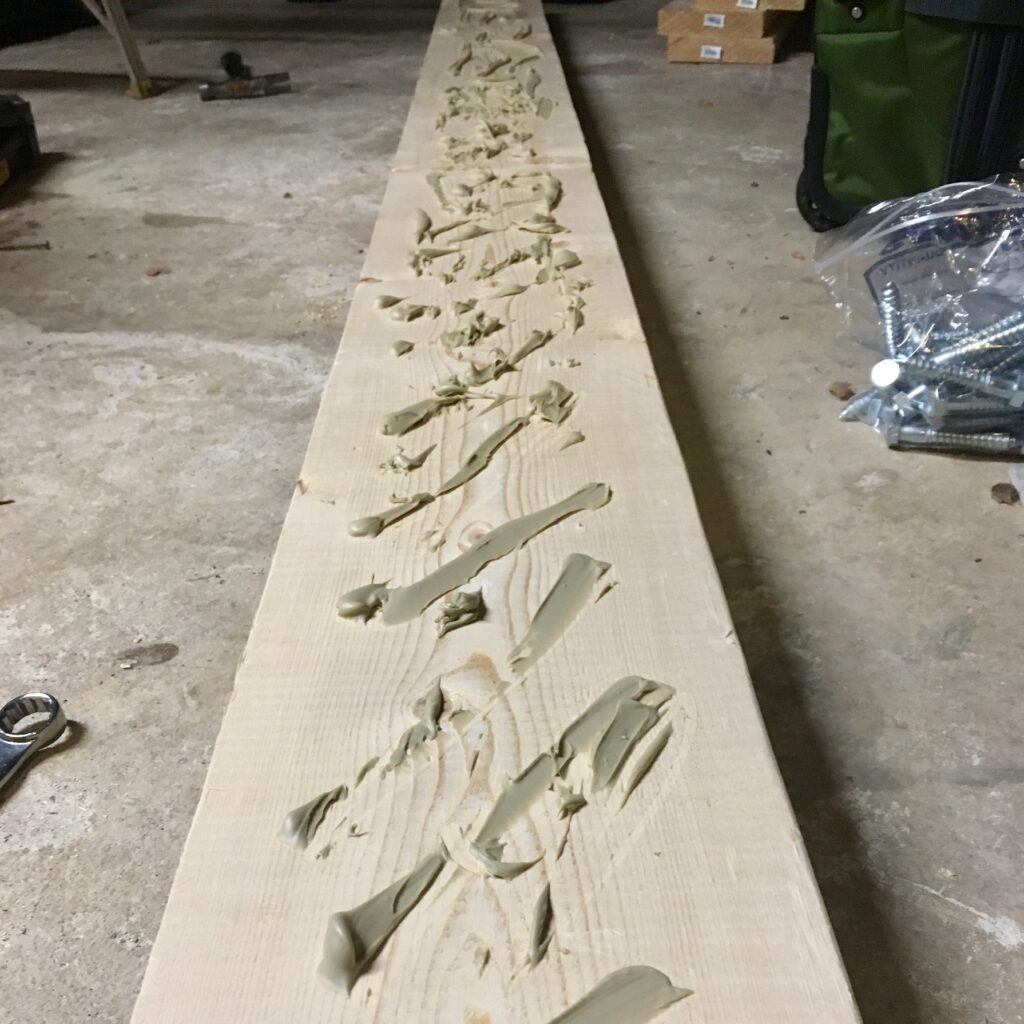
You’ll note in that photo that I show 2 roughly every 16 inches; after the first on I cut that number in half. Driving those nails – especially the upper ones – in the space between two floor joists sucked. The bolts are what does the real work, anyway. The nails basically just hold the lumber in place until you get the bolts sunk and the Liquid Nails adhesive sets up. After the holes were drilled, nails were started, and bolts were started, it was time to flip that baby over and apply some Liquid Nails. With the Liquid Nails on I was ready to go.
All I had to do now was maneuver it into place, start at least two nails (preferably one near each end), and start getting those bolts in. Somehow I managed to only need help on the first one. All-in-all this took me about four hours from start to finish, not including a run to the local hardware store. In my opinion it’s well worth it for the peace of mind.
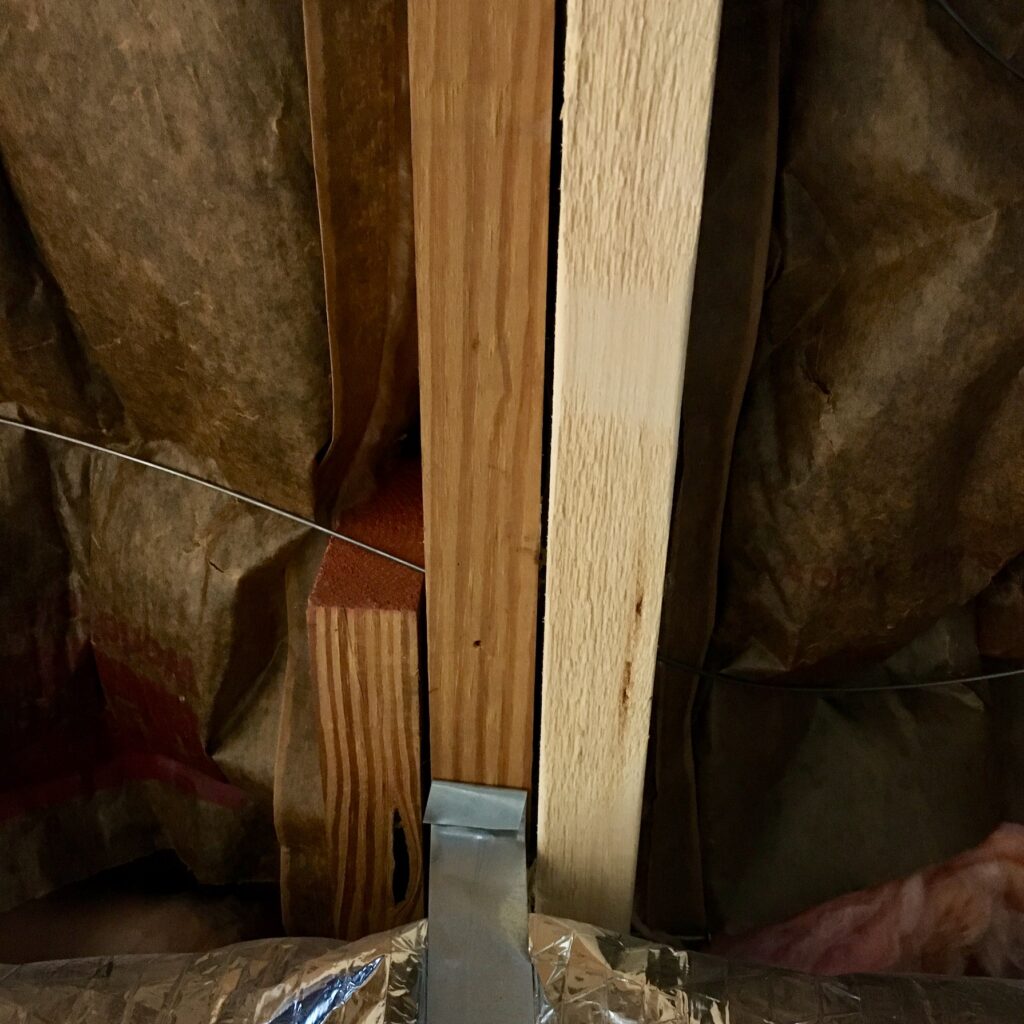
Note in the photo above how the non-foundation end “overlaps the overlap” toward the middle of the house. If you can get that overlap it will give you maximum strength. The more length the better, especially if it ties in with another structural member.
Final Thought
Nothing super tactical or sexy here, but if you’ve got a gun safe or grand piano or 200-gallon water tank or whatever sitting on floor joists, you might think about shoring up your floor. Hopefully you’ll never notice the results. If you’ve ever seen a sagging floor, or the complicated and insanely expensive repair procedures for one you’ll know this is preferable. An ounce of prevention. . .