Recce Series BONUS! Throwback Recce Belt Kit
As I recently mentioned in my recce series article on recce gear, I decided to rebuild my early-2000s jungle patrol fighting load. Though not the wisest expenditure of cash, I did this for a couple of reasons. I wanted to see if the general concept was still valid. I also wanted to see if you could create a workable recce belt kit out of very dated - but also very affordable - ALICE components.
The Recce Team | Recce Gear Loadout | Recce Weapons | Recce Insertion | Patrolling Skills | Individual Skills | Patrol Base Ops
This article contains affiliate links.
If you're enjoying this series please consider supporting Swift | Silent | Deadly on Patreon. Each one of these recce articles represents somewhere between 8 and 20 hours of hard work. You support is greatly appreciated!
The Recce Belt Kit
ALICE stands for All-purpose Lightweight Individual Carrying Equipment and was US military issue from the early-70s into the early-2000s. My goal was to recreate the jungle fighting load I carried in the early-2000s. I remember really liking this rig, but abandoning it because it wasn't practical for emerging ops in AFG/IZ. Putting one together now should be relatively cheap because ALICE gear is dinosaur stuff and really cheap. I also decided it might be fun.

My original jungle belt recce kit consisted of the following, clockwise from the belt buckle: SAW pouch, two canteen pouches, butt pack, canteen, and four magazine pouches. That's a lot of stuff on a belt, and a substantially bulkier load than the average Leatherneck was issued at the time. The suspenders were a grenadier vest, later with the front grenade panels removed and replaced with simple straps.

I decided to duplicate this rig without going overboard on cost...and maybe cutting back a bit here and there. I bought all my components at Saigon Sam's (affectionately known as "Saigon Scams" back in my day) just outside of Camp Lejeune. Instead of a LBV or grenadier vest I just bought a Y-harness/suspenders. I also dropped one canteen. I could not wait to to get home and put this stuff together.
Putting it Together
When I got home I dumped all this stuff in the floor and started playing. I initially used metal ALICE clips to put the rig together. This was a trial run prior to using zip ties, which I'll discuss below. I assumed that with my slightly-expanding waistline I may be able to get a couple more pouches on the belt. Not so much. In addition to dropping one canteen I also found it necessary to drop a magazine pouch. This was necessary to keep my front nice and clean, something I heavily prioritized this time around.

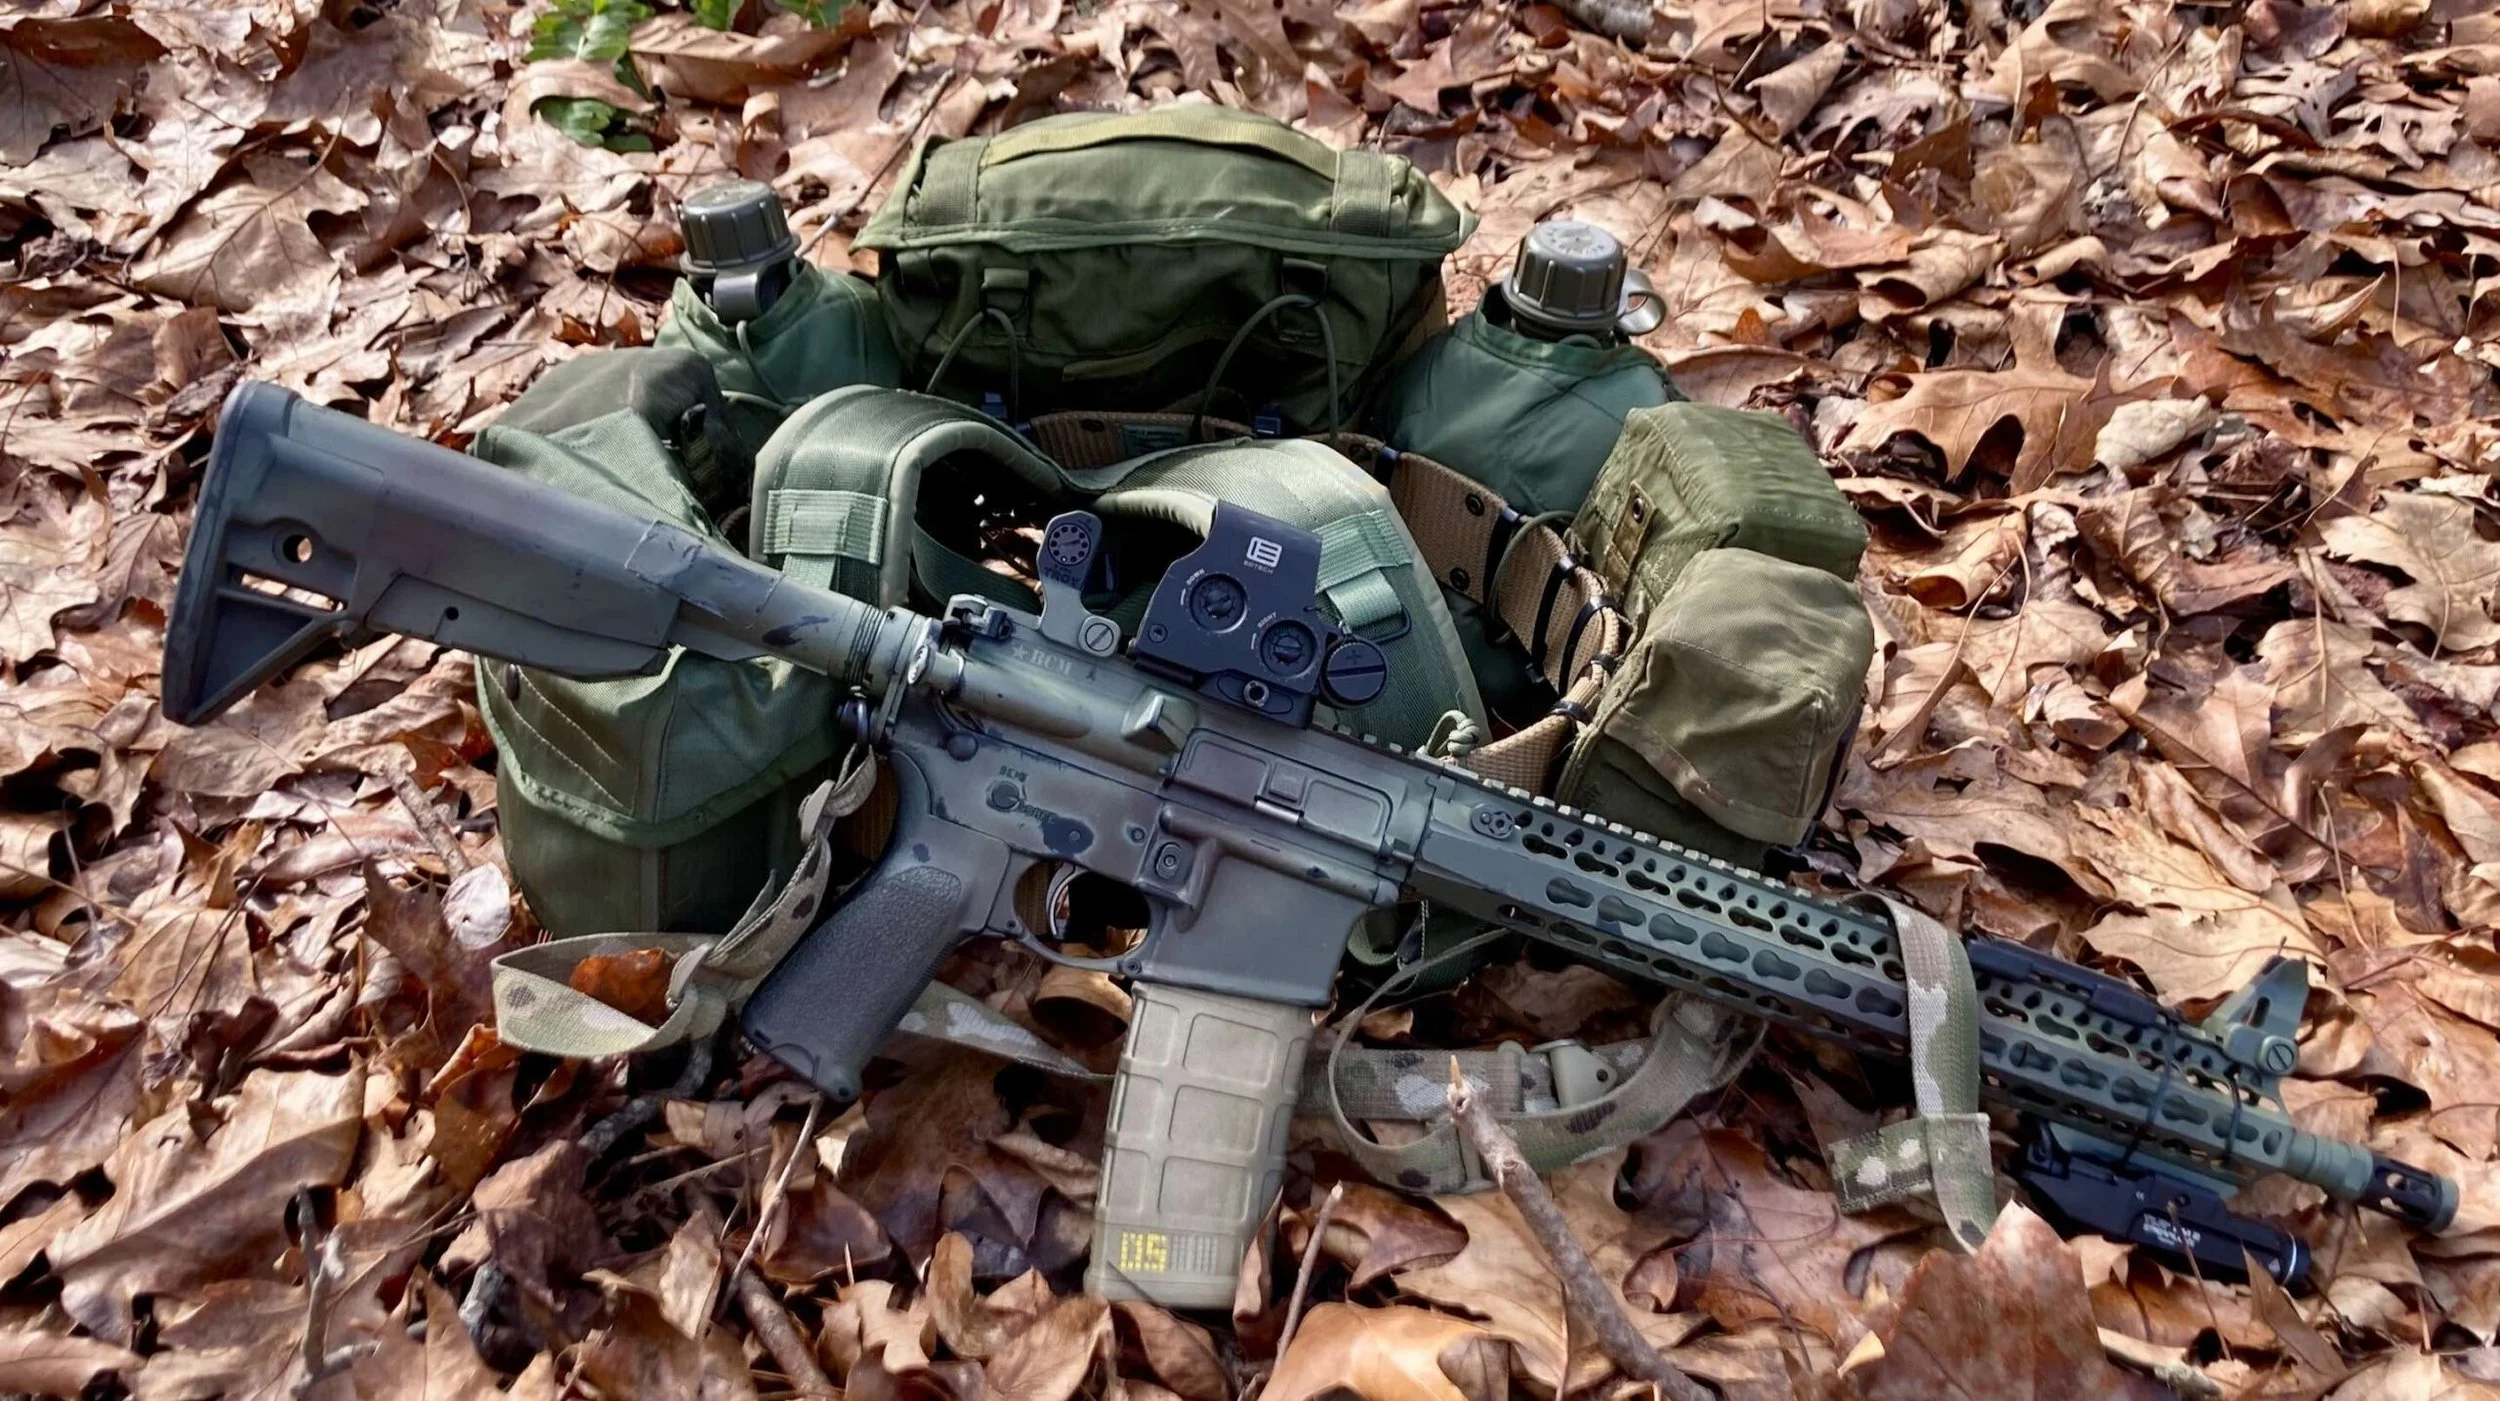
Here's what I ended up with, again, clockwise from front-and-center. First, a SAW pouch as my "possibles bag." I debated on the necessity this pouch, but the need for some sort of admin pouch is almost unavoidable.

Beside it is a "sustainment" magazine pouch. This isn't a go-to, speed reload pouch, but magazines from this pouch can get rotated to the left side as ammo is used. Beside the mag pouch is a canteen pouch.

In center-rear is an brand-new, surplus butt pack. I absolutely love the design of these butt packs. Flanking it is another canteen pouch, containing a canteen with a canteen cup.

Next up, on my left side, are two more magazine pouches, each holding 3 30-round magazines. These are the pouches I would intend to reload from if I actually got into a fight. Honestly this ended up being a pretty damn decent patrol rig. Let's look at how I improved it, but first I want to talk about the importance of a clean front.
The Front Thing
I absolutely could have gotten more pouches on this kit. I'm 100% confident that I could have gotten all the original stuff on here. I chose to leave the front of the belt clear of pouches, however, for several important reasons. First, walking with magazine pouches hitting your thighs SUCKS. I didn't realize how much until I walked around with the temporary setup. It took all of about five minutes before I decided that something had to go. I can't imagine walking up and down mountains with stuff hitting my thighs - I'm just too old and ornery for that now.

Next, pouches on the front make it difficult to comfortably get into a high kneeling. This is a really common position to have to hold on short security halts and the like, so it is important to be comfortable in this position. With the front of the belt clean I can kneel with the left or right leg forward.

Finally, getting into a nice, low prone is massively easier without pouches on the front. When I was on active duty using a belt rig loaded up with stuff I'm pretty sure I remember unbuckling my belt whenever I had to get in the prone. Frankly I'd prefer not to have to do this...and no one is telling me how much stuff I have to carry, so why not? Now let's look at "polishing" this kit.
Saying Goodbye to ALICE
Once I settled on the general layout I liked I started refining the details of the kit. First and foremost I wanted to get rid of the metal ALICE clips. They do a reasonably good job, but they can also open up on their own - some are "tighter" than others, and some are looser. Obviously this isn't ideal. Hard metal objects near your skin can also be really pokey. ALICE clips can also limit where you put some pouches. They have to be a certain distance apart, and if one of your clips lands in a bad spot on the belt - like one of the belt keepers - you aren't getting that ALICE clip on.

So I got rid of them all and used zip ties. I bought some seriously heavy-duty zip ties rated for 175 pounds. There is very little concern about them breaking, even under the rigors of combat. I carefully placed these so that the sharp, cut ends were not facing up and not facing toward my body.

To be honest, I think this is one area where ALICE clip gear is better than MOLLE stuff. With MOLLE you absolutely have to use a slot (or two or three) of MOLLE webbing.With ALICE gear and zip ties you can put stuff wherever you want it, as close together as you can physically get it.
Improving the Suspenders
Once the ALICE clips were all gone I wanted to get rid of another piece of metal: the suspender clips. The clips are strong, but they have some disadvantages. They can sometimes come unsnapped on their own accord. This can cause them to come off the belt, or more likely snag other stuff with the now-open hook. The pic below shows a hook that spontaneously opened up when I set this recce belt kit down for photos.

Next, these metal clips can be a bit noisy, especially when they open up. And finally, they are big hunks of unyielding metal, so they can be uncomfortable when you land on them when hitting the prone or just sitting down to execute the rest plan (more on that in an upcoming article).

I replaced these metal clips with 550 cord. I routed the cord through the same grommet that the clip would have gone through. This is a quieter, softer, better retention setup for the suspenders. I did the same thing at all four points, and added two pieces of 550 to suspend the butt pack in the rear. Due to differing lengths of the rear straps getting the rear balanced took a little bit of time.

Loose Ends
Finally, I tied up all the loose ends. More accurately I taped up and burned all the loose ends. All my loose straps got carefully folded and taped with Gorilla tape. This keeps loose straps from getting in the way when trying to retrieve other stuff. It also keeps these straps from getting caught on stuff, and generally prevents you from looking like a gear-bomb.

I also burned all the loose ends of any 550 cord used on the belt. In my last gear article I mentioned dummy-cording canteens and other easily lost items. Below is a canteen with a dummy-cord long enough to allow the user to drink from it and refill it. When not in use the dummy-cord gets stuffed into the canteen pouch.

All of these of 550 cord ends get burned. This prevents the cord from degrading by literally falling apart, and it prevents all these ends from becoming snag hazards. It also makes you look a little more professional - definitely a secondary consideration, but you're not trying to look like a soldier from some under-funded, irregular, banana-republic defense force.

Cutting Weight
I did make one other small modification to the magazine pouches on this kit. Since weight is always a consideration, I don't want to carry anything I don't have to. One thing I don't have to carry is grenades...mostly because I don't have any grenades.

Each ALICE magazine pouch has a grenade pouch on each side. These are less than worthless to me since not only are they empty, they also take up valuable space. So, I carefully removed each one of these pouches by cutting the thread holding them on. This isn't a huge reduction in weight or bulk. It gets the pouches a little closer and saves maybe a couple ounces. But ounces equal pounds and pound equal pain...
Is This a Viable Recce Belt Kit?
At this point we should be asking if this kit is still viable. Does it provide a workable platform for conducing recce-type patrolling? I would say that my answer is, "yes, with a couple caveats." Over all this is a pretty good rig. It's not uncomfortable, it carries adequate supplies of ammo, water, admin stuff, and survival gear. The one thing I have neglected to put on this kit so far is a first aid kit, but that could be attached to several places (I would, will if I choose to keep this kit, put it on the butt pack's carrying strap). It's not perfect, though.

The biggest problem presently is the magazine pouches. They are designed for aluminum GI magazines. Unfortunately for me I mostly have PMAGs, which are bulkier. I can get three PMAGs in some of these pouches by staggering them "down, up, down" but that's not ideal. I can get three in but the top won't close, and that's no ideal, either. My options would be to add a different closure, or buy some GI mags (which, like PMAGs, are incredibly reliable), or spend more money on different pouches.

Best of all was the cost. I spent $128 on all the pouches, the canteens, and the canteen cup, and ALICE clips (but not including zip ties and 550 cord). A buck-twenty is way, way less than a commercial rig of equivalent quality. The good thing about this kit is it is genuine, US military surplus and this stuff is built to last. A comparable off-the-shelf rig would cost several times more. The Mayflower Tactical Jungle Kit is over $500. Heck, just the belt, suspenders, and butt pack are $148.
Civilian Applicability
If you're in the military the cost of the Mayflower Kit or a LBT patrol rig might be worth it. As a civilian (like me), the odds that you will need a $500 patrol rig for anything other than photo ops is highly doubtful. If you do think you may need some sort of setup like this, an old ALICE rig might be the way to go.
I'm not sure I'm going to invest in aluminum mags to make this kit work for me. Putting it together was a really fun project (involving a couple movies and a few beers), though. If I choose to keep it, this recce belt kit is completely viable. It's not the latest and greatest but its far from obsolete.
