

The Bug Out Bag (bugout bag, B.O.B., or go bag) is the first place many people start with preparedness. Honestly, if it gets you started, GREAT – it’s a start! Unfortunately the bug out bag is often plagued with unrealistic expectations. Fantasies of “living off the land,” “heading for the hills,” and the “zombie apocalypse” too often color the concept of the bug out. Today I offer you a treatise on a much more useful, realistic bug out bag.
This article contains affiliate links.
Bug Out Bag: Not Your Top Priority
“Bugging out” is the concept of leaving your home for safer environs during an emergency. If you’re an average American, the bug out bag shouldn’t be your first preparedness priority. It can cause a lot of potential problems. First, “bugging out” implies that you are leaving your home. Your home provides a number of massive benefits that are difficult to replicate. Your home provides shelter, security, safety, and comfort. It also contains all sorts of useful “stuff,” especially if you’ve made any effort to be basically prepared. You will be unable to take most of that stuff with you if you bug out.
Once you leave you are also “on the streets” which can be dangerous.You will likely be mingling with others who are trying to flee. You may not make it to safe destination before running out of fuel, and be stuck in limbo. Your supplies may make you target for those less prepared. I will stay put until I have no other option.

To put this idea into perspective I’ll use myself as an example. I have lived in my current house for two and a half years. I am writing this article now because we are only just getting around to putting together bug out bags. We have focused way more effort on making our home livable by adding a garden, 14 hens, a wood stove and plenty of firewood, etc. It will have to get pretty bad here before we consider leaving.
Sometimes bugging out is prudent and even unavoidable. If your home is flooded, on fire, or leveled by a hurricane or tornado, bugging out is about your only option. Even better would be to bug out before disaster strikes; by staying in a disaster area you endanger rescuers who have to attempt to save you. This requires decision making and my prescriptions aren’t black-and-white, but the point is, sometimes bugging out is a necessity. While I believe you should spend early time and money preparing to stay at home, a bug out bag isn’t a bad idea.
The Realistic Bug Out Bag
Unfortunately the concept of the bug out bag has largely been hijacked past the point of any real usefulness. I promise you: you will not have to fight zombies! You will also not “live off the land,” regardless of what you pack in your bugout bag. Heading for the hills? You and about 10,000 others, pal. Also, even if you were alone in pristine wilderness, do you have any idea how difficult it actually is to survive? If you haven’t watched the show Alone, I highly recommend it as an easy, in-home reality check.
Instead of focusing your initial preparedness efforts on zombies or being dropped in the middle of the jungle, focus on the likely. If you live in the West, you may have to bug out due to wildfires. Those of you living in the Southeast are likely to have to bug out because of hurricanes. People in many parts of the country may need to leave due to flooding. Those living near interstate highways and rail lines may have to bug out for a few days due to chemical spills in the event of crashes.
In those instances you aren’t going to head to the forest and start snaring food. Much more likely you will be traveling to a friend or relative’s house outside of the affected area. If you don’t have friends or relatives who can take you in, you may be getting a hotel for a few days. Many people in the recent flooding I witnessed are in hotels on FEMA’s dime. You don’t need 1,000′ of paracord and a melee weapon to live in a hotel for a couple weeks. You will, however, need a change of clothes, a phone charger, and some money.
Sometimes bug out bags are unrealistic because of cost. Many you see online are loaded with really expensive stuff. In this article I strove to keep cost, well, realistic. This should be a very attainable, realistic bug out bag for most people. Once you’ve covered the realistic bases, then you can focus your energy on the zombie apocalypse – fair enough? Now let’s look at the realistic bug out bag.
The Bag Itself
The backpack is the standard container for the bug out bag, and for good reason. You can easily carry a backpack if you’re forced to walk. You can put a backpack in your lap if the National Guard throws you in the back of a 5-ton truck. A backpack leaves your hands free for negotiating obstacles common in disaster areas. There are a couple more considerations in regards to choosing your bag.
Size & Weight
Your realistic bug out bag should be large enough to hold what you need without being so large as to limit your mobility. The “three day pack” or “assault pack” is a good size model – large enough to carry some stuff, but still comfortable to maneuver and small enough to fit in most transportation platforms. It shouldn’t be so heavy that you can’t climb over moderate obstacles with it on. I would shoot for a pack 30 to 40 liters in capacity. Avoid getting a pack that is too large because, as I learned in the military, your load will grow to fill the space.
I recommend keeping your pack weight to under 25 pounds, and honestly probably closer to 20. This doesn’t sound like much, but put twenty pounds on your back and walk five miles. Those of you who know what you can do know. Those of you who assume you’ll be able to have little idea how difficult carrying 20 pounds over a long distance can be. Again, my recommended weight is 20 pounds with a hard ceiling of 25. For children, the elderly, and people with mobility issues this weight must be further reduced.
Urban “Camouflage”
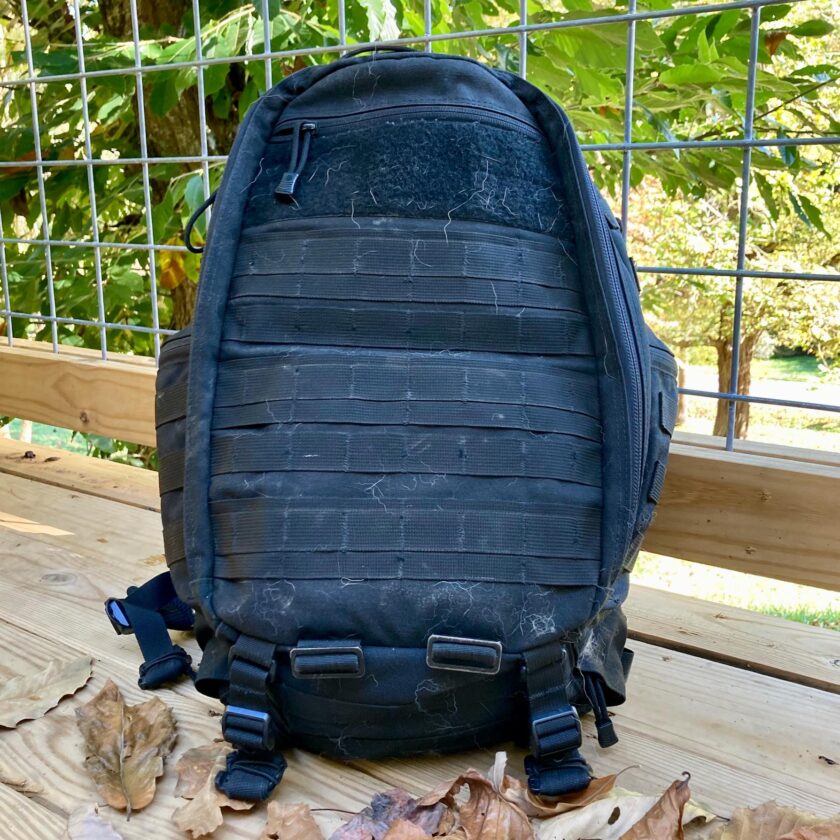
I think this is one that gets too much play. Frequently you’ll see recommendations to avoid bags in “tactical” colors (black, OD green, tan) or with MOLLE webbing. I don’t think it’s a terrible suggestion, but I do think it gets far more traction than it deserves. Look around when you go out – a massive percentage of people with backpacks have tactical-looking packs. More than military colors and features, I’d prefer my pack look not-brand-new, i.e. a little shabby. I would also tend to steer away from massive, backpacking-style packs that look like they hold a wealth of equipment.
Waterproofing Your Bug Out Bag
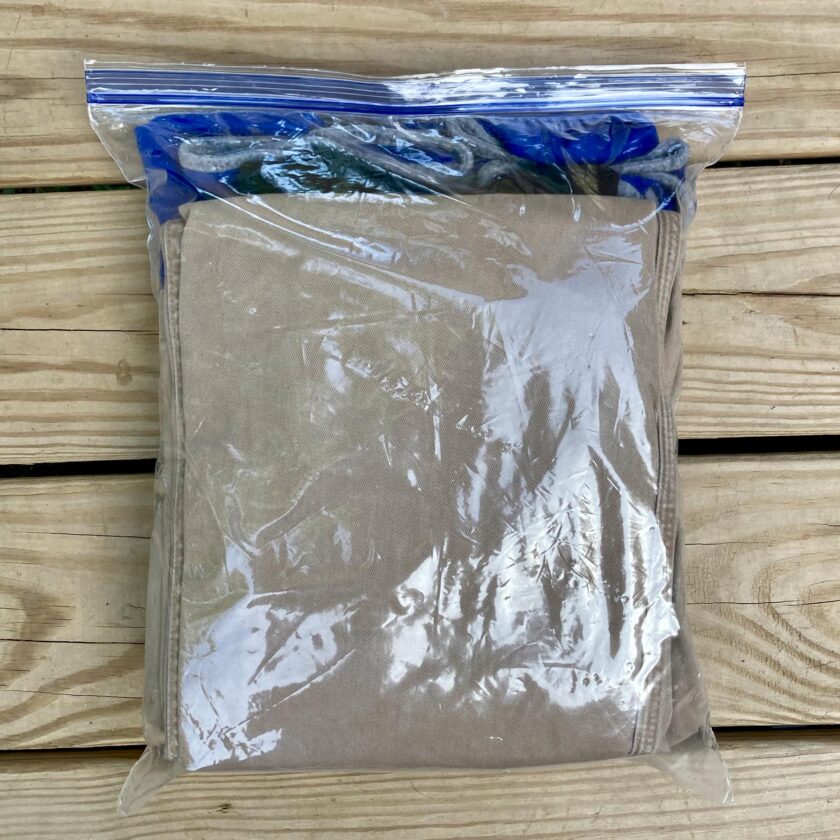
Emergencies often happen in inclement weather. I would strongly recommend waterproofing your backpack, or at least its contents. You don’t have to go crazy with expensive waterpoof bags. You can do it all with Ziploc-type freezer bags. Freezer bags are much tougher than sandwich bags and will hold up to some abuse. I recommend getting several sizes of bags; not only will they waterproof, they will help organize your bag. I used quart bags for small items like hygiene supplies. I use gallon bags for larger items, and a 2-gallon bag will hold a change of clothes or a bulky sweatshirt. Then all of that stuff can go into a very large 3-gallon bag which lines your pack’s main compartment. You pack is now waterproofed, organized, and you have some bags to use for other purposes in the future.
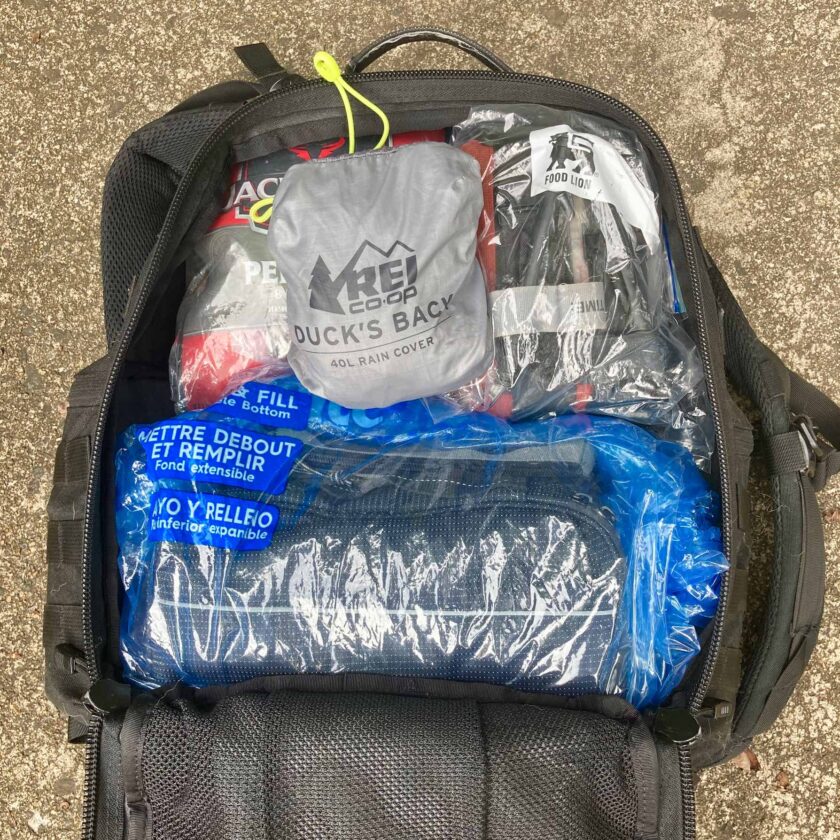
If you don’t want to buy these bags from Amazon, you can find them at your grocery store. Better yet, you can probably save some money by purchasing store-brand bags. To add a bit of waterproofing to the pack itself, either buy one with a built-in rain cover, or buy an aftermarket raincover.
For more information see my full article on waterproofing a backpack.
Specific Packs
The sky is the limit in regards to price, but I wouldn’t break the bank on a fancy pack just for this purpose. Plenty of good packs can be had for $100 or under. Here are a couple of ideas, though keep in mind plenty of other excellent packs exist.
- The Osprey Hikelite 26 is on the smaller end at 26-liters and comes in just over $75. It has a built-in raincover and Osprey’s “almighty guarantee.”
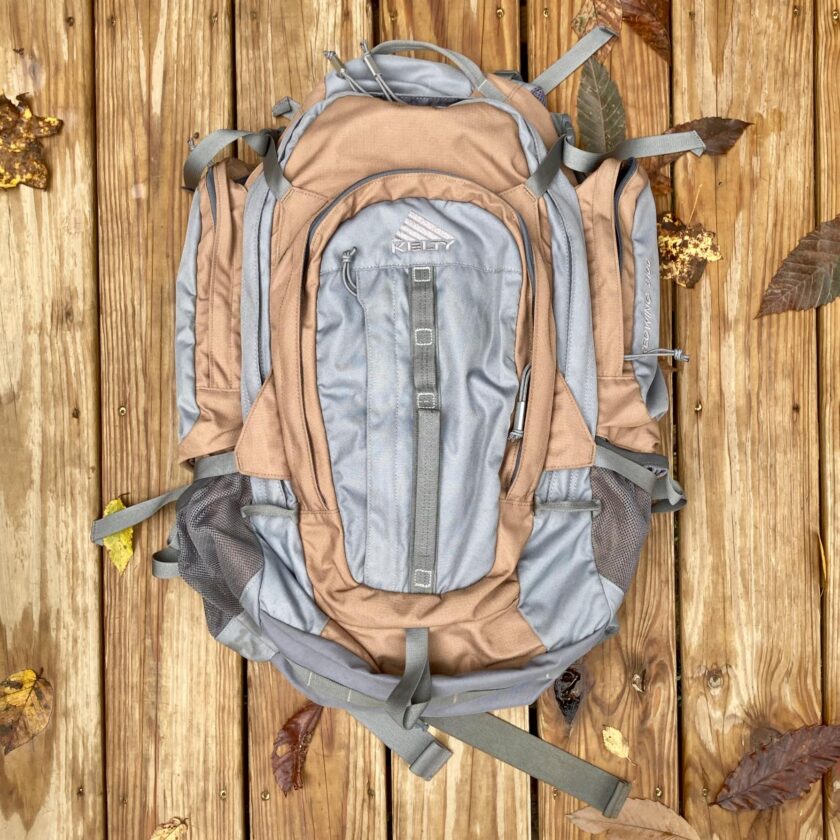
- Kelty’s Redwing is an outstanding, 36-liter pack and comes in right around $100. I have an older version of this pack and love it. As a matter of fact, this is the pack I’m using in this article.
- I have zero experience with the “Diamond Candy Waterproof Hiking Backpack” but with 2,400+ reviews averaging 4.5 stars it sounds pretty solid. It’s a 40-liter pack and sells for $50.
I don’t have access to a ton of backpacks. This article does an awesome job of exploring the “best” bug out bag backpack. If you’re planning to buy a pack I would recommend giving it a look.
Tier 1: Change of Clothing
One of the most important items in your realistic bug out bag is a change of dry, clean clothing. In an emergency you may be forced to wade through water, be exposed to hazardous materials, or tear your clothes getting around/over/under obstacles. You might start the emergency in clothes poorly suited to emergency conditions, like a business clothing. The stuff in your realistic bug out bag should be fairly rugged and offer some protection from the elements.
Acquiring Bug Out Bag Clothing
I don’t recommend running out and buying brand new, high-speed, low-drag clothing for your realistic bug out bag. It’s not realistic to put brand new stuff into long-term storage. Instead, I recommend one of two strategies.
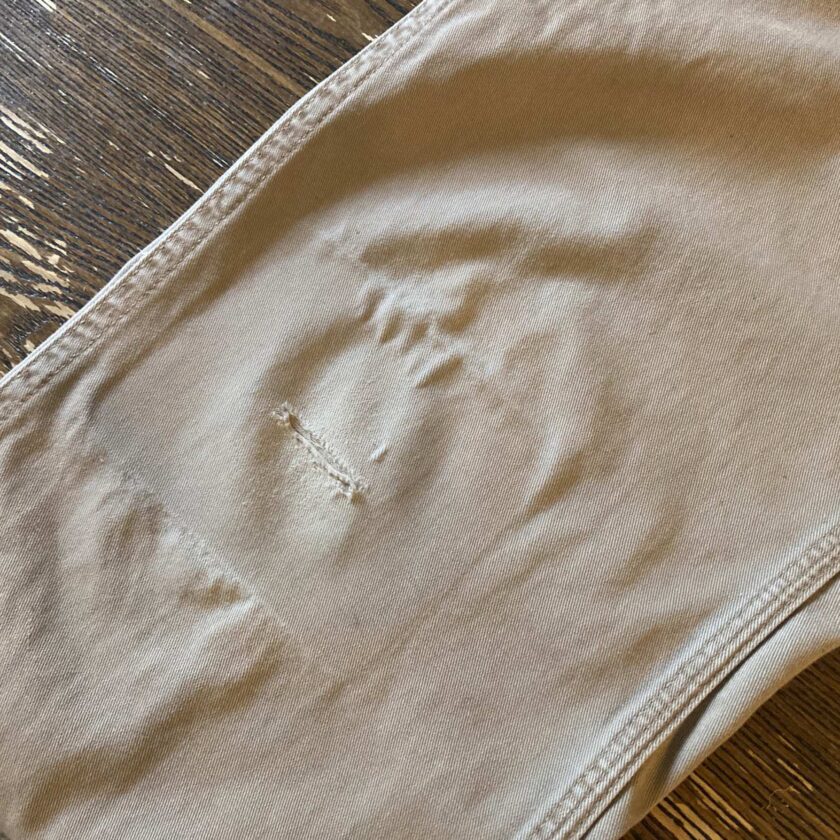
- Use your old clothes: I think the best strategy is to dig around in your closet. Use stuff you already have, but that is a little too worn for day-to-day use. I blew out a knee in a pair of my pants, so I patched it, and that went into by bug out bag. The t-shirt is one that is a little ratty looking. I chose a sweatshirt that I painted in; yes, it has paint spots but is otherwise in great shape. The only things that are new/current are socks and underwear. If you go this route, just make sure stuff still fits.
- Go thrift store shopping: Alternatively, you can hit up the local thrift stores. Or you can do so in combination with using your old clothes. Have everything but a sweatshirt? Don’t buy a new one – sweatshirts are really expensive! Go to the thrift store, instead. If you don’t like this idea, consider this: I used to work on a variety of contracted training gigs. I traveled all over the U.S. I worked with one dude semi-regularly who traveled with the clothes on his back. a toothbrush, and a laptop. Upon arriving at his destination he’d spend $15 or $20 at the thrift store buying his clothes for that city. Before leaving he’d put his travel clothes back on, re-donate the clothes he used, and move on.
Clothing Needs
You should put the following in your realistic bug out bag.
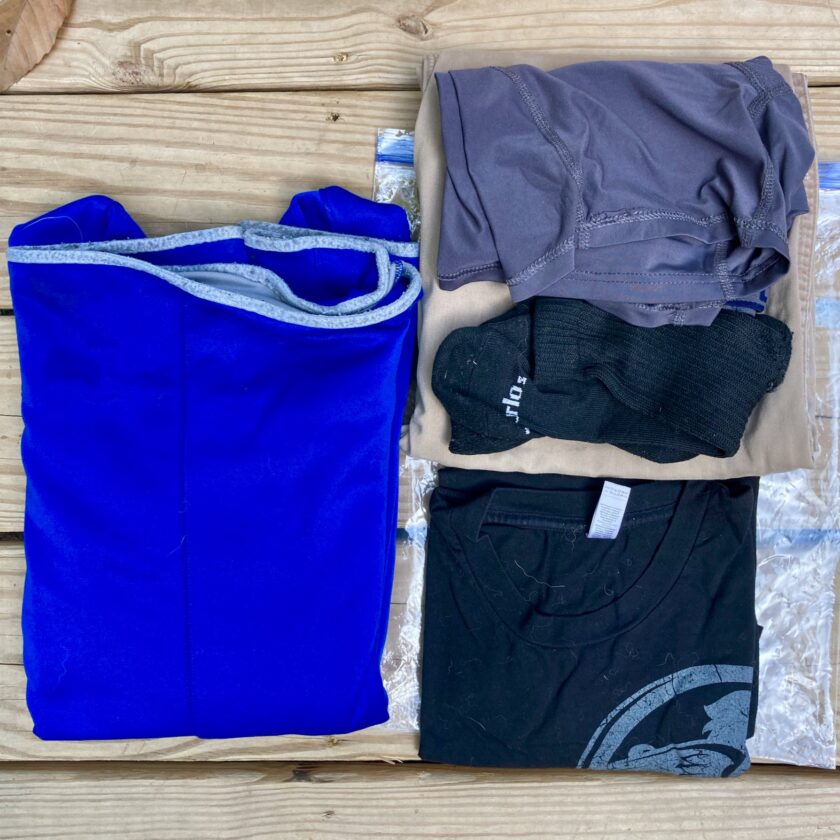
- Long pants, not shorts: Pants will protect you from environmental hazards like thorns. They will also protect you from the environment by preventing sunburn and helping keep you warm. They should be somewhat durable.
- Shirt: I have a simple t-shirt in my bug out bag. Would a merino wool, SPF-45, button-down with zip-off sleeves be way cooler? Sure, but a t-shirt is free, comfortable, and will do just fine in most realistic situations.
- Clean underwear and socks: Pretty self explanatory, no? I did NOT get these at the thrift store.
- Warming layer: I would recommend a warming layer. Even in hot climates it cools off at night. Add in exhaustion, limited food, a light breeze, and you can get chilly fast. Throw in a sweater, sweatshirt, jacket…something.
Bonus Points: Shoes
Having a pair of shoes is a really, really good idea. Even a cheap pair of used sneakers is probably better than the flip-flops you found yourself in when the disaster started. They’re also better than the $300 hiking boots that got soaked with floodwater mingled with fuel, raw sewage, fertilizer, and all sorts of other unmentionables.
If you’ve ever had to walk any distance or spend any real time in wet shoes, you know how important this is. Wet shoes are miserable after a few hours. After a few days they can actually cause some health problems, like trench foot. Wet feet can certainly contribute to frostbite and ultimately, hypothermia. Add in a bunch of chemicals, dirt, etc., and you’ll really be wishing for a pair of clean, dry shoes.
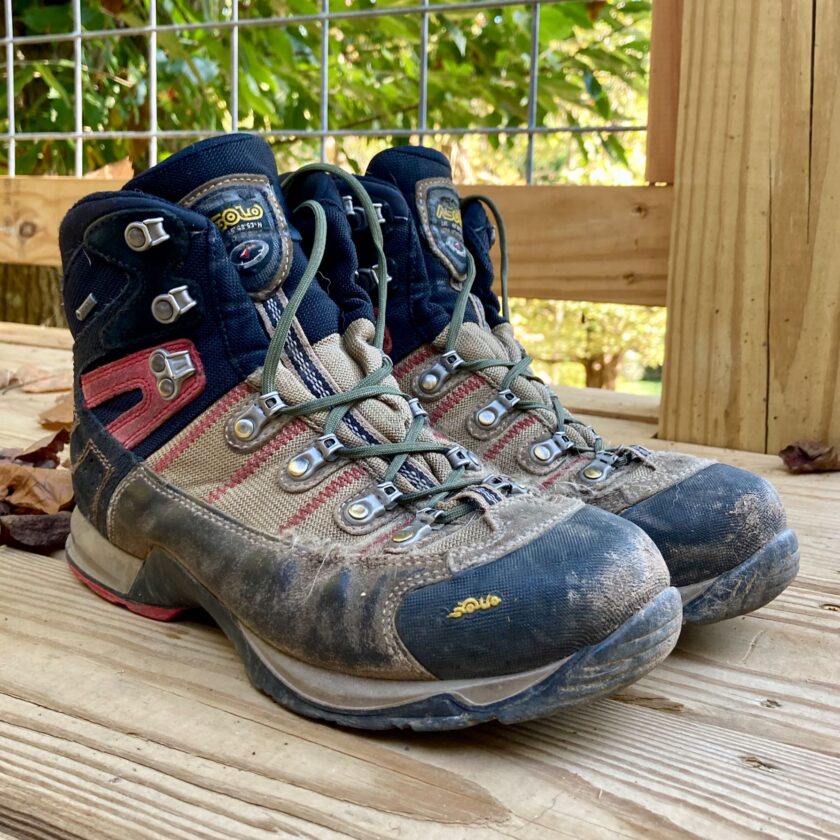
In this case I recommend repurposing an older pair of your own shoes. This has several advantages. First, you know you like them and you know they fit. You also know they’re broken in and (at least somewhat) comfortable. And they’re much cheaper than a pair of new shoes. You can certainly buy shoes at a thrift store, too. I’d take a cheap pair of sneakers that’s dry over a wet, contaminated pair of the best boots in the world.
Bonus Points: Belt
If you’re packing a bag with the intention of being able to run out naked and be totally equipped, you need to think about a belt. This is especially true if you plan to carry a concealed handgun. Though the PHLster Enigma is wildly popular now, I’m betting most of you still rely on a belt holster.
Tier 1: Basic Hygiene Items
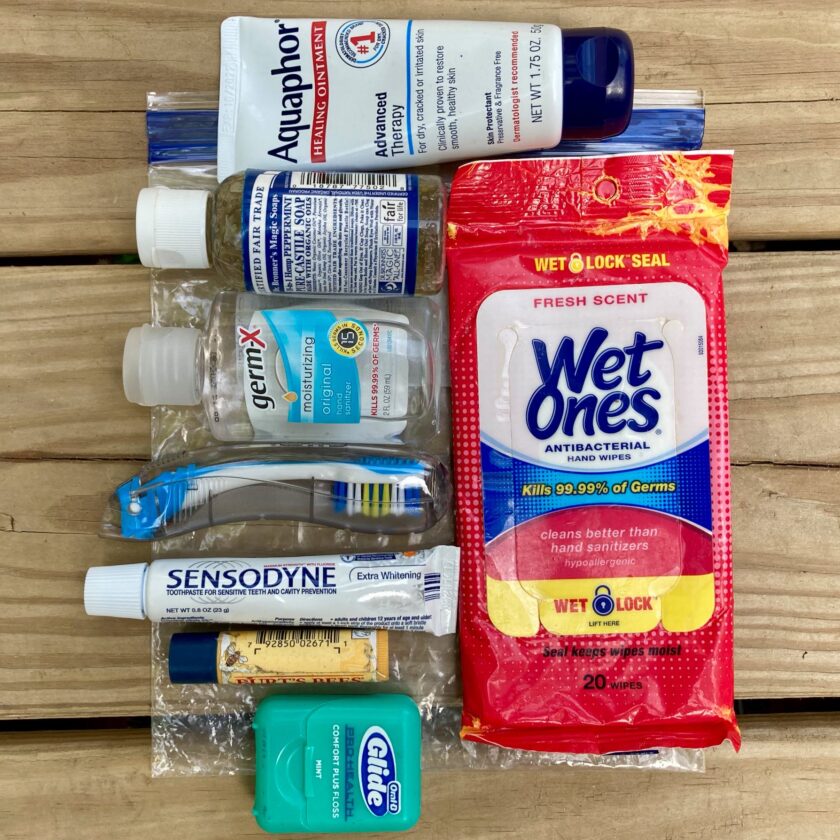
Some basic hygiene supplies will go along way to keeping you clean, healthy, and comfortable. Having a dirty mouth can make you feel disgusting; having dirty hands can seriously compromise your health. There are lots of other things you can put in your pack besides what I mention below. Think about the situation, though. I would recommend going as minimalist as possible. If you find you have room for extra hygiene stuff, double up on some of these instead of adding additional comfort items.
Hand Sanitizer
For a while you couldn’t find hand sanitizer, but it is once again widely available. I would keep a small, travel-sized container of alcohol-based hand-sanitizer (I really like Germ X). In an disaster with open sewer lines, “unconventional” bathroom facilities, even just a lack of running water, bacteria and viruses are a huge concern. Couple that with inadequate medical care and you could set yourself up for a real problem. Head it off by keeping your hands clean. Wash them when possible, use hand sanitizer when it isn’t. Remember, a little hand sanitizer and a bandage make an excellent, long-lived tinder for starting a fire.
Soap
Even though hand sanitizer is a great stand-in for soap, real soap is hard to beat for washing hands and body. Real soap can also wash dishes, clothes, and more. I’m a big fan of Doctor Bronner’s Magic Soap. You can dilute it 10:1 and it still works well. A little goes a long way. It’s also really versatile: you can even use it as toothpaste.
Wet Wipes
Wet wipes can be used to clean your hands, bathe your body, and wipe your butt. They are kind of bulky and heavy, but well worth it their minimal cost. Buy a travel-sized packet of wet wipes for each family member’s bug out bag.
Toothbrush, Toothpaste, Floss
Keep your teeth clean. Pack a travel toothbrush (I really like this one), or pack a regular toothbrush – they’re dirt cheap and really don’t take up that much space. Throw in a travel-sized toothpaste. Enough said. Oh wait – one more thing. Dental floss is incredibly useful. It can be used to clean your teeth, but it is also some of the toughest thread you can imagine. You can use it for all sorts of things. I strongly recommend having a full roll of good, high-quality dental floss in your bug out bag.
Lotion
This might seem like a comfort item, however, lotion can keep your skin from cracking. Cracked skin creates points of ingress for potentially harmful microorganisms, making skin health really important. Dry skin is worse in cold weather or every arid climates. Consider a small tube of lotion of ointment like Aquaphor. In a pinch Aquaphor can also be used to help get a fire going.
Tier 1: Backup Wallet/Admin
Most of you probably have your wallet on your person most of the time. This one is so critical I would absolutely recommend backing up some items in your pack. This may seem like a secondary consideration, but it’s pretty important.
Government-Issued ID
Some identification may be required to get in and out of certain areas during a disaster. In an area I recently worked, IDs showing home address were required to get down certain roads. You may have to show IDs at various points during a state of emergency.
A passport is a great option if you have one. It’s federally issued and universally recognized. Pull it out when you travel internationally, and throw it back in your bugout bag when you get home. Just make sure to keep it in date. Another really good option when you renew your passport is a passport card.

Cash Money
Money is critical to a realistic bug out bag. I recommend having AT LEAST $1,000 in your bug out bag. I would say there is no effective upper limit. Personally I’d like to work up to $10,000 in my bugout bag. Money can’t buy happiness, but it can buy everything else. Including food, fuel, car repairs, a place to stay… If you and your spouse both had $10k in cash in your bags, what wouldn’t you be able to provide for yourselves in the event of a disaster? Full disclosure: I’m nowhere near that amount.
Putting cash in your bug out bag isn’t quite the same as buying night vision goggles and “backpack guns.” That money isn’t spent, you’re just choosing to store it in a really portable location. Though ideally it’ll be there should you have to one day bug out, you can also pull it out to cover an unexpected health insurance deductible or handle some major car repairs. In other words you should be saving some cash anyway, so why not put it in your bug out bag?
Once you do get beyond a couple thousand dollars, you may consider converting some cash to gold. Gold is very compact and durable. To my knowledge gold has never lost its value – you won’t make money on gold, but you won’t lose value, either. There is also the possibility that the dollar may be worth far less one day, but gold should still go a long way. I’m not the “gold guy” but it’s not a bad idea.
Other Cards
There are some other cards that are probably a good idea to keep on hand, or at least keep copies of.
- Backup Credit Card: It’s a really good idea to have a backup credit card that you can go to should you need to get a hotel room, rent a car, buy groceries for your family…whatever. Backups of your debit/ATM cards are also good to have on hand. Remember to keep these cards in some sort of RFID-blocking sleeve. If your bank doesn’t want to give you a backup, you can tell them your current one is damaged. That’s how I got a duplicate of my regular credit card.
- Concealed Carry License: I would strongly recommend having a copy of your concealed carry license. Though I wouldn’t recommend trying to carry on a copy under normal circumstances, in a disaster you’ll probably be able to convince a cop that you’re on the up-and-up if it’s credible that your wallet might’ve been lost.
- Vaccination Record: if you’ve been vaccinated against COVID-19 it would be a very good idea to have record of vaccination. Trust me – the vaccine card is way less invasive than the driver’s license you already possess and tracks you far less than the social media you opted into years ago.
Keys
Have an extra house key, car key, and keys to any other important items, like safes or safe deposit boxes. It may save you a lot of headache when you return to your home post-disaster.
Tier 1: Health & First Aid
Your body is one of your most important survival tools. You need to have the stuff necessary to keep it functioning.
Glasses
If you wear glasses, you need to have a pair in your bug out bag. If you wear contacts you should forgo them and opt for a good, old-fashioned pair of spectacles. Contacts can be problematic in dusty, dirty conditions. They require a lot of support equipment like cleaning solution. And putting them into your eye with dirty fingers is certainly sub-optimal. Go with glasses, preferably with a frame that is fairly durable.
Prescription Medication
Depending on the medication in question, this might be THE most important item in your bug out bag. You may not live very long without prescription medications, so it’s a good idea to bring some with you. Some medications, like insulin can’t be stored in your bug out bag due to the necessity of refrigerating them. If that is the case have everything else you need (glucometer, alcohol preps, syringes, etc.) packed, and be able to simply grab the medication itself.
It may be difficult to get a large supply of extra prescription medications. You may have luck talking to your doctor and explaining you’d like some surplus considering the events of the past two years. Most physicians should be understanding of your concerns. Be sure to rotate medications to keep them in date. If you are storing medications in your bug out bag you will want to keep the bag itself in a cool, dry place. Also be sure to keep the medication on the interior of the bag where it is protected from light.
Basic First Aid Kit
I won’t belabor first aid kits. I’ve written about both my personal IFAK and the basic first aid kit before. I strongly encourage you to check out those articles. My “advanced” IFAK probably costs a couple hundred bucks to put together. If you can’t afford that – or can only do so at the expense of other critical survival needs – put together a basic kit for each of your family members. It will cover you for 90% of the traumatic stuff you’ll face.
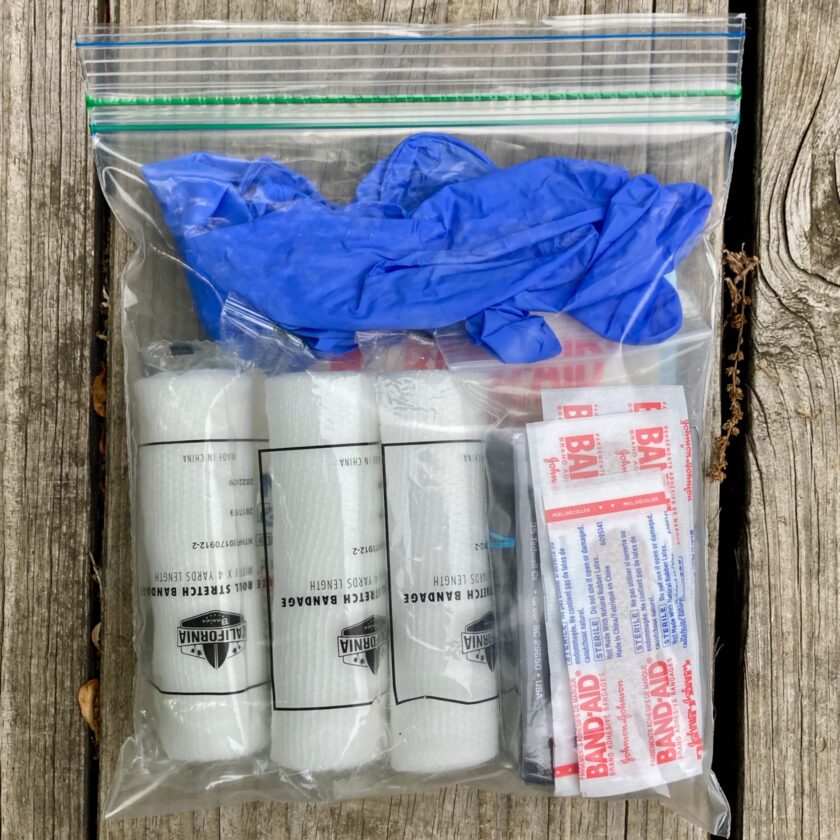
The basic first aid kit should contain mostly dressing and bandaging materials. I recommend having some individually packaged 4x4s, roller gauze, and a triangular bandage. You should have pair of gloves, even if you’re unconcerned with contact with your family members’ fluids. Remember, gloves worth both ways, and you’re also protecting your family member (or yourself) from your filthy hands. Throw in a few bandaids, some antibiotic ointment, and maybe some Steri-strips. Throw it all in a quart-sized Ziploc and you’ve got a solid first aid kit.
Over-the-Counter (OTC) Medications
I recommend adding some OTC medications to your basic first aid kit. This will let you take care of some mild medical problems. Problems of this nature are more likely that trauma, so be prepared to deal with them. Below are what I keep on hand in my realistic bug out bag. Please note that this is not medical advice.
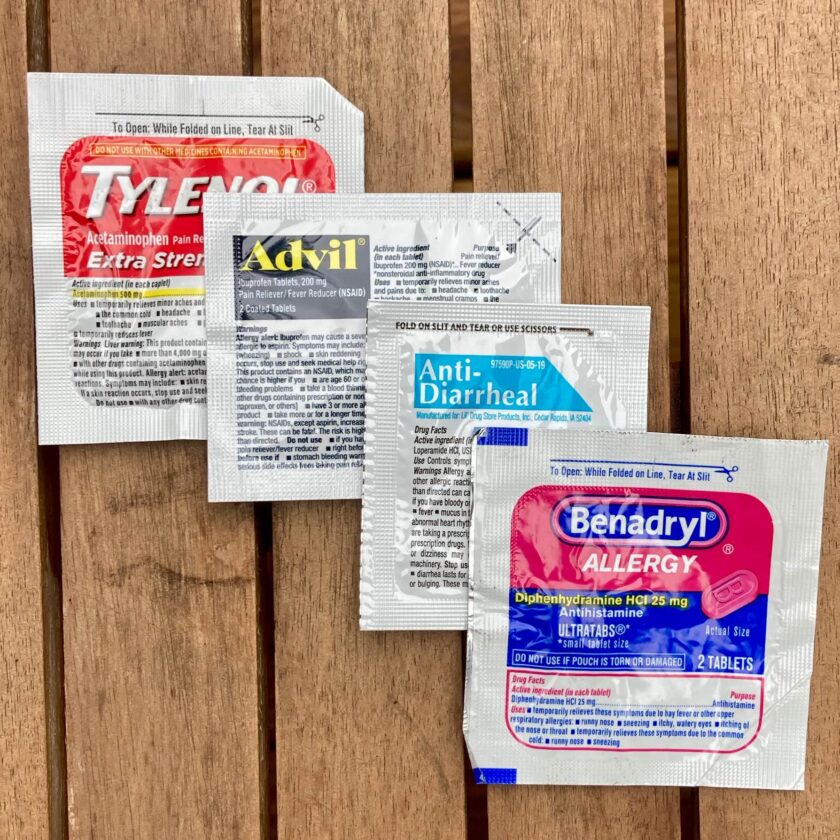
- Ibuprofen (Advil) AND Acetaminophen (Tylenol): mild pain-relievers and fever-reducers. When you combine ibuprofen and acetaminophen you get an outsized impact, similar to a mild narcotic pain reliever. Also, if you have a fever you can alternate these drugs. This let’s you keep an anti-pyretic (fever reducer) on board at all times without exceeding the maximum dose of either.
- Loperamide (Immodium): an anti-diarrhea medication. Prevailing wisdom used to be “let it flow” and get the bacteria out. In reality this strategy doesn’t really get the bad stuff out, but it can dehydrate you rather quickly.
- Diphenhydramine (Benadryl) can be really useful in the event of an anticipated allergic reaction, or to keep one from recurring after epinephrine administration. I also like to have Benadryl on hand as a sleep aid for noisy or unusual sleeping situations.
If you have allergies or other specific medical problems, you may want to add to this list. This is just a basic list designed to keep you relatively healthy and comfortable for a short time.
Strangely, I recommend buying your OTC medications at the gas station, in the little single-serve packs. They are more expensive, but the single packs have huge advantages. They are very durable and waterproof. You don’t have to open a large container and expose a lot of medication to light, air, and moisture – just the two tablets you’re taking then. Having medications in the original, sealed, foil packets also makes clear to law enforcement exactly what they are.
Tier 1: Electronics & Communication
Your phone is an incredibly important survival tool. Sure, we like to knock the guy that considers his phone a flashlight. But consider all the other stuff a phone can do. It can call for help, arrange transportation, or book a hotel room. Your smartphone can help you navigate, even without service, via its GPS engine (provided you have some maps downloaded, a practice I recommend). Your phone can contain a wealth of information in the form of books, saved, documents, and photos. And at the very least, it is a backup flashlight, capable of lighting a room for quite a long period of time. You should be able to keep your phone up and running. I recommend the following minimalist kit to do so.
Phone Charging
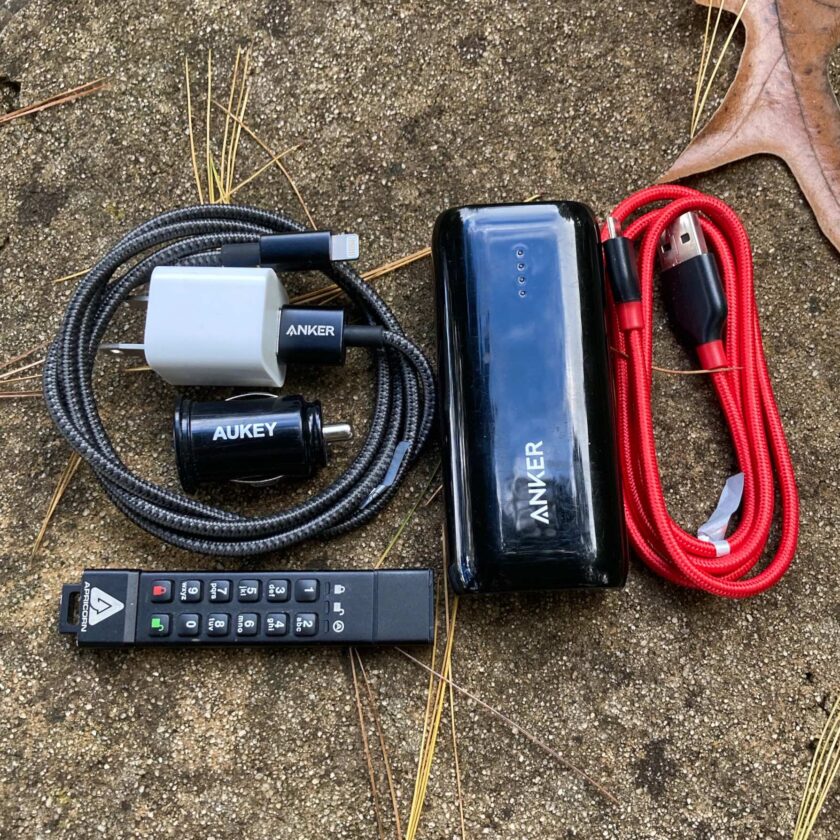
- Phone Charging Cable: This one’s a no-brainer, right? I’ve always liked cables from Anker. Their double-braided cables last a long time; I have some that are over five years old. In the meantime most of my OEM iPhone cables do good to last a year. Anker makes cables in a variety of lengths that will fit iPhones, USB-C, and Micro-USB. Though the cords in my pack are 3′ I definitely see the benefit of longer cords in crowded environments.
- Wall Charger: Obviously you want a way to charge your phone from 110V power. I like a two-port adapter that lets you charge two devices at once. You and your spouse could charge at the same time, or you could charge your phone and your battery pack at once.
- 12V USB Adapter: You never know where you might find yourself when displacing under emergency conditions. Be able to charge your phone from a vehicle’s 12V plug. I like this two-port model for the same reasons I like the two-port 110-USB above.
- Pre-Charged Battery Pack: Having a pre-charged battery pack lets you charge your phone with no external assistance. I would choose one at least large enough for two complete chargers, and I would definitely pack the cord to recharge the battery pack.
AA Batteries
The most common battery in the world is the AA. I recommend having maybe four of these in your bug out bag, stored in a battery storage container or in the original packaging. I’m a big fan of lithium batteries for two reasons. First, the shelf-life is about 20 years. Secondly, they won’t leak/corrode and ruin your electronics.
Tier 1: Food & Water
You should probably bug out with a little bit of food and water. I am sort of a minimalist in this regard. Again, we aren’t bugging out to the hills to go all Red Dawn on the Russians. We are probably just leaving the immediate disaster area. One thing I’ve seen first-hand in a number of disaster areas is an out-pouring of food donations. I recommend having enough food and water to get yourself comfortably to a resupply, which may take a day or two in a really bad situation.
Water
Between food and water, water is by far the most important. If you have extra weight in your pack I recommend using it for water. You can survive for a long time without food, but you won’t live more than a few days without water. I recommend having at least two quarts – a half-gallon – of water in your realistic bug out bag. Half a gallon of water should be considered a minimum, not a hard and fast rule. In hot weather you can easily drink twice that amount in a day.
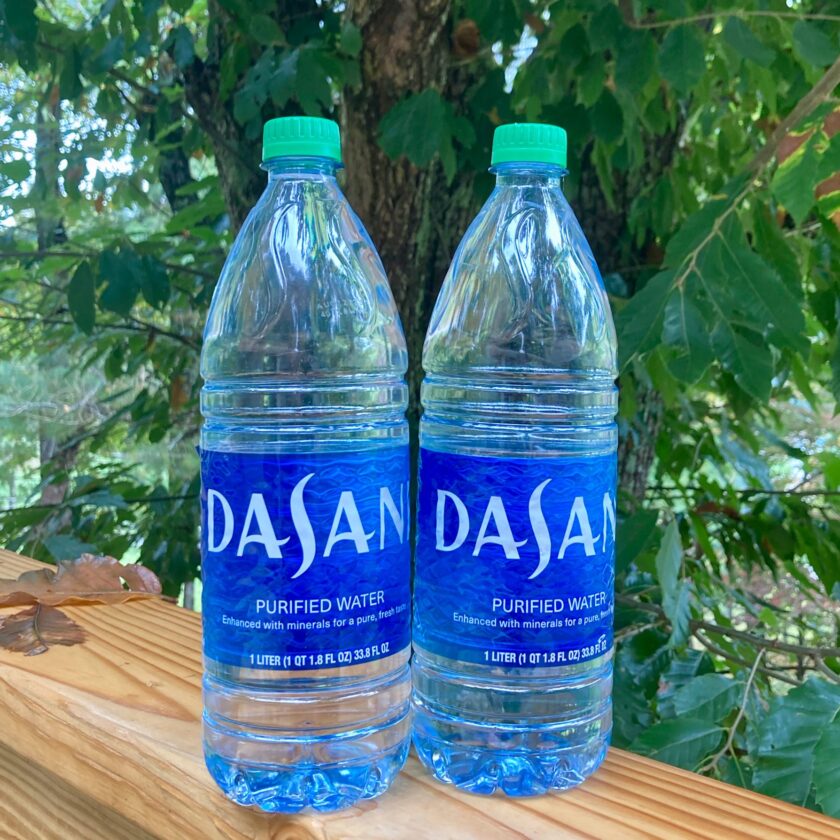
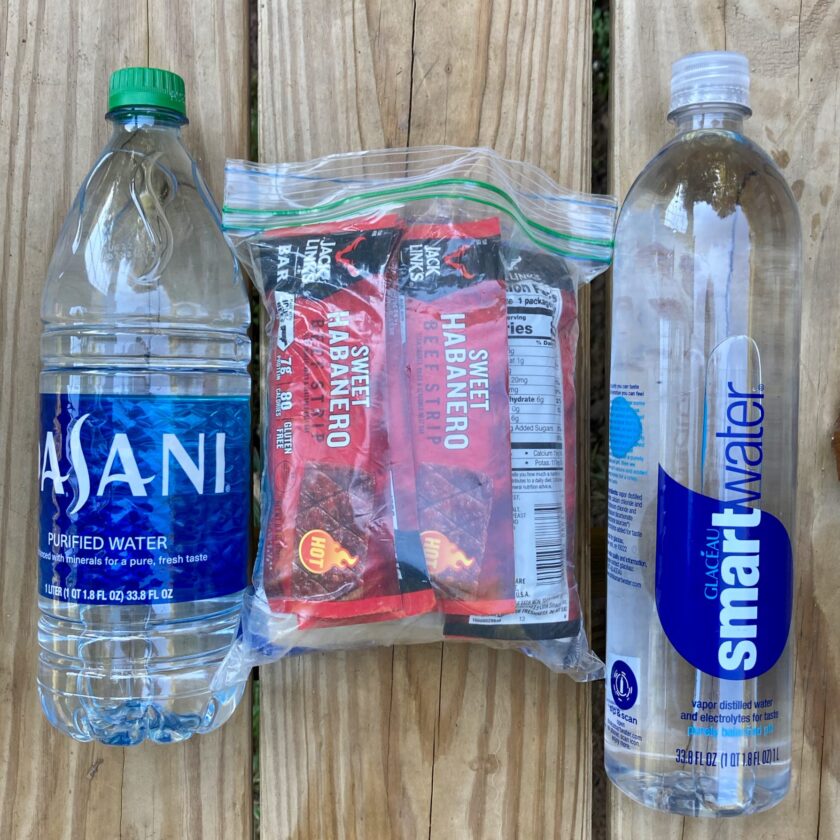
You don’t have to go out and buy expensive water bottles. I LOVE my stainless steel water bottles from Self Reliance Outfitters. I talk about them every chance I get. However, spending $40 on water bottles isn’t necessary to have a good, solid water container. Again, I recommend a trip down to the local convenience store. Plastic water bottles there that we are so conditioned to throwing away will last for many weeks of reuse. If you shop around you also have a huge variety of sizes, from just a cup to almost two liters.

Backpackers love SmartWater bottles because they are tall and skinny and fit down the sides of a pack easily. The big ones contain just over a quart of water. The big Deer Park bottle in the picture holds a quart and a half…plus a couple ounces. However, it has kind of a crappy lid. Choose water bottles based on their durability, capacity, and shape.
Right now water is a dirt-cheap commodity. One day that may not be the case. Spend $5 now and have plenty of water in your bug out bag should the day come that you need it.
Water Procurement
The problem with water is its bulk and weight. A single gallon weighs 8.33 pounds, which is almost half the recommended weight of the realistic bug out bag. Water is also bulky; a gallon of water in a several bottles takes up a LOT of space in a small backpack. And no matter how much water you carry, you probably want a way to procure more.
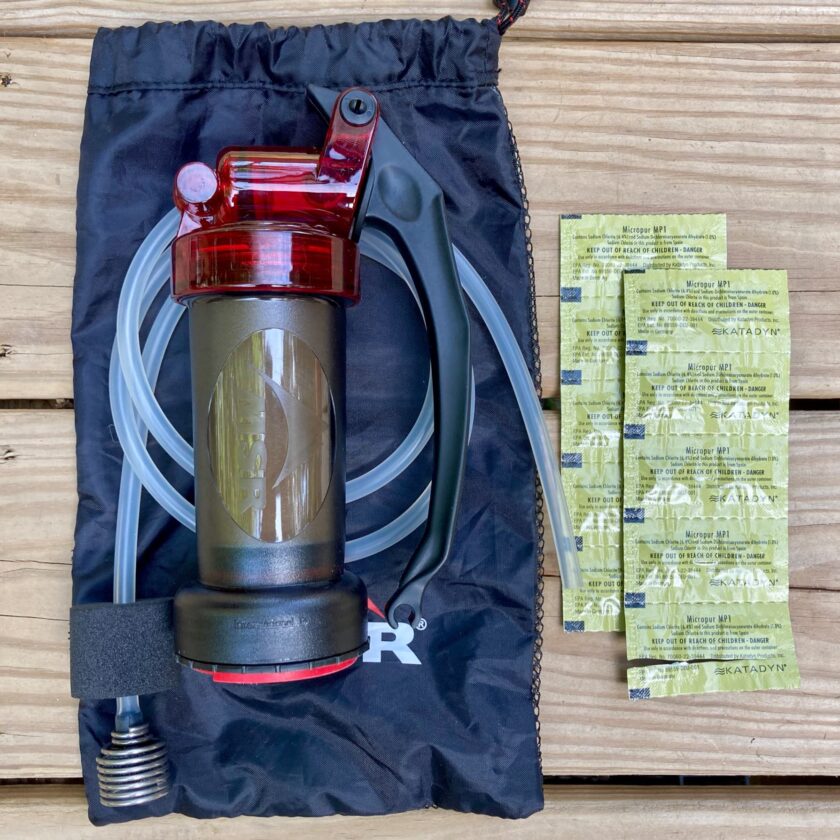
In the types of disasters you are mostly likely to bug out from, water is going to be dirty. Any kind of flooding – be it from simple heavy rains to a hurricane – will put all manner of pollutants in the water. Fuel, sewage, fertilizer, industrial chemicals, animal waste, corpses…these are just a few of the contaminants in flood water. You will definitely want a way to clean your water.
Unfortunately tablets alone won’t do the trick. They only kill microorganisms. They won’t remove heavy metals, chemicals, oil, etc. Boiling won’t do anything to remove the substances, either. In fact, boiling will merely concentrate them. I hate to say it, but you really need a high-quality water filter. One downside to mechanical filters: many of them require a Nalgene or similar bottle as a collection container, adding expense to your kit. For a more in-depth dive, I recommend checking out this article from Integrated Skills Group.
Food Principles
You should also have a little bit of food. This is where most people start with prepping, and probably with bug out bags. I don’t think a realistic bug out bag needs 72-hours of 3,000 calories a day. Three days is a worthy goal, but you need to look at survival food as rations rather than meals. You could, in fact, go three days without eating, but this will provide you with some energy and an emotional boost. There are a couple of principles to which I adhere when stocking my food bags.
- Shelf Stable: Food should be reasonably shelf stable I’m not going to rotate my food every week. It should have a shelf life of at least a year. I plan to check off my bug out bag once a year (every October) and rotate out the foods.
- Durable: I don’t want to open a wrapper and get a handful of crumbs. Your foods should be reasonably durable, and the packaging should be waterproof.
- Ready to Eat: Food that requires cooking, even boiling water, complicates your life a lot. Now you have to pack some sort of stove, or build a fire. Building a fire is much harder than most people think. Keeping it going is difficult, and boiling water over is WAY harder than you probably imagine. A fire will also reveal your location and naturally attract others. Have stuff you can pull out and eat.
- Good Enough: You aren’t going to enjoy five-star meals, but you also don’t want stuff that tastes like crap. Get stuff that you’ll actually (somewhat) enjoy eating.
Food Ideas
Rather than a list of “should haves” these are some ideas. I’d rather you have stuff you like rather than stuff I tell you you should have. Just remember to stick to the principles above. Below are the things that I like in for bug out bag foods.
- Tuna Packets
- Beef Jerky
- Single-Serve Peanut Butter Packets
- Granola Bars
- Nuts in individual packets. Nuts are incredibly calorie dense (and delicious).
- Candy: I like Payday bars – they are very durable and pretty calorie-dense. I also really like individually wrapped chewy candies, like Hi-Chew.
Try to get a decent mix of stuff. You don’t want to have ten packets of salty beef jerky, and no carbs, nor do you want to eat 15 Snickers bars in a row. You’ll probably desire a little bit of variety after just a little while. Remember, though, these are RATIONS, not meals.
Tools and Gadgets
Getting lower on the priority list, I would probably consider some tools. These are important, but I wouldn’t prioritize them. I would prioritize stuff that you are almost guaranteed to need, like clothing, cash, and water. I also place these in the lower priority tier because they should be covered in your existing EDC items. Once you have satisfied those needs then consider adding expensive tools.
Flashlight
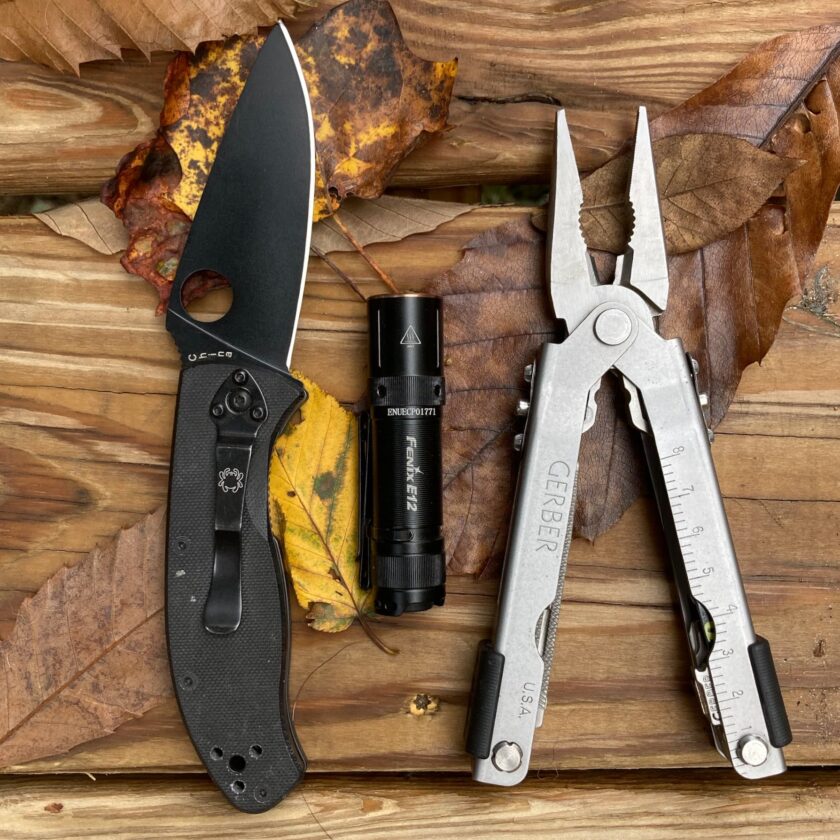
A flashlight is one of the most important preparedness tools you can have. I recommend that you keep one on your person at all times. Flashlights are so important, I recommend keeping a backup in your realistic bugout bag. There are a couple of ways you can go – choose a duplicate of your EDC light or upgrade and carry a larger, more powerful light. Either way, light is so important I do recommend a backup light in your bag. My top choice is the Fenix LD12. Plenty of other AA-powered lights would serve you well, though, including the ThruNite Archer AA, EAGTAC D25A, or the Olight I5t.
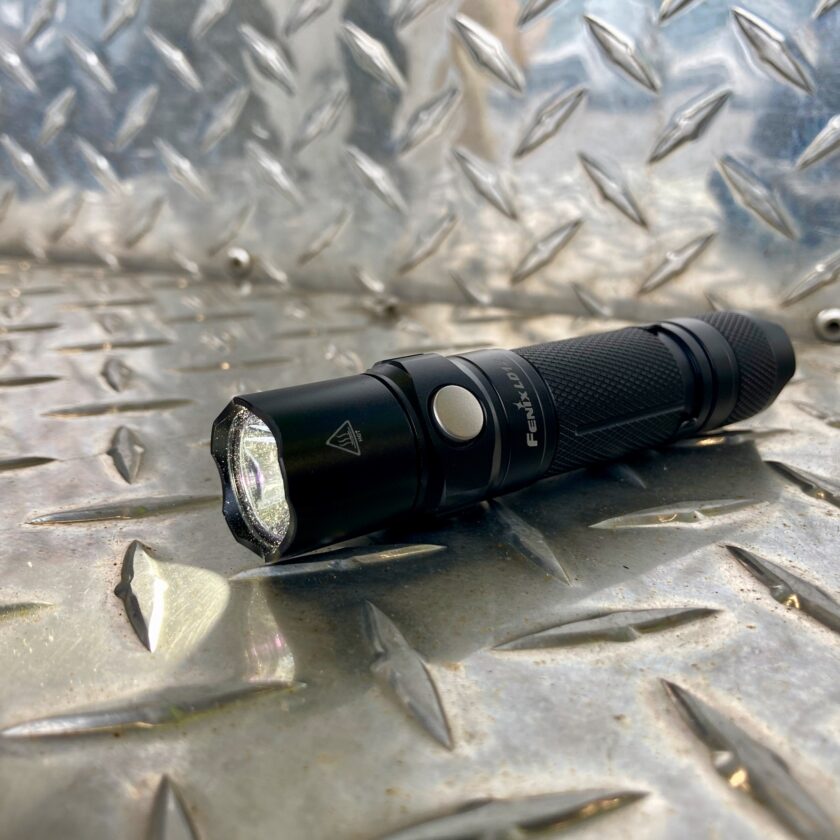
I have reviewed over a dozen pocket-sized, handheld flashlights over the past couple of years. I don’t have a lot of hard and fast criteria. However, I would stick to something using AA batteries. Double-As are the most common battery on the planet. You’re more likely to find them in an emergency and they’re cheaper to stock now. My only other criteria would be a light that is durable and waterproof.
You might also consider a headlamp. Headlamps have some awesome advantages over flashlights. Remember, we’re not kitting up for an assault on an enemy compound so won’t don’t have to limit ourselves to 10,000-lumen tactical flashlights with a strike bezel. We can use a white-light, non-defensive, hands-free headlamp. I use this one for SAR jobs, but you can certainly get by on a cheaper headlamp.
Multi-Tool
Honestly, I could take or leave a multi-tool. The times I’ve actually really, really needed one…well, I can’t really remember the last time. Still, they’re compact, fairly inexpensive, and do a lot of things. Having one in an emergency pack really isn’t a bad idea. Though there’s much newer, sexier stuff out there, I’m still rocking the good, old-fashioned Gerber MP600 Multi-Plier.
Knife
A knife is last on this list because you should absolutely, 100% be carrying one on your person. If you have one on your person the one in the bag only serves as a backup. Knives are so important, though, having a backup is a really good idea. If the knife is a backup, I recommend it be similar in function to your regular, EDC knife. I carry a Spyderco Para Military 2 on a daily basis, and my backup is a Spyderco Tenacious – a really similar design.
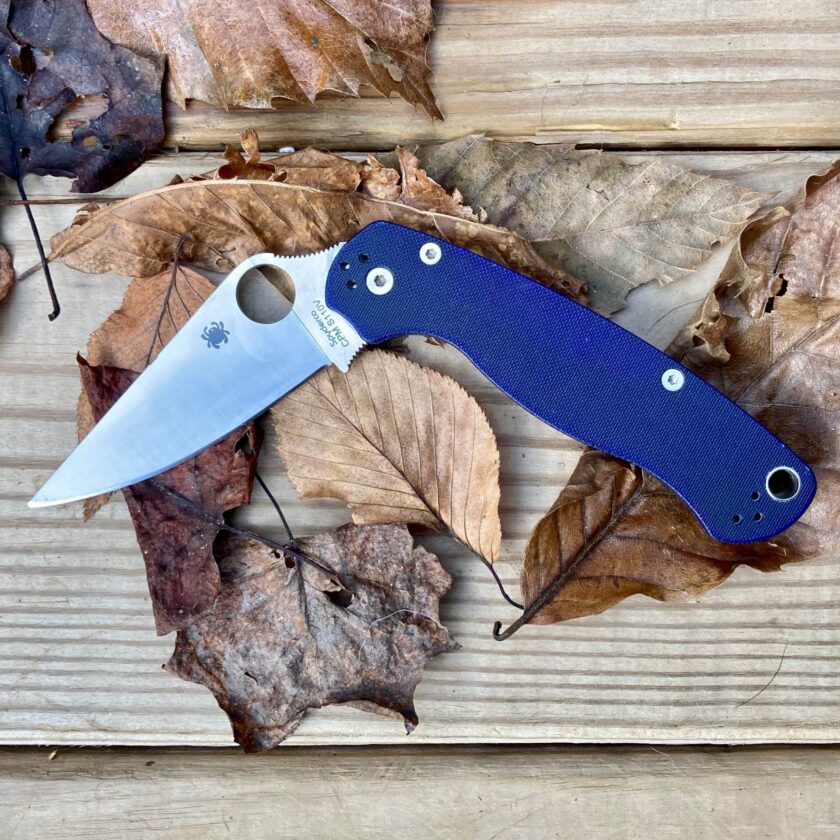
I’m not really the knife guy, so I hesitate to make knife recommendations. Some of you reading an introductory article like this might be completely lost, so let me offer just a bit of advice. Here are a couple knives I’ve owned and carried that I would definitely recommend checking out. Sorry I don’t have something in every price category – I just don’t own that many knives.
- Honey Badger from Western Active – $40: This is definitely a budget knife and I wouldn’t go much lower than this, price-wise. Overall it’s a pretty solid little blade for the money.
- Spyderco Tenacious – $50: This one is my bug out bag knife. For just $10 I feel like you get a pretty big upgrade over the Honey Badger.
- Benchmade Bugout – $125: The Bugout is one of the most popular knives around and for good reason. It is made from top-quality materials and weighs next-to-nothing. It’s definitely a bit more pricey but you get what you pay for.
- Spyderco Para Military 2 – $160: This is almost the perfect knife for me (great size, great weight, very good steel, very ergonomic). This is also about as much as I’m willing to pay for a knife – after this I feel like you hit diminishing returns.
Fire Starting Tools
I’m a big fan of fire-starting junk. Starting a fire is a pretty low-likelihood skill. Preparing for it is really simple and inexpensive and easy, though. In a bug out bag for realistic emergencies I would invest very little money, space, and weight into fire-starting stuff…but I would invest some. If resources were limited I would invest in a Bic lighter. Honestly, stored well, that will probably do for almost any emergency. When it is cold out (below freezing) you will need to store it near your body to keep the fuel from gelling. You will also need to protect it from moisture and physical damage.
If finances permit, I would also recommend some sort of sparking fire starter, generally a ferrocerium rod. “Ferro” rods are really durable, throw of sparks easily, and last for thousands of strikes. The ones from Uberleben are my new favorite; they are really solid.
If you want a much deeper dive into fire-starting gear, technique, and consumables, check out my immense Comprehensive: How to Build a Fire article.
Sleeping/Sheltering Gear
Having a way to provide for your own warmth and shelter is not a bad idea at all. The chance of having to use a tarp-shelter that you erected in the middle of a disaster area is honestly pretty low. However – and this is a big HOWEVER – this may be high priority for you if you live in a very cold climate.
Sleeping Bag/Blanket: If you’re going to pack sleeping/shelter gear, start with the sleeping bag or blanket. You can use this under the broadest range of circumstances. Currently I have my Kifaru Woobie packed in my go bag. I wouldn’t recommend buying one for this purpose, but mine (which I’ve had for five years) doesn’t see much use these days otherwise.
Tent or Tarp: A tarp is much cheaper and lighter than a tent…but also massively more difficult to setup into a meaningful shelter. If that’s your plan you need to be practicing. A lot.
Self-Defense Stuff
I almost chose to entirely omit this category. Why? Well, if you’re serious about self-defense most of this stuff will already be on your body. There are a couple of reasons I can think of for putting self-defense gear into your realistic bug out bag, though.
NOTE: This article will not cover choosing a “bug out gun.” If you need help selecting a firearm or seek a deeper understanding of concealed carry I strongly urge you to check out my ongoing Gun Owner 101 series. This article will also not cover long arms. Again, we are discussing stuff that happens somewhere in the country multiple times a year, not an episode of The Walking Dead.
You Can’t/Don’t Normally Carry
Some people can’t carry a gun on a daily basis, whether because of legal issues, physical limitations, one’s occupation, etc. Honestly, no judgement here. I choose to carry, but if you choose not to it’s probably the right choice for you. If you choose not to carry under normal circumstances you may want to have a firearm in your bug out bag. Bug out situations may be a little more volatile than everyday life. You also may be displacing to somewhere much less safe than your current environs. For whatever reason, you may wish to leave with a firearm.
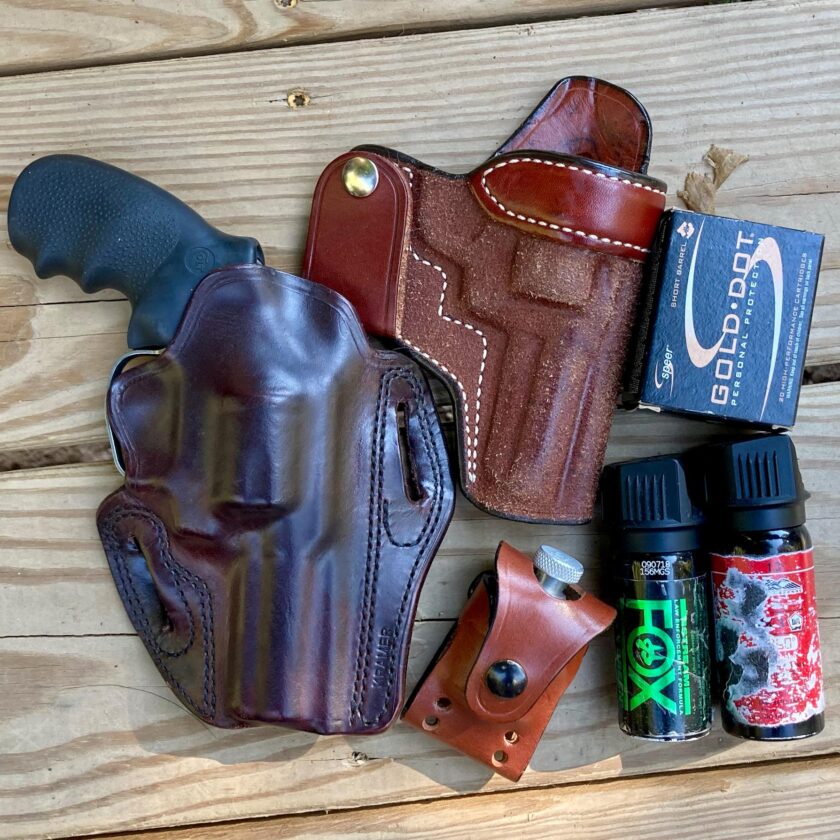
If this describes you, you shouldn’t just have the gun packed. You should also have a holster. A holster will protect the gun’s trigger while it is in the pack, and allow you to secure the gun to your body once you leave your home. Also pack ammunition and magazines, as your gun will be pretty useless without them. I also strongly urge you to consider a can of high-quality pepper spray, a very good non-lethal option.
You Want a Backup Carry Option
Another viable reason to pack a firearm in your bug out bag is to provide a back up option. If you should have to leave your home, buck-naked in the middle of the night, it would be nice to have self-defense tools already packed. I admit this is very appealing to me, though I do not keep a gun packed in my bug out bag at this time. Again, you will want a high-quality holster, ammunition, and some magazines. If packing a backup firearm is important, packing a can of pepper spray is probably pretty important, too.
A backup carry option also gives you the option of arming a friend or family member. I have some qualms about this; if they are very competent with firearms they probably already own one and are bringing it. If they aren’t…I’m not sure I want the liability of arming them. I would be willing to arm others with pepper spray, so my future “old” cans of pepper spray may be finding their way into my bug out bag.
To Improve Existing Defensive Capabilities
I may very well adopt this strategy: packing some self-defense tools to improve my existing carry capabilities. Here is what I mean: carry some items to support your existing carry gun. I would recommend a couple spare magazines, a belt-mounted magazine pouch, a weapon-mounted light, and a holster to accommodate the gun/light combo. If you’re like me and have a hard time being comfortable doing strenuous activity in a AIWB rig, you may also wish to throw in a OWB holster. This might make like infinitely more comfortable if you have to do a long foot movement, soaking wet, over and under downed trees and other obstacles.
Safe Storage
One problem posed by storing guns in bug out bags is safe storage. A packed bug out bag would be a pretty attractive target for a burglar, especially if it looked like it was full of good stuff. If you have children in your home you must also remember that the will likely have access to the bags. Here are a couple possible solutions.
You could keep a small bag of gun-related “go bag” stuff in your gun safe. When it comes time to bug out, grab your bug out bag, and the small bag of gun stuff from the gun safe. It would only take a few additional seconds, but give you massively more security. Another alternative would be to store your bug out bag behind a locked door, or in a locked container (like maybe a large Pelican case).
Whatever you choose, remember that owning guns also comes with some responsibilities, and one of those is safe-keeping. Accept your responsibilities.
A Couple More Things
I have just a couple more thoughts on the idea of a bug out bag and bugging out itself.
Never “Finished”
First, your bug out bag – even a realistic bug out bag – doesn’t have to be a perfect. We want to have some basics covered in the event we have to leave in a hurry. However, odds are low that you have to grab one bag, slip your shoes on, and go. You will probably have a least a few minutes – say five or ten – to grab other stuff, like your EDC handgun. The idea of a capsule bag containing everything you need is compelling…but maybe not the most realistic for most of our incomes.
Next, you shouldn’t consider your bug out bag “finished.” If you have time to add other stuff, yous should. For example, if you can, grab a grocery sack and throw in a bunch of stuff from your pantry. Grab the sleeping bag and stuff it in. Throw a raincoat on the outside…whatever. On thing on that, though – you should probably have a plan for what you’re grabbing last-minute to make it as efficient as possible.
Don’t Limit it to a Single Bag
Finally, you can also have other stuff packed to take. We have “bug out boxes” – Rubbermaid containers that go in the vehicles with greatly expanded capabilities, quantities of food, etc. We’ve actually had these packed for a long time now. It’s easy to get fixated on “The One” bag, but you can certainly pack more than one bag. You still want a backpack that you can shoulder and walk with…but utilize the miracle of the modern automobile to carry as much stuff as possible until walking is inevitable.
Only as Far as You Can Carry It
Your bug out bag will only take you as far as you can carry it. When is the last time you got out and walked with a pack on your back? Twenty to 25 pounds doesn’t sound like much on your phone screen. It feels like a lot more on your back. The most important accessory for a realistic bug out bag is physical fitness. Again, get out and walk and KNOW what you are capable of. Then improve it.
You also need some skill. As I tried to point out a couple times throughout, equipment is mostly useless without skill. The idea of building a fire in the woods is romantic. The reality is way harder than most people imagine. You should be trained and practiced with your tools and equipment. Otherwise they amount to a pile of feel good, talismans.
Closing Thoughts
The bug out bag shouldn’t be your first preparedness priority. Staying home should be your top priority – there are a lot of variables and you leave a lot behind when you have to move. Bugging out shouldn’t be completely off the table, though – if it’s necessary you should go early, go without hesitation, and go prepared! Make your bag realistic. Once you have your realistic bag you can pack your “head for the hills” bag.


1 thought on “Preparedness: A Realistic Bug Out Bag”
Comments are closed.