Comprehensive: How to Build a Fire
There are few skills that are as universal as building a fire. From remote Afghani villagers who have never seen a cell phone to the most Gucci'd-out backpackers, the fundamentals of building a fire don't change much. It comes as a surprise to me when I encounter individuals who can't build a fire...even though I encounter them with some regularity. This post is going to take a very deep dive (13,000 words and 70+ photos) into how to build a fire.
This article contains affiliate links.
How to Build a Fire: Caveats and Disclaimers
Last year I was invited to teach a brief survival class to a joint law enforcement/emergency medical services unit. I gladly agreed and spent a great deal of time preparing my lesson. Additionally, my Search & Rescue team membership is contingent on completely a pack test (walking a prescribed distance, with a prescribed weight, within a time limit) and a skills test (both completed successfully). Some of the skills in the skills test relate to personal survival, including building a fire.

Over the past six months these two motivators have caused me to spend a great deal of time building fires. It is probably my single most practiced survival skill†. I have learned an awful lot in researching/rehearsing my class and in preparing myself for my SAR team skills test. Additionally, my girlfriend and I heat our home with wood. It's not quite the same, but during the winter I have maintained and thought about a fire every single day. Combined, I've learned a thing or two about fire in the past few months.

These lessons apply indoors and out, and for fires large and small. I want to pass a few of those lessons on to you. This ground is covered in numerous books, videos, and other articles...everywhere. Still, I haven't had my say on it and I felt I could add some stuff that you don't normally get from books (namely, TONs of photos). I really hope you get something out of it. If you find it helpful, please consider sharing it with someone else who may find it helpful.

A huge caveat here: there is more than one way to skin a cat. I have my biases and my prejudices. I have my preferences in tools, materials, and techniques. You may not like the way I build a fire. That's fine, but all of these preferences are borne out of experience. I recommend you develop your own set of preferences out of experience, as well.
Another caveat: this article is generally geared toward building survival-type fires in the outdoors. Though the principles can be used to build an fire, anywhere, that is the contextual framework behind this article.

This article is very long; it is my attempt to literally cover it all from top to bottom. I have probably missed something, and I know my article is limited by being mainly geared to one environment (temperate forest). I feel like the principles upon which this article is based are sound and will serve you well anywhere. It will talk about firestarters including sparking tools, matches, and lighters. It will talk about materials - natural and manmade tinder, kindling, and fuel, and it will talk about technique. There will also be a few general principles mixed in here and there.
Principle #1: Building a Fire is Hard
Building a fire is hard. Sometimes you can get a fire going in no time with minimal effort. Sometimes your fire-making efforts will frustrate you to no end, and you'll end up with a smokey fire that will require an outsized effort on your part merely to keep it alive. Occasionally you might have a hard time getting a fire going at all, especially if conditions are crappy. I like to say that up front to set the expectation for myself because I occasionally get a little cocky.
This past Sunday I went outside to build a fire so I could take a few remaining photographs for this article. There was snow on the ground but I had plenty of really good, natural materials, I took my time - a good fifteen or twenty minutes to collect what I thought were really good materials. Wanting to light the fire only with natural tinder I used all of my birch bark stash...and ended up with the first attempt smoldering out. I'm making a rule for myself to always set the expectation that the next fire I build will be difficult. If it surprises me and is easy, great! But if not, I will have prepared for it as if it were going to be a very difficult.

I say this not to discourage you. Rather I say this to make you appreciate the difficulty of starting a fire - even for someone fairly experienced like me - and motivate you to practice. If you haven't build a fire lately, your skills have degraded. If you've never built a fire in the rain or snow, are you really prepared to build one when it's raining or snowing? Do you really know how hard it's going to be to build a fire in the dark if you've never done it? For that matter do you really know how well your tools and materials work, and work together, if you haven't practiced with them?
This is my is nothing more than my usual admonishment to get out and DO. Remember, building a fire is hard. Practice is required. Take your time. Prepare well. Don't get cocky, especially when you really need that fire.
Now let's move into firestarting tools. There are dozens of different firestarters out there so this section - even though it doesn't even come close to covering them all - is fairly lengthy. Your tinder will be determined by the tool you are using. There are two broad, general categories of firestarting tools: sparking tools and flame-producing tools. Both have advantages and disadvantages. You should probably have one of each. This section will explain the various options out there.
Firestarting Tools: Sparking Tools
Sparking firestarters are tools that produce nothing but sparks. Using these tools can be a bit more challenging than using matches or a lighter. You must exercise much more care in the preparation and care of your tinder. It must be able to catch and maintain a spark, and nurture it into a flame. That is a huge disadvantage when you are cold, tired, wet, hungry, and scratched from head to toe from fighting through brush. These tools do have some tremendous advantages: they are very durable. I have carried one in my pocket for a dozen years - I doubt matches or a lighter would even last a year in my pocket without being destroyed. Sparking tools also last much longer in the number of strikes they are capable of.

Sparking rods are probably the most common form of sparking firestarter. There are some more "mechanical" firestarters like the Blastmatch which have some advantages (one-handed operation) but also some significant disadvantages (moving parts). The ferro (or mischmetal, see below) rod is about as simple and robust as it gets. It requires nothing else other than your knife for sparking. A ferro rod will last for thousands of strikes. It consists of a single, critical piece with no moving parts. Like a pencil, if you break your ferro rod...well, now you have two ferro rods. Every firestarting kit should have a ferro rod.
The Ferro Rod
You will encounter sparking "rods" constructed of either ferrocerium or "mischmetal." As with most things people have preferences about which they carry/use. The difference basically boils down to this: they both work the same. They both produce sparks. Mischmetal‡ rods have lower iron content and higher magnesium content, making them a tad softer and allowing them to throw larger, hotter sparks. Both require some skill to create a fire. Mischmetal might be slightly more forgiving, at the expense of being used up a bit faster. Ferrocerium (or just "ferro" rods) are more commonly available and are probably what you're likely to run into.
My two favorite sparking rods are the exoTAC fireROD and nanoStriker. The large fireROD is in my outdoor kit at all times. It is large enough (both in length and diameter) to get a very good strike. The handle portion is hollow allowing for the storage of a couple Tinder-Quik tabs. This is a very cool firestarter.

The smaller nanoStriker goes on my key chain. It has been there for years as a "just in case" firestarter that is almost always on my body or in my clothing. It is very durable and I would buy another one in a heartbeat.
Though I don't own one, the Überleben-brand firestarters are highly recommended by some members of my SAR team. I know quite a few members go into the woods with them, and the come in a variety of sizes and styles, including a classic, wooden-handled ferro rod, a necklace style, and a handle-less, hexagonal rod. Überleben also makes a ton of other outdoor, fire-related products, and they are American-made. I highly recommend checking them out.
Magnesium Block
Another variation on this theme is the magnesium block firestarter. This tool is nothing more than a ferrocerium rod set into a block of magnesium. The ferro rod provides sparks and the magnesium provides some tinder. The user scrapes off some magnesium shavings. Magnesium has a low ignition point but burns very, very hot. The sparks ignite the magnesium which can then light other materials. The magnesium block is an admirable attempt to combine a form of durable tinder with a ferro rod.

This is a very neat idea and it has been incorporated into a number of survival kits, including military-issued kits. In practice I have some hesitation about this tool. The ferro rod contained in the magnesium block is fairly small. Since it is glued or epoxied in, these rods occasionally fall out. Because they are so small it would be difficult to use one on its own if it did fall out. If it fell out it would also be very easy to lose.

If you do purchase one of these tools ensure it is from Doan Manufacturing, the most trusted name in magnesium firestarters for decades. Do not buy the cheap Coghlan's brand found at Walmart; these are known to use inferior glue, resulting in loss of the ferro rod.
Spark Lite
A good alternative example of a sparking firestarter is the Spark-Lite. It is basically the striker portion of a cigarette lighter without the fuel tank. I own one of these and have used it to great effect. It is not included in my current survival kits, however. It is simply not as robust as a ferro rod.

The Spark Lite comes in a small plastic case, along with a bunch of Tinder Quik tinder tabs. This isn't a bad system at all, but the reliance on moving parts makes me a little nervous about relying on this as my primary. It has all the disadvantages of a sparking tool (it creates only sparks) with none of the advantages (extremely long life, extreme durability). There are some versions of the Spark Lite (like the one shown) that have a replaceable flint. I would recommend upgrading to one of those if you can find one.
For some additional information on using sparking firestarters, please see my article entitled Tips for Using Sparking Firestarters.
Firestarting Tools: Flame-Producing Tools
Flame-producing tools are, as the name suggests, firestarters that actually produce a flame rather than just sparks. There are two general categories of flame-producing firestarters: matches and lighters. As with everything else each of these has its advantages and disadvantages. First, let's look at the advantages of this entire class of tool in comparison with spark-only tools.
Flame-producing tools have huge advantages. Because they create a flame they can provide much higher heat over a much longer duration, and in a more precise location. This opens up a world of possibilities for tinder. No longer do you need incredibly fine, wispy material; now you can start a fire with small twigs that would be completely untouched by sparks alone. If I were in dire straights - like, was soaking wet, outdoors, in freezing temperatures - I would go directly to one of these types of tools. They are very forgiving relative to working with sparks.
But the also have huge disadvantages. These tools are very vulnerable to water. Yes, they come in waterproof containers - even some lighters come in sealed, rubberized housings - but they underlying tool is incredibly vulnerable to water. Second, they are very fragile, relative to a simple sparking tool. Drop your sparking tool in the mud and step on it several times before you realize? No biggie - pick it up, dry it off, and get to work. Drop your lighter or matches in the mud...? You may be in for a long, cold, lonely night. Finally, flame-producing tools are bulky. To get the same number of fires (or fire attempts) out matches you'd need to carry thousands of them. Lighters - you'd probably need scores of them.
For these reasons, good and bad, I carry both a sparking tool and a flame-producing tool. I strongly recommend you do the same. If I have to build a fire and have the luxury of taking my time, I'll use my sparker to conserve my relatively very limited supply of matches. If I need a fire RIGHT NOW! I'll use matches because they offer the fastest, surest fire. The sparker is also there in case I run out of matches, or if they become lost, damaged, whatever. Both have a role, and both have a place on my person when I'm in the outdoors.
Firestarting Tools: Matches
I am a big fan of matches, specifically UCO Stormproof Matches. These matches have some features that make them very desirable for survival purposes. First, they have quite a long burn time for a match. These burn with a very intense flame for 15-20 seconds. They are windproof. While a strong wind may cause the flame to die down it is very, very hard to put these matches out with wind. They are also waterproof. They can be splashed with or briefly submerged in water and will still light (I have actually tested this). Even when burning they can be submerged in water. If pulled out within about a second they will resume burning (I have tested this, too).

Now the downsides: they are bulky. This is good because it means they provide a bit of fuel. But it's bad because you can carry less of them in a limited amount of space. They also require specialized striking surface. I would greatly prefer these be strike-anywhere matches, but I understand that they aren't for safety purposes. Having plenty of extra striking paper with your matches is strongly encouraged, but use great care to ensure the matches aren't in contact with the striking paper when stored in the case.

I strongly recommend getting the kit with a waterproof match case and a couple extra boxes of matches. The match case is very durable, waterproof, and provides a striking surface for the matches. Having some extra matches will allow you to practice with them and understand their limitations. Ultimately, though, if my life depended on getting a fire going with a single attempt, UCO Stormproof Matches would be what I used.
Zippo Typhoon Matches
I have also just recently tried the Zippo-brand Typhoon Matches. Though I have far less experience with them, they look promising. They are wind and waterproof and burn very intensely. They come in a very robust, waterproof container and my only real complaint is that finding refill matches is somewhat difficult and the kit is somewhat expensive - when purchasing through Amazon. A set of 25 refill matches is $10 directly from Zippo, and the kit is only $12 via Zippo's site.

The Zippo Typhoon Matches are also enormous at four inches long. This is fine - they might be easier to strike than a smaller match when your hands are frozen but they don't burn massively longer than my preferred UCO matches. The large size also makes the case fairly large and limits capacity (the case holds 15 matches), but the case does seem extremely robust. It also has a wonderful striker built into the bottom with its own rubber cap. Like anything else there are pros and cons.

Kitchen Matches
Of course, you can also use regular, old matches, with a couple caveats. First, don't use books of paper matches. They are simply too fragile. Getting them even slightly damp ruins the whole package. Second, get large-sized, wooden matches. Wooden matches come in a variety of sizes. The small ones burn only for about 15 - 20 seconds and they are very prone to breakage. The wood is very thin and light and it is incredibly easy to snap your matches in half as you attempt to strike them (see the note on technique below).

Second, make sure you find strike-anywhere matches. Strike-anywhere matches can be struck off just about any old scratchy surface like a rock, your zipper, or even your fingernail (sometimes). Strike-on-box matches must have a specialized striking strip embedded with a certain chemical to ignite the match. You can carry those strips (simply tear them off the box the matches came in, or order more) but it is preferable to have a match you can strike without the need for a specialized striker.

Improving Matches with Wax
Finally, coat your matches in paraffin wax. You can buy paraffin wax at the grocery store or hardware store, usually with the canning supplies. Melt the wax in a double-boiler. I drop the matches in, then pull them out with a pair of forceps, and then stand them up to dry in the a piece of Styrofoam. Repeat this three times to get a nice, thick layer of coverage.

Coating your matches in paraffin wax does two things. First, it makes them waterproof. They won't be as waterproof as the Stormproof matches above but they'll be damn close to it. They can definitely take a good soaking without water getting into the match head. Second, it makes them burn longer and stronger. The paraffin wax becomes fuel. I have found that wax-coated matches will burn about twice as long as uncoated matches, with a flame that is about 1/3 higher. This is definitely a good thing when you are trying to build a fire.

When I was a kid/teenager, film canisters were the thing for storing matches. A film canister of waxed matches and a companion full of Vaseline gauze was the firestarter of the day back then. I think that died due to the popularity of sparking firestarters and the near total disappearance of film. If you can run across some film canisters, snatch 'em up! I always liked the clear ones whose top fit into the can, creating a smooth cylinder, and reducing the likelihood of the top being pulled off in a backpack or pocket.
A Note On Match Technique
It might seem silly to include a note about how to strike a match. This is one that I've learned first-hand, and saw in one of the survival books I've read in the past few months. When striking a match do not hold it by the end of the stick. This places pressure on the center of the matchstick and can cause it to break. This is very true of long, survival/lifeboat-type matches, and it is true of weak kitchen matches.

A broken match is harder to strike, and it is hard to direct the flame where you desire it. Instead of holding the match only by the stick, also support the head of the match with your index or middle finger. This supports the middle of the matchstick and prevents it from breaking. It ensures good contact and good friction with the striking surface giving you better ignition reliability, as well.
Firestarting Tools: Lighters
The other major category of flame-producing tools is lighters. Lighters come in all shapes and sizes and some are better than others. For some reason I've never been a huge fan of lighters and have always preferred matches. As such most of my experience around refillable, butane lighters is from lighters I ordered specifically for this article.
Disposable Lighters
Disposable lighters like the cheap 3-packs of Bic Classics on the "impulse racks" at the checkout line are inexpensive and very accessible. I have a TON of these things around the house. As a somewhat preparedness-minded dude it's hard to pass these by when I see them...but I don't have one in my survival kit. I'm not saying they are bad, but they do have some significant disadvantages.

First, they are fairly fragile. Though most disposable lighters will last a long-time in the pocket or purse of cigarette smoker, they don't hold up quite as well to the rigors of outdoor use unless well protected. The striker mechanism is susceptible to grit, and highly susceptible to rust when exposed to moisture. The plastic on some lighters is very flimsy and can be crushed just by stepping on it. All of these lighters are susceptible to fuel leakage over time, though again, some are better than others. Finally - and this really is a huge problem - the fuel begins to gel at 32°F and the lighter will no longer work until warmed up.

Personally my pick for a disposable lighter is the Bic Classic. It is about as tough and reliable as a disposable lighter gets. Some experts recommend lighters that are transparent to allow you to check fuel level, and lighters that have an adjustable flame. Those are desirable features but there is generally a huge decrease in quality when going to lighters with those features. You might find a good one or you might not. My recommendation is get a Bic, get it in a bright color, and verify it works. Tighten a zip-tie around it, under the fuel switch to keep it from depressing inside your pack. Have lots of spares, and don't rely on it as your primary, in-case-of-emergency firestarter.
Butane Lighters
Butane lighters have some massive advantages. First, they are windproof. The wind can blow as hard as it likes and it's not going to blow out your lighter. Butane lighters produce a very intense flame that can light some pretty robust "tinder." They're refillable, they don't leak, and you can get them with rugged, waterproof housings. For this article I ordered two butane lighters.

The first is bright orange, waterproof, floating, butane lighter from UST. I'll be honest: this lighter feels very cheap. The lighter assembly pulls out of the housing for filling. Both components feel kind of crappy. Both worked just fine for me, but I would be very careful not to subject this lighter to a lot of impacts. It's just seems like it's made of cheap plastic that is just itching to crack when it gets cold.

On the plus side it seemed to work pretty well. Only time will tell the tale about its longevity but so far, so good. Additionally, this is a truly waterproof lighter as long as the housing is intact. The housing seals tightly. It also floats. I can't make either of these claims about the next lighter I tried.
The second is a classic Zippo with a modern, butane insert. The classic Zippo has some problems with its fuel-delivery system. You pour lighter fluid into the cotton wadding in the lighter and hope it stays there. But it doesn't. Inevitably it evaporates and you're left with a lighter with no fuel. It's also really, really easy to overfill, leaving you with a greasy, stinky lighter, and potentially contaminating other stuff in your kit. I love the classic Zippo look and feel as much as the next guy, but it's not ideal for survival use.

If you you have an old Zippo lying around and don't want to buy a new lighter, or you just really, really like Zippos, here are a few considerations for you. First, choose a Zippo in a bright color. Theoretically a chrome Zippo could be used for signalling. Realistically, I wouldn't necessarily count on it and would greatly prefer a dedicated signal mirror. Still, multi-purpose items are desirable, so I'll leave that one up to you. Personally I prefer an orange version.

Second, fill your Zippo right before you go out. It all you're doing is a day hike that should be fine. Finally, just to ensure your Zippo keeps working, you can stash an extra flint or two under the cotton pad when refilling. If your flint craps out you know you have a spare. If you're counting on this lighter I would also highly recommend carrying some spare fuel as well.

The Modernized Zippo
You can upgrade your Zippo with a modern, butane insert. I ordered a Zippo and the insert for this article and admit really, really digging the look, feel, and even the smell of the legacy Zippo (I smoked a bit as a teenager and - of course - had a Zippo). However, the downsides aren't enough to convince me to use it for serious purposes. The butane insert fits a standard Zippo body. It is refillable with pressurized butane, and comes in either a single- or double-burner option. The double-burner option burns hotter but the single conserves fuel. I think I intended to order the double but the single showed up.

The flame is hot, strong, and adjustable. To adjust it simply remove the lighter from the housing. A refilling port is on the bottom, as is a screw with a "+" and "-" which adjusts the flame up or down. I haven't worked with this lighter long enough to swear by how long it holds a tank of fuel. If other butane lighters are an indication it should have no problem keeping its tank full for months. Again, I really dig this, maybe out of nostalgia's sake. Keep in mind the downsides of this lighter, though: it is not waterproof and it will not float.

One potential downside to the butane lighters (and disposable lighters for that matter) over the legacy Zippo: you can't light it and set it down lit. The old Zippo can be lighted and sat down, and will continue burning. You don't have to hold anything to keep it going. The newer butane lighters require that you hold the fuel button down to keep the lighter lit. I doubt this would come into play in very many scenarios but it might. And I like the idea of using the old Zippo as a makeshift, short-term candle if needed.
Zippo Upgrades
Yet another option for modifying the Zippo is Thrym's Pyrovault. It is a high-impact plastic Zippo body that is waterproof. It will accommodate the standard Zippo lighter (minus body) and some other brands of butane lighters (it will not work with Zippo's butane insert unfortunately). I think this is a super neat item but it adds significant bulk to the lighter, as well as significant cost ($30).
Other Firestarters
There are a host of other firestarting tools out there. I couldn't hope to even mention every single one of them here, let alone cover each on in depth. I will cover a few, though. Some of these are things you may consider adding to your kit, some are items of opportunity, and some you may want to stay away from.
Fresnel Lens
I have never used or even owned a Fresnel lens. It is nothing more than a thin, flexible magnifying "glass". They can cost nearly nothing, take up almost no space (they fit in your wallet), and can go anywhere without being caught by a metal detector or flagged as suspicious (you can always pass it off as a simple magnifying lens)(realistically, though, my nanoStriker has flown with me hundreds of times; I have only been asked about it a couple of times at concert venues and once when entering DEA headquarters for a speaking engagement). Fresnel lenses work by concentrating the sun's rays. I think the method of ignition is a little "out there" but I really should give this a try - expect to see something about this soon.
Lighter Options
There are definitely some more exotic firestarting options out there. I've talked about the problems with the classic Zippo (it won't hold fuel very long). A good alternative if that sort of thing floats your boat is a field lighter like the Douglass S Field Lighter reviewed by my buddy Matt at EverydayMarksman. Personally it's not for me, but if you dig it and can afford there is no reason it wouldn't work beautifully as a firestarter.
There are also various new electric lighters that produce an arc rather than a flame. These have the advantage of being USB-rechargeable and they are completely windproof. Still, I'm somewhat skeptical of a tool like this for survival purpose. That's probably just me being old and set in my ways, but if carrying a lighter I'd prefer one that throws an actual flame.
Steel wool + 9V battery
This is a very cool trick: hold both contacts of a 9V battery up to a wad of fine steel wool and watch it begin to spark and smoke and be consumed. If you happen to have these things, cool, use them! But this isn't the type of thing I would pack "just in case." There are just too many other, better ways to make fire.
Fire Piston
I consider the fire piston the worst of both worlds. If you aren't familiar a fire piston is a tube fitted very closely to rod that fits inside it. You drop a bit of tinder material in and slam the rod. The air inside is rapidly compressed and heats, sometimes lighting the tinder, which is then shaken out on to a tinder bundle and blown into a flame. As I said, I think this is the worst of both worlds because it requires a specialized tool, and requires a lot of care in tinder selection. Maybe I'm missing something but this one is not for me.
Primitive Tools
The bow drill is a thing I very much want to get good at. I love the idea of being able to make fire with no other manmade objects but a knife. However I haven't invested the time to learn and honestly, it's not high on my list of priorities. This is where I part ways with most survival experts, and this will probably draw some hate my way, but it is a massive investment in time for a very low likelihood event that is fairly easily prevented. Knowing primitive methods also isn't an ironclad guarantee of a fire, especially in an emergency when it's dark, you're injured, hypothermic, etc. It takes a decent amount of craftsmanship to make a bow drill, and even experts have a difficult time making them work 100% of the time. Again, I think this would be a super cool skill to have and I want to learn it one day, but I still wouldn't totally rely on it.
The Makings of a Fire: Tinder
A fire begins with tinder. Tinder is the lightest, finest, and driest of all your fuels. The other two are kindling and fuel. Effective tinder is the most difficult of the three to come by, so it is where we will spend the most time. Tinder is the fuel that can be lit with your firestarting tool, be it matches, flint and steel, or something more esoteric like a the primitive methods mentioned above. Tinder can be more time-consuming to create and can be very difficult to find, especially after dark and especially in wet weather - probably the exact time you really, really need to get a fire going.
Your tinder must be matched to your firestarter. If your firestarter only produces sparks, you must have very fine tinder that will catch a spark. The fibers of the tinder must be fine enough that they will be heated sufficiently by a single spark to combust. If your firestarter produces a match or a flame you can use a much broader array of material as tinder, including paper and wood shavings.
Manmade Tinder
Manmade tinder is far more forgiving than natural tinder. However, it requires forethought to prepare and it is expendable. Nearly infinite varieties of manmade tinder abound from purpose-built, store-bought products to simple stuff that you probably already have at home. I am only going to address a few.
Vaseline Cotton Balls
cotton balls that have been swathed in petroleum jelly make excellent tinder. In fact, this is my preferred tinder and one that I am loathe to hike without. Though slightly messy to create and package, with they are very forgiving when it comes to making fire. You can also make a couple hundred of these for well under $10 (cotton balls, petroleum jelly).

When making these guys start with 100% cotton balls. Don't try to saturate each and every fiber. Get a good coating of petroleum jelly on the outside of the cotton ball and leave it at that. When you are ready to start a fire, break open and fluff out a cotton ball out to make a large target for your shower of sparks. The individual fibers of a cotton ball are small enough to catch even very small sparks and nurture their heat into flame.

Once a flame is established it will wick the petroleum jelly up as fuel. A large cotton ball covered in petroleum jelly will burn for as long as ten minutes. This lets you start your tinder, then have plenty of time to get small shavings and twigs going to establish a more substantial fire.

I carry several in waterproof, plastic match case in all of my survival kits and packs. The case is waterproof, takes up very little space, weighs very little, but carries enough Vaseline cotton balls to start several fires, or allow me several do-overs should I need them.

Tinder-Quik Tabs
Tinder Quik tabs are a commercial tinder that resemble a very tightly packed cotton ball. They are treated with something (they have a vaguely oily smell), are water resistant, and ignite easily once fluffed up. They are extremely compact. I keep two in the tiny tinder compartment of my exoTAC fireROD firestarter, the primary sparking firestarter in my kit. Though similar tinder-tabs are made by other companies I greatly prefer the originals from Four Seasons Survival.

To use a Tinder Quik tab, break it open. They are packed very tightly so you will have to fluff them out a bit. Once fluffed out they will catch a spark very easily. Each one will burn for approximately one minute.

Uberleben Tindar Wick
The Uberleben Tindar Wick is a super neat little product consisting of a short aluminum tube (about half the diameter and one-quarter the length of an ink pen) with some cord run through it. The cord is highly flammable and will light with a spark. I didn't understand the utility of this until I saw it demonstrated; you spark the cord which ignites and burns readily. Then, by holding the aluminum tube with the burning end of the cord protruding, you can use it as a match to light your tinder. It is a super neat concept and I may add one to my kit. I'm sorry I don't have photos at the time of publication.
Dryer Lint
dryer lint is often touted as a tinder and I suppose it's fine. I'm not a huge fan unless you are on an extremely tight budget and can't afford a bag of cotton balls and a tube of generic petroleum jelly. If if you have the foresight and are taking the time to gather dryer lint, why not take a couple more minutes and combine petroleum jelly and cotton balls? If, for whatever reason, you end up with nothing but dryer lint don't hesitate to use it, but I wouldn't make it my front-line tinder. For this article. I good, fist-sized ball of lint ignited very easily - as easily as Vaseline-cotton - but only burned for around 30 seconds, and not as strongly as Vaseline cotton balls.

Other Tinder Items
There are all sorts of other commercial tinders from fuel tabs to pastes to putties and plenty more. Honestly, I'd save my money and pack a container with petroleum jelly/cotton and a stick or two of fatwood (covered below).
Incidental Tinder
Sometimes we have tinder on us and don't even realize it. This is a good reason to go through your kit occasionally; not only does it help you identify damaged and out-of-date stuff, it helps you remember what you have in your pack. When in doubt in a survival situation dump your pack and take stock (obviously not at the risk of damaging or losing your stuff - don't do it in the middle of a downpour or in pitch darkness); sometimes this can get some creativity flowing. Below are some sources of tinder that you may have on your person incidentally.
Bandages
A lot of you carry first aid kits. How many of you think about them as a fire-starting adjunct? Bandages often make pretty good tinder. They are dry, usually have fine fibers that can be fluffed out to catch a spark, and often will burn decently well. I would try other things first to preserve my first aid capability, but if I really needed a fire and a 4x4 bandage was my best bet I would absolutely use it.

Bandages also make great wicks for flammable hand sanitizer. Any hand sanitizer solution that is 70% alcohol or higher will burn. If you can find 80% hand sanitizer, even better. Generally a hand santizer-soaked bandage works many times better than either the sanitizer or the bandage by itself.

Paper
If your firestarter produces a flame, paper is an excellent tinder. Though you probably aren't hiking with a newspaper in your pack, you likely a have some paper in the form or receipts, business cards, food wrappers, or money. Though most of us would probably hesitate to burn a $100 bill, a fire might we worth much more if you're caught outdoors in bad weather.

Keep in mind that receipt paper and money burn with a little more difficulty than newsprint. This receipt burned, but I kept having to feed it air.
Pocket Lint
You may have some incidental pocket lint. Don't hesitate to use it to get a fire going! But don't count on using this as you may not have any, and it may be soaking wet when you really need it. Also keep in mind that you are likely to procure only a tiny amount of lint from your pockets and it will go very, very quickly, so spend some time preparing your fire set.

Natural Tinder
Being able to acquire natural tinder in your environment is a supremely important skill. While we would all like to have manmade tinder when the chips are down, we can't necessarily count on it. Even if we have done our job to our utmost abilities and prepared, our tinder might have been lost, destroyed, or used up. Being able to acquire what you need from your environment is the best way to ensure you will have what you need when you need it.
I am a big fan of a sentiment that I read in several survival books over the past year: don't worry about the names of plants. Focus on the properties you're looking for instead. With that being said, there are still three plants that I am going to recommend as natural tinder because they are so very good, and between the three of them they grow nearly everywhere in North America They are all pretty easily recognizable and don't require a lot of detailed study. The first is bark from the various birch trees, the second is bark from the various cedar trees, and the third is the cattail.
Birch Bark
Birch bark from many of the various birch species (yellow birch, black birch, and paper birch, for instance) is one of the most forgiving natural tinders that I know of. Birch bark is loaded with rich oil that burns easily and keeps a flame going for a good while - maybe up to a minute depending on the amount of bark you have gathered. Even better, some type of birch that is good for firestarting grows pretty much everywhere east of the Mississippi in the U.S. and across Canada.

Birches are easily recognizable and the bark can easily be pulled off of the trees. Little preparation is required to use the bark; you can strip it from the tree, roll it between the palms, and it will usually take a spark as-is. Though - again - I don't like the idea of learning a bunch of plants down to their Latin name, I would recommend knowing how to spot a birch tree. Combined with a spark they will give you an easy, dependable firestarter.

Frequently when I am hiking and encounter a birch tree I will strip a bit of bark off and stow it in my pocket. If I have to build a fire I will begin with my naturally acquired tinder rather than dipping into my stash of cotton balls. The birch bark can be easily replaced in the wild, but the cotton balls cannot. Since the cotton balls are the better firestarter I want to preserve them until I really need them if possible. Be careful not to strip excessive amounts from trees, and not to strip bark from the total circumference of the tree, which can damage the tree. Absolutely life before tree, but if there are plenty of trees just space out your bark collecting.

Cedar Bark
I have also had very good luck with the fibrous bark of the cedar tree. Cedars can be found in East Coast forests throughout the deserts of the Southwestern United States and up through Canada. I have successfully started fires with cedar bark in environments from scrubby pine forests of South Carolina to the high deserts of Utah.
 Again, the cedar is one tree I would take the time to learn to recognize. A cedar can provide extremely good tinder, good kindling, and decent fuel. Some variety of cedar and/or juniper (which is very close kin to the cedar) grows over much of North America.
Cattails
Dave Canterbury recommends learning to recognize cattails, and I agree, because they grow nearly everywhere and they are tremendously useful plants. Look for cattails near water, especially still water like lakes and ponds. Cattails can provide for a lot of needs including food and cordage. The ripe heads of cattails (the namesake part of the plant) make excellent firestarters. Cattails are so useful that I am trying to get them to grow along my ditch, both as a water break and as a potential tool for future use.

Cattail heads consist of very tightly packed fibers. The tight packaging of these fibers, as well as the cattail head's natural, rain-shedding shape ensures the fibers stay dry deep into winter. These fibers break easily away and fluff themselves out. They take a spark easily and provide sufficient oxygen for the maintenance of a fire. They burn quickly, so be ready with some more substantial before you spark them.

Other Plants
To beat a dead horse: outside of birches, cedars, and cattails, I am not really a fan of learning hundreds of plants. Rather than learn specifics, learn principles and look for the type of material that would make good tinder. Below are a few plants I've run across that would make great - if very fast-burning - tinder. I don't know what they are and don't particularly care - I got all of them to take a spark and light larger tinder. All of these were found in winter.

Pay attention to the nature of these plants - they bear light, fluffy, and airy fibers. Any of these would catch a spark, as would many barks and other substrates. Sorry to beat this to death but look for characteristics, not specific plants. Also keep in mind that the fibers shown here are extremely light and fine. They may flare up very quickly and then die so ensure you have your fireset ready to go before you put a spark to them. If using plants like these to stare a fire, be sure to gather plenty - not just one or two heads. More equals more heat, and more chances to do-over should your first attempt fail (which it very well might).

Manmade tinder is nearly always preferable if the chips are really down and your safety/health depends on getting a fire going. However, manmade tinder isn't always available to you. It can be neglected, forgotten, lost, damaged, or used up. Understanding the principles of fire-making rather than relying solely on consumable goods is a much more durable way to think about firestarting.

Fatwood
Even though fatwood is a natural tinder it is more often purchased than found. If the size of my kit permits I carry a stick of commercially purchased fatwood in my firestarting kit to go along with my Vaseline cotton balls. Fatwood is pine wood that has become heavily saturated with pine resin. This resin is extremely flammable and takes a flame easily. Fatwood can often be found in the stumps of dead pine trees. The resin of the dead tree will succumb to gravity and descend to the trunk and tap root. This resin will protect the stump from rot much longer than the main body of the tree, making fatwood stick around for a while after the rest of the tree is decomposing.

If you can find some fatwood in the wild you should have little trouble starting a fire, but looking for it after you need a fire can turn into a huge expenditure of time and energy. That's why I prefer to bring a stick or two along. When trimmed into small shavings it lights readily from a flaming cotton ball, will hold a fire a bit longer and with more intensity while you add kindling. If you purchase fatwood, choose a stick for your kit that is the reddest and/or has the strongest turpentine odor.
Shavings and Feather Sticks
If you have a firestarter that produces a flame a world of tinder options opens up to you. You can use much bigger tinder because your firestarting tool produces much more heat. An excellent form of such tinder is wood shavings. You can whittle them completely off the stick, or leave them on the stick as shown below. This is called a "feather stick." Made from suitable wood this is an outstanding tinder.

A feather stick (or simply shavings) opens up a lot of surface area. Each shaving now has a ton of surface area to collect heat and to combust. The other nice thing is that even in wet woods carving down will generally get you to dry wood underneath. It's nice to have two ore three of these handy when starting a fire; one or two to get the fire going, and one or two in reserve should the fire die down unexpectedly.
Nature's Tinder Bundles
Occasionally nature will provide a ready-made tinder bundle for you in the form of animal nesting material or birds' nests. Rodents will nest in dry places. If you can find such places you can sometimes find their nesting material. Nesting material is often near-ideal tinder: dry, soft, fine, and fluffy. Same thing with birds' nests: if you can find a bird's nest it will likely be nice and dry and loaded with good tinder material.

The only problem is that finding such nests is a pretty unlikely proposition. There's a reason this appears last on my list - unless you have several hours to poke around looking for this stuff, the odds that you will find it are low. I wouldn't count on it as tinder material. If it presents itself as an opportunistic tool - GREAT, use it! But don't spend hours wandering around the forest looking for a bird's nest, and certainly don't endanger yourself by climbing a tree to get at one. Consider these prizes of opportunity.
The majority of this article has focused on firestarting tools and tinder. This is because these are the hardest part of starting a fire. If you can master tinder collection, and match your firestarter to your available tinder, much of the battle has been won. But not all of it - the next step is kindling.
Principle #2: Work Smallest to Largest
Tinder is the material that nurses a spark into a flame and keeps the flame alight. Kindling is larger fuel that builds enough heat to ignite your ultimate fuel. The second principle of fire-building is "work smallest to largest and don't go too big, too fast." The reason for this is that the fire must become hot enough to ignite the next that that is placed on top of it. Failing to do this means, at very least the wood simply won't ignite and provide you with any heat. At worst it means this non-lit piece of wood will smother at least part of your fire by depriving it of oxygen.
Progress up in the size of your fuel slowly and methodically. A key to this is preparation. Before you ever pull your firestarter out of your pocket you should be prepared not only to light to the tinder, but to work all the way up to kindling. You should also be prepared with plenty of kindling on hand to light smaller pieces of fuel, and enough fuel to keep the fire alive while you walk the woods collecting more and more fuel. I like to spend a good amount of time - 15 minutes or more if I have the luxury - preparing my fireset before I set the first thing alight.

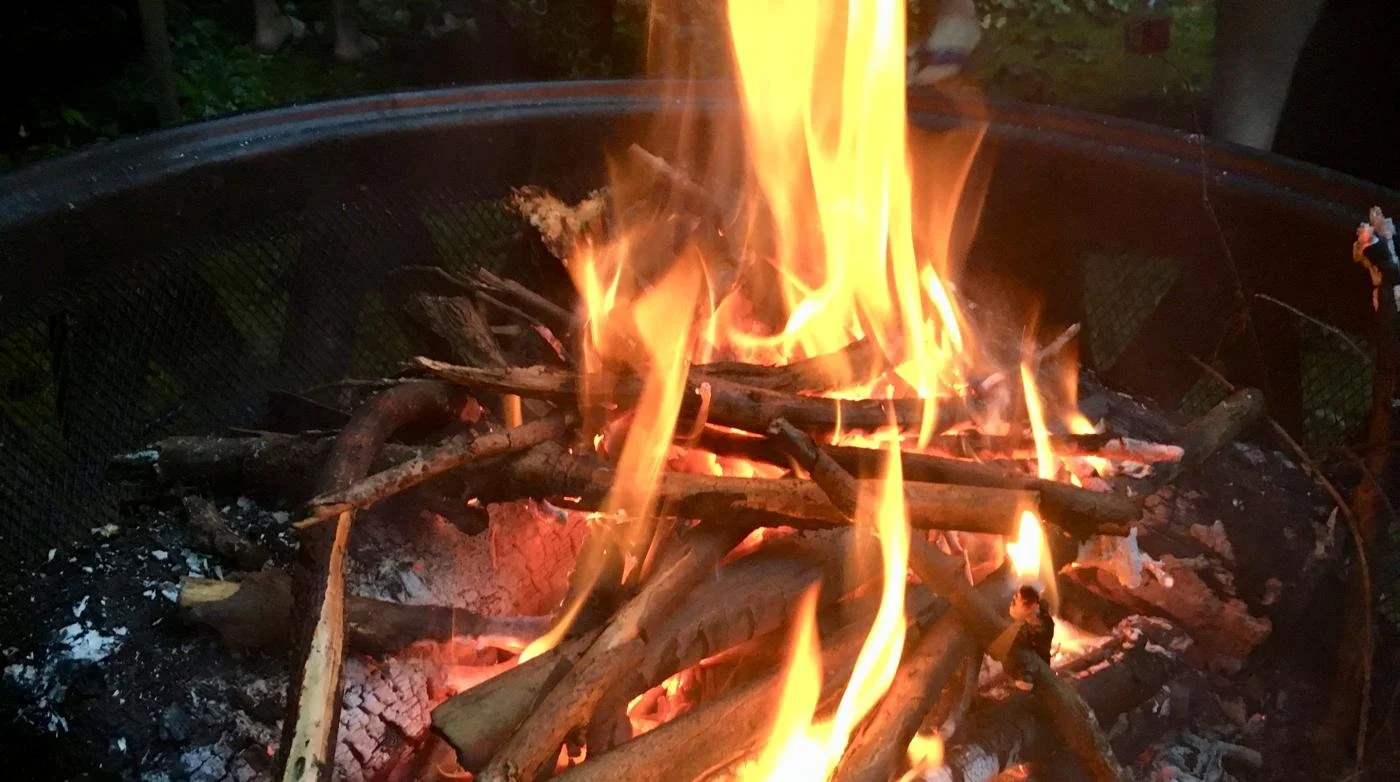
The photo above is a good example. Not shown is a large wad of birch bark that I used to light the fire. The twigs there are dead, fallen birch branches that I scrounged under the same tree. From tiny, tiny little twigs up to pieces larger than my thumb, by working in order I was able to get the largest pieces burning. If I had started with the largest pieces it is very unlikely I would have been successful. Preparation is absolutely critical to successfully building a fire. In your backyard a poor fireset can be compensated for with lots of newspaper or perhaps some charcoal lighter fluid. In a wilderness emergency, preparedness of your fireset (and in the bigger picture your skills and equipment) may be critical to your survival because you may not get a second chance.
Kindling
The next step up from tinder (as you have probably contextualized already) is kindling. Though there is no hard, definitive line that separates kindling from tinder, but it is generally accepted that kindling is anything from pencil-diameter sticks up to stuff an inch or two in diameter. There are some characteristics of good kindling that you should look for.
First, it should be very dry. You are lighting kindling off of a very small, fairly fragile flame. you want to start with very, very dry wood that will easily ignite. Not only should it easily ignite, it should also produce enough heat to light the next size of firewood. Green or waterlogged wood does not make good kindling. Dry wood will typically be fairly light and should retain its structure. If the wood is falling apart or you can easily pick it apart with your fingernail it is probably not your first, best choice for kindling.

How do you tell if kindling is dry? Use your senses of sight, touch, and smell. Dry wood should look dry - so break it open and take a look. Obviously it should feel dry. If you have questions about whether or not it is green, smell it. If it smells of sap it's probably not suitable kindling. Another good indicator you can look for is wood that has been dead long enough to lose its bark. If the bark has naturally been stripped from the wood, or it comes off easily when you break the wood, you've probably found halfway decent kindling assuming it's dry on the inside, of course.

You can look for kindling on the ground, and in trees. Most of us naturally gravitate toward looking at the ground for firewood and that's fine as long as you know what NOT to collect. Sticks on the forest floor usually have one thing going for them: they are dead and have fallen of their own volition. All other things being equal, this should add up to great kindling because this means they aren't green and retaining a lot of water.

However, stuff on the forest floor is exposed to other forms of moisture like rain and snow. If leaves cover them they hold this moisture in and it quickly begins to soak into your potential kindling, ruining it. If you manage to happen across recently fallen sticks then use them! But if they've been lying a while, reconsider.

If you're striking out by looking down at the ground, change directions and look up. Dead limbs that are still attached to trees are often outstanding kindling. Because they are still attached to the tree they are somewhat protected from rain and very often will be dry. Because they have not lain on the ground it is very rare that the will have accumulated much moisture.

A good rule of thumb when collecting kindling (from trees or the ground) is the old Boy Scout admonishment, "if you can't snap it, scrap it." If the stick bends instead of snapping cleanly in two, it's probably not going to make great kindling because it is still green and retains too much moisture. Once you have a roaring fire going you can burn a small amount of green wood and use it for select purposes like keeping a fire, but for kindling your first and foremost criteria is "dry."

Finally, softwoods generally make better kindling than hardwoods. Again, I don't want to put you in the business of memorizing a bunch of trees. A quick, down and dirty way to think about it is: conifers are usually softwoods. If you can find a stand of pines, hemlocks, spruces, firs (or even just a tree or two) you have found softwood. Softwoods will ignite pretty easily and will produce an intense heat that will get your fuel going. As a side benefit, their sap is usually flammable, too. Don't turn up your nose at a good supply of otherwise high-quality kindling (I really like birch, poplar, and sycamore) but when in doubt look for a tree with needles.
Split Kindling
Sometimes splitting larger pieces of wood into kindling has some huge benefits. If you can't find dry twigs, the interior portion of larger sticks may be very dry. Splitting the wood also seems to make it ignite just a bit easier. Splitting your own kindling also lets you make a variety of sizes from very small to fairly large. You can split kindling as described below in the "Batoning" section.
Principle #3: More Than You Think You Need
I recommend gathering way, way more tinder, kindling, and fuel than you think you need. Unless you are just building a short-duration fire for practice or to heat water or something, you will eventually use it anyway, so why not put a few extra minutes in up front?
When you start your fire, a couple things might happen that necessitate much more tinder and kindling that you imagined necessary. Your fire might burn much faster than you imagined, leaving you with a rapidly dwindling fire and a rapidly diminishing supply of stuff to burn. Do you leave it, possibly to burn completely out, while you go searching for more wood to put on it? You probably have no choice but to leave it, but life is much easier if you invest in some extra before you need it. Your entire firestarting attempt might fail, requiring you to relight it. This is much easier - mentally if nothing else - if you have already invested the time up front to have extra supplies of tinder and kindling on hand.

Finally, your fire will eventually die down. When you go to sleep, walk away from your camp for a few too many minutes, or simply forget to check. You will want kindling on hand to get the fire going again, and you will want plenty of fuel to keep it going, especially before you bed down. There is nothing any of us wants to do less than get out of a shelter at 2 AM to go stumbling through the woods to find fuel to keep the fire going.
I have seen various recommendations on how much fuel to gather. My favorite goes like this: gather what you think you will need. Then double it. Then double that. Alternatively, gather what you need, then gather five times that amount. I like both, but in any event, gather up way, way more wood than you think you need. Though it is tempting in training to always build very small practice fires, I also recommend occasionally building a fire and keeping it alive for at least a couple hours on wood you have gathered by hand. It will give you a completely different appreciation of how much wood even a fairly small fire can go through.
Feeding the Fire: Fuel
Once the fire is going, it is time to begin adding fuel. Fuel is larger wood that will keep the fire going for longer periods of times - hours versus minutes. Fuel is generally characterized by its density - fuel is very heavy and dense for its size, relative to the stuff you used for kindling. While coniferous trees (pines, spruces, firs, etc.) make great kindling, hardwoods make good fuel. Ash, maple, hickory, locust, and nearly any oak - many of your deciduous trees - will make outstanding fuel.
Fuel should be dead and dry but is a bit more forgiving about moisture content; your fuel can be a little green or a little damp. A little. If your kindling is doing its job - burning hotly and laying a bed of coals - slightly green or damp wood will still burn. You may find that slightly (I can't stress "slightly" enough) green wood burns longer than wood that is completely dry, making it about ideal for keeping a fire overnight or all day long.
Wood that is too green or has soaked up too much moisture from the ground will not burn well no matter what. Some trial and error may be in order to find the right fuel or blend of fuels. I admit this is the portion of my practice sessions that normally gets short-changed. I spend a lot of time starting fires and not a lot of time keeping them alive.
Finding fuel that is already broken down into firewood-sized pieces is somewhat unusual. Good firewood is hard and dense for its size. It is unlikely to be spontaneously broken at convenient lengths. There are a couple of ways to deal with this. The easiest is to feed it into the fire slowly, as it burns. Put one end in the fire, when it burns in two, feed a little more in. This is the most energy-efficient method. Sometimes you may need to process firewood. This is where batoning comes in.
Batoning
It is hard to watch anything knife-related on YouTube without batoning coming up. Batoning uses a little bit of physics to help your lightweight knife cut through thick, hard wood. This can be useful for processing firewood, as well as other bushcraft/camp chores, like cutting ridgepoles for shelters. I'm not going to beat this to death but I would be remiss if I didn't at least mention it. First of all, to baton you should have the right knife. You should not baton with a folding knife - a fixed blade is called for. A folder will break if batoned enough, and know you're in the woods without a knife. The photos here demonstrate batoning with an ESEE-4 - just about the perfect general-purpose, outdoors/camp/survival knife. Your fixed-blade should also be very tough, again the the ESEE-4 (or just about any other ESEE knife for that matter). Other good examples see on these pages are the Benchmade 162 (my camp/survival knife) and the Becker BK10.

Next, you will need a baton. This is nothing more than stick that is long enough and strong enough to make repeated, somewhat precisely-placed blows. You are going to pound the knife through a piece of wood, so you will want something that won't break. Wood that is too dead/decomposed with break, while wood that is still somewhat green will not. You will also want a stick that brings some weight down onto the knife, but that is controllable. Hardwoods are generally best suited for this task. After you have acquired your baton you're ready to go.
To cut a piece of wood in two, align your knife perpendicular to the wood. Place the blade against the surface of the wood and turn it to a 45-degree angle.

Bring your baton down onto it, striking flatly on the back of the blade. It should cut into the wood.

Remove the knife and replace it, this time an inch or so away with the blade angled 45-degrees back the other direction (the two angles should meet each other to form a V-shaped notch).

Repeat, going back and forth. A notch will develop. As the angles get too deep rotate the log and form a notch all the way around the log. Once you have cut around the entire circumference of the log you will likely be able to break it in two. Unless a log is exceptionally hard, or exceptionally large, you should be able to make relatively quick work of it.

To split wood, use a similar technique, but start at the end of the log. The log I used for the photo below is off my woodpile and, naturally, was cut with a chainsaw (for expediency's sake). Place the blade flat against the log. If possible try to align the blade with preexisting cracks in the wood along which it is already predisposed to split. Now strike it with the baton until it splits the wood.

A couple quick cautionary notes are in order here. First, don't try to split anything that is larger in diameter than your blade is long. If you can't strike the end of the blade it may become stuck in the wood. Second, use only a wood baton - don't use a stone or similarly hard object. At very least you will damage your knife. At worst you may break it. This is a very quick down-and-dirty primer into batoning. This article goes into substantially more detail about the technique.

Site Selection
Before you generate sparks or a flame you first want to consider placement - where we are building the fire. Here are a few considerations.
Safety: One component of placement is safety. I hear the old joke, "if I get lost I'll just start a forest fire and wait for the firemen" pretty frequently. It's usually meant humorously, but you definitely DO NOT want to find yourself in a forest fire. You are very likely to die, kill others, cost millions of dollars to put the fire out, destroy hundreds of acres of forest, as well as burning down homes and vehicles. I think we can all agree that statement should be considered nothing more than a tired old joke that is ready to be retired.
Since we do not want to start a forest fire - indeed, we want to carefully avoid it! - we want to clear the general area of flammable material, with the exception of material we are intentionally providing the fire. We don't want to catch leaf litter on fire, so take your time to dig out a fire pit. Remove organic matter from your site. Surround it with rocks if you like. The old rock ring is probably is cliche for a reason - it works pretty well to contain the fire. Use caution with rocks from creeks or rivers; they may contain moisture that, when heated, expands and causes the rock to explode. Other than safety there are several other factors that impact where you build your fire.
Level: You probably want to have a nice level spot upon which to build your fire.
Wind: You do not want to build a fire right in the wind. Wind will create a safety hazard by blowing embers around. it will make it hard to build a fire, hard to keep it going, and hard to get much benefit from the heat of the fire. Try to select an area somewhat sheltered from the wind. A log, large rock, or even a tree to one side of the fire can shelter it from the wind. If you can't find an area that is naturally sheltered from the wind you can erect a shelter by stacking rocks rocks or logs to the windward side.

Rain: If it is raining you may try to build your fire under some sort of natural shelter. Use caution not to build too large a fire under a flammable object (like a tree). Rock formations might work for this purpose. Generally once the fire is really going it would take quite a bit of rain to completely extinguish it, but if you are expecting heavy rain this should be a consideration for you.
Shelter: If you are spending a night in the woods, you will also want your fire in proximity to your shelter, though not so close as to endanger it. Close proximity will allow you to keep an eye on it, and it allow it to provide from some warmth when you are actually in your shelter.
Fuel availability: Rather than bring the fuel to the fire, bring the fire to the fuel. Don't camp in an area where you have to traverse great distances to gather fuel. Camp near the woods where fuel is accessible. Though you will eventually find yourself traveling farther and farther for fuel, don't start with a long trek for it. Sometimes this might mean building your fire near a large log that you want to use as fuel. Rather than spend energy cutting it up you can start your fire at an end and keep feeding the log in.
Practice sites: You will notice that a lot of the fires shown in this tutorial were built in the fire ring in my backyard. While I wish every fire I made were deep in some primitive wilderness area, that's just not possible. Your backyard, in a fire pit or even a charcoal grill is an excellent place to practice the fundamentals of fire craft. Don't wait to practice until you have the "perfect" location to begin practicing.
The Fire Set: Putting it All Together
At this point you have your firestarter(s). You have accumulated tinder, either natural or manmade, and you have gathered of kindling. You have also gathered some fuel, and you have way more of all three than you need, and have chosen a safe, sheltered spot for your fire. Along with some oxygen, you are now ready to put these items together into a fire.
I like to start by putting down a foundation for my fire. This is especially true when the ground is soggy, muddy, snow-covered, or otherwise wet. This lets me get my tinder up off the wet stuff, and once the fire is going it will turn into a bit more fuel. It also gives you a slightly more stable foundation upon which to work. I like to take sticks of about an inch in diameter and break them about a foot long, give or take. I then lay them side-by-side until I have a nice little platform.
 Next, there are two schools of thought. One is more geared toward primitive methods of fire-building and says you should have your tinder and some kindling already stacked up in a tipi or log-cabin arrangement. You then simply add your flaming tinder bundle and the fire comes to life (below is a pretty piss-poor example of that, but an example no less - I'm just not a fan of that style of fire building).
 Below is a log-cabin arrangement. I tend to prefer this over the tipi if I am going to pre-build a fire like this. First, the big, open top lets me set my tinder bundle in, and add more tinder and kindling. Next, once the fire is going I can stack other flammables on top of the "cabin" to let them heat up and, if necessary, begin drying off. The openings in the side allow for plenty of air flow, and they allow me to feed the fire from just about any side until it takes off.
As I said, the principles in this article often apply to all types of fires. Below is a "log cabin" fire lay in my wood stove at home. This is really an excellent way to promote good airflow and get a very hot fire going quickly. I didn't even realize what I was doing until I saw the finished product and realized how closely it resembled outdoor fire sets.

With manmade tinder that burns for a few minutes I find that pre-building a fire set like this isn't entirely necessary. As long as you have plenty of tinder and kindling laid by you can typically add to it a little at a time. This requires attention and patience on your part. Light the tinder and then start with the very smallest of twigs.

As they take light keep feeding them slowly but steadily into the fire. The fire is still very fragile at this pint and will require more or less constant attention, at least for the next few minutes.

As each set of twigs takes light, add some more, increasing slowly in size. Be very careful not to smother the fire at this point. The fire below is off to a really good start. Fires are often smothered by going "too big, too fast." Take your time and let the fire breath. Remember that oxygen is critical to your fire's success, and that you have to build enough heat to ignite whatever you put on next. I find that really thinking about those two principles helps to guide me in how fast to build up my fire.

As you stack wood onto the fire be careful to leave plenty of air space. Oxygen is critical to a successful fire, so leave plenty of space for air to flow. Rather than place sticks side-by-side, alternate them. Create a criss-cross pattern with sticks by stacking them in alternate directions. This helps to ensure adequate oxygenation of the fire. I would avoid laying pieces of fuel side-by-side, closely together at really any point in the process. This greatly reduces the opportunity for oxygen to circulate in and around the fuel where it needs to be.

Notice that as the fire gets stronger and larger fuel is added, the pattern stays the same: add a little bit at a time, gradually increasing in size, until the fire can support the next bigger size. Also notice that as the sticks get larger, they can get longer. This helps them stand somewhat more upright and lean against each other rather than laying on the fire, again providing for oxygen flow.

At this point some of your kindling sticks have likely burned completely through. This leaves an unburned end (or two) sticking out of the fire. These are great sticks to begin feeding back into the fire. First, they have proven themselves flammable. Second, they are already heated and have a hot, smoldering end, and they ignite very easily, adding more heat to your fire. Thirdly, they are there, so why not use them?

At this stage in the fire it should be going reasonably well, but quite a bit of tending will still be necessary. Once you get larger pieces of fuel on and burning you can relax a bit - failing a torrential downpour your fire will be OK. You have time to tend to other chores, go hunt more firewood, or just relax and warm yourself for a few minutes.
Putting the Fire Out
With an entire, massive article about starting a fire, it seems a little odd to talk about putting one out. This plays to safety, however, and should not be overlooked. I like to default to the Boy Scouts' "cold out" standard. A fire should be extinguished until no hot spots remain. The first step in this process is to spread the fuel out. Obviously don't spread it into other flammables like leaf litter, but break what remains of the fire apart. This will help to dissipate the heat, and the fuel will start dying out.
Water will also help the fire go out. Pour liquid slowly over coals and ashes, stirring it in to allow complete coverage. Depending on the size of your fire this may require several trips to the creek, lake, or whatever your water source. Also don't neglect to thoroughly douse any logs with coals embedded in them. These coals may sustain themselves for days in a limited-oxygen environment, only to flare up late. Take the time to wet everything and put the fire completely, coldly out.
Closing Thoughts
And that's it - that's how to get a fire going. As I said in the beginning, there are many other techniques that might be used to start a fire. I have no complaint with any of them in proficient hands. But if you have no preferred tools, materials, and techniques, you could do much worse than the advice offered here.
There's plenty more I could say on the topic of keeping a fire going (something I deal with daily from September to March or April). I would love to show you how to bank coals to keep them alive and various methods of keeping a fire going over a long time. I don't want to get into into it here because this article is already long enough and it has consumed a lot of my time. And, if you can get the fire going you're well on your way and can probably figure out the rest through some trial and error.
Again, I hope you got something out of this. If you did, please consider passing a it along to someone else who could use it. Thank you for reading!

†Perhaps to the detriment of other survival skills, like shelter-building. I need to spend way more time working on that!‡"Mischmetal" actually means "mixed metal" making ferrocerium technically a "mischmetal," too.