In the last installment in the virtual machine series, I discussed the basic setup of Ubuntu. Today I am going to talk about snapshots, why they’re important, and how to manage them. This tutorial will walk through my workflow for working with snapshots.
Snapshot Basics
A snapshot preserves a point in time on your computer to which you can revert back at a later time. Any changes you have made before the snapshot was taken are preserved, and any changes made after the snapshot were taken are discarded. You can probably already imagine how this could be useful, but I will explain.
Snapshots offer us a tremendous security capability. They allow you to record your virtual machine with the latest updates and security configurations before you expose it to any risky behavior. After the snapshot is recorded, you can conduct your risky behavior – internet browsing, opening untrusted documents, etc. When you shut down the VM and restore the snapshot, you are reverted back to the state you were in when you recorded the snapshot. If you happened to get infected after recording the snapshot, it is simply wiped away.
Snapshots can also be used in other ways. If you are a researcher, researching a topic and find a treasure-trove of documents, have twenty five browser tabs open, and need to step away, you can take a snapshot. When you restore to that snapshot you will come back to everything exactly where you left it. Since I am only interested in security, this use for snapshots is outside the scope of this article and won’t be covered in more detail.
Virtualbox makes working with snapshots very easy. This tutorial will follow my workflow when creating and maintaining snapshots. There are basically three steps: get the VM in the condition you want it, record the snapshot, revert to the snapshot, repeat.
Step 1: Get the VM in the Condition You Want It
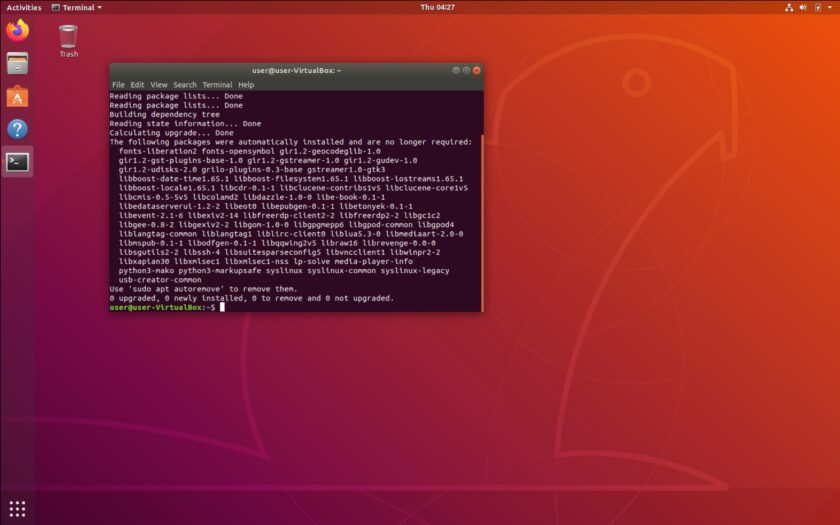
The first thing I do upon booting my virtual machine – virtually every single time – is to check for and install the latest updates. When I restore back to the snapshot, even if it is days or weeks later, I want the machine to have the latest possible updates. As described in my second part in this series, I open the terminal, and run the command to update:
sudo apt-get update && sudo apt-get upgrade
Once updates are complete, you can begin other tasks whose changes you want to preserve. Most days, it will simply be pulling updates. Occasionally, though, it might be installing or removing an application, configuring a program, or adding a durable file (like a password manager database) to the system. Again, only do this if you desire these changes to be persistent.
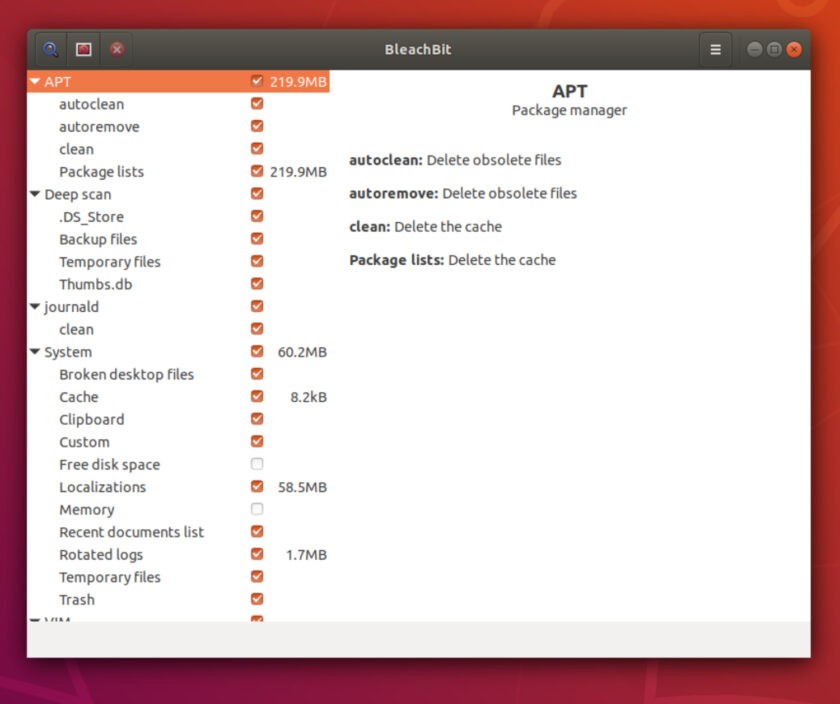
The last thing I always do before taking a snapshot is to run Bleachbit. Bleachbit is a tool that cleans up unused and unwanted files. I run this as much to keep my system running smoothly as for any anti-forensic value it offers. At this point I am ready to take a snapshot.
Step 2: Take the Snapshot
Once the virtual machine is in the condition you want it to be in, you are ready to take a snapshot. From the drop-down menus at the top of the Virtualbox interface (Windows) or at the top of your screen (macOS) click on “Machine”. Alternatively, you can use a hot-key shortcut of “Host + T”. The “host” key is the right Control key (Windows) or left Command key (Mac).
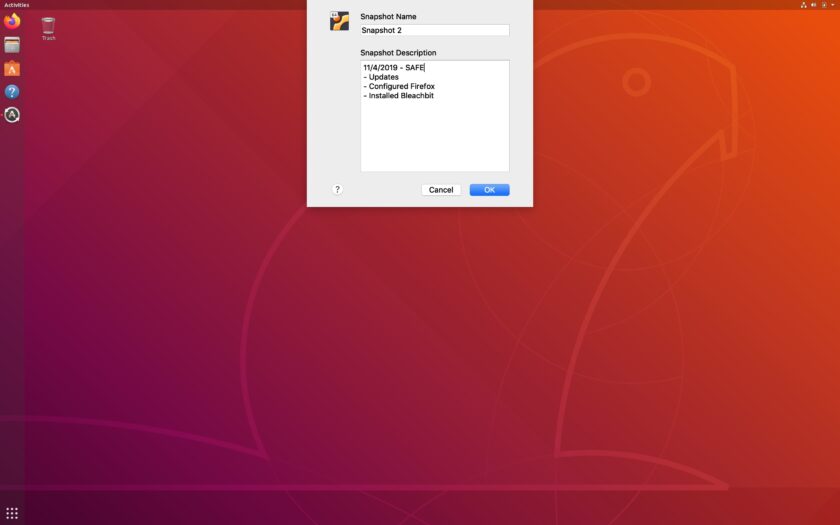
A snapshot dialogue will appear. This dialogue allows you to name the snapshot, and record a description. I recommend taking a moment to fill out the description. I always record the following:
- Date, SAFE or UNSAFE. “SAFE” lets me know that the snapshot was taken before I conducted any risky activity and the likelihood of the VM being infected is very low. If the description says “UNSAFE” I know that I have saved a file or otherwise saved a state with a relatively high risk of infection or other problems.
- Actions Taken. I always list out actions I took with the VM. Usually this consists of nothing more than “Updates” and “Ran Bleachbit”. This at least gives me a rough idea of what configurations I had made and what the VM had been exposed to at the point when the snapshot was taken.
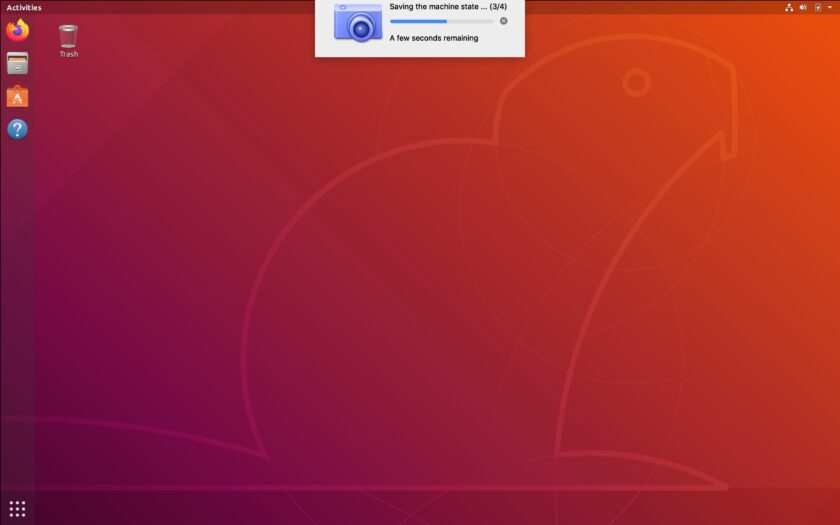
When you have filled in the description, click “OK” and the snapshot will be recorded. This may take a few minutes depending on the speed of your host.
At this point your snapshot has been taken. You can now proceed with your risky activities, knowing that you have a safe point in time to which you can revert the VM.
Step 3: Restore the Snapshot
At this point we have configured the machine the way we want it, created a snapshot of this configuration, and conducted our risky activities and are ready to shut down for the day. There are two ways we can do this: at shutdown or before starting the machine up next time. Let’s look at both.
Restoring on Shutdown: When shutting the guest operating system down through Virtualbox (rather than its native shutdown command) we are given the option to restore the machine to the most recent snapshot. This is generally my preference; most of my VMs are used for untrusted browsing and I have little desire to save files downloaded during those sessions.
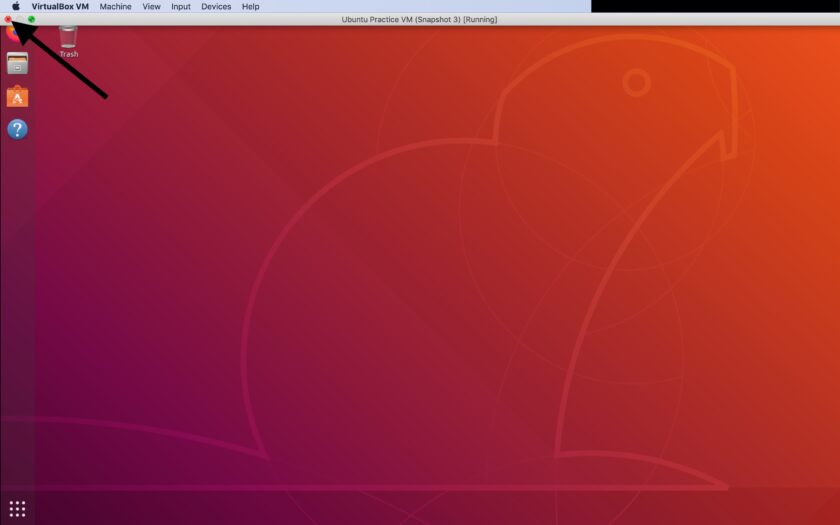
To restore the snapshot go to the top right (Windows) or top left (Mac) of the Virtualbox window. Click on the “exit” button.
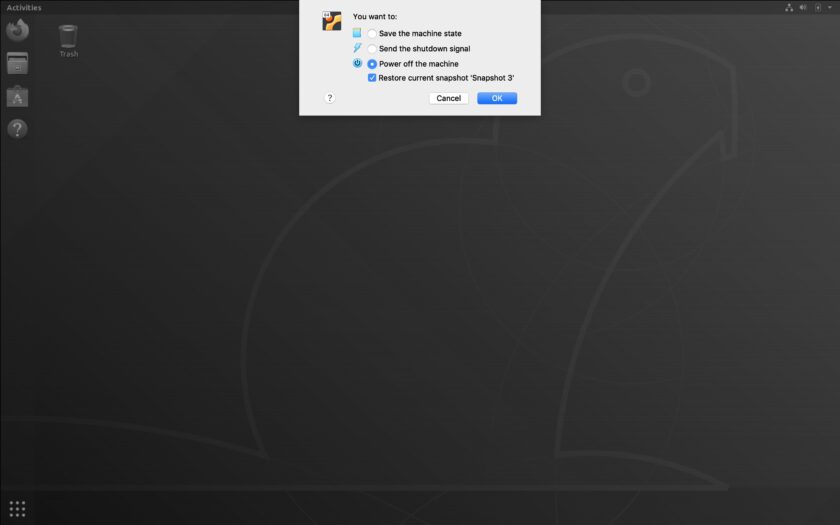
You will be shown a dialogue offering your three options: “Save the Machine State,” “Send the Shutdown Signal,” or “Power Off the Machine”. Select “Power Off the Machine” and ensure that the “Restore current snapshot ‘snapshot X’” box is checked.
The machine will shutdown and the window will close. The next time you boot up, your machine will be exactly where it was when you created the snapshot.
Restoring on Boot: Sometimes you may choose to close a VM without restoring to a snapshot on close. If, in the future you desire to revert back to a previous snapshot you can do so. This gives you the flexibility to revert back to ANY snapshot, not just the last one recorded. You can do this through the Virtualbox interface.
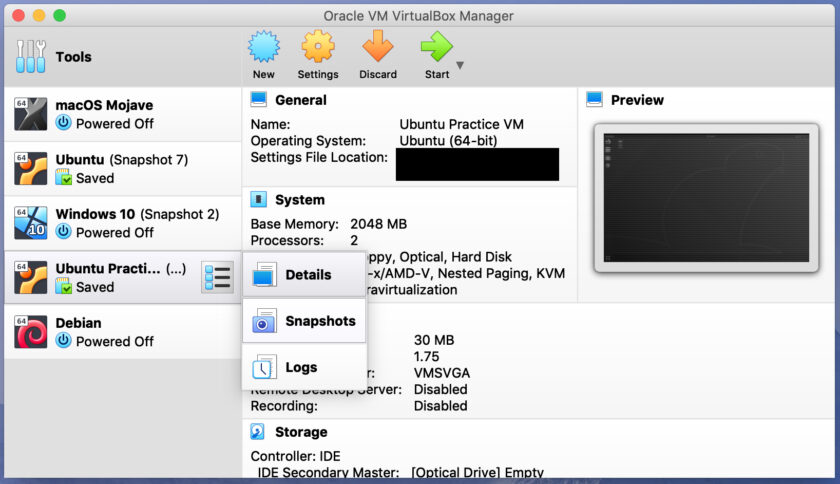
First, select the VM you are working with. Normally, Virtualbox displays the “details” panel which contains information about your VM’s system settings, etc. We want to view the snapshots and choose one. To access the view of your snapshots click on the overflow button (three stacked dots and lines) and select “Snapshots”.
This will open a view of all the snapshots you have created for the VM. Clicking on any snapshot will allow you to see when it was created and read (or modify) its description.
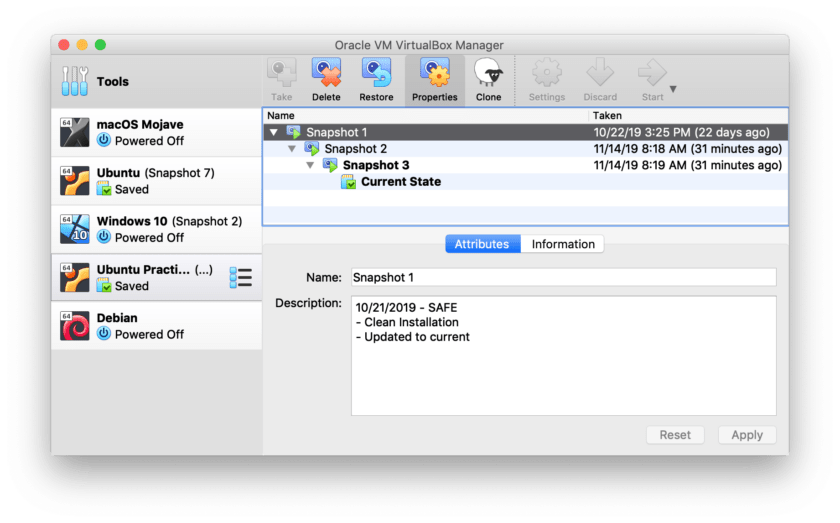
Select the snapshot to which you wish to revert. Going from this example, I am going to revert to Snapshot 2. To so so I simply select it by clicking on it, then click the “Restore” button at the top of the Virtualbox interace. This will overwrite the current state of the machine and the next time I boot, the machine will be where it was when I took Snapshot 2.
Step 4: Repeat
In my workflow I generally open a VM for the day. I do my browsing for the day in that VM. Upon close/power off, I restore it to the snapshot I took in the morning. Tomorrow morning when I get up I will boot the VM, get updates, run Bleachbit, and take a snapshot, repeating the process. This lets me record durable changes – like security updates – daily without dragging trash around from one session to the next.
Deleting Snapshots
You probably don’t want to maintain a whole bunch of snapshots. Snapshots consume a lot of space, so I like to keep them to a minimum. I usually keep two snapshots on hand unless there is a compelling reason to keep more. The two I keep are the very first snapshot I took upon a clean install and initial update, and the most recent snapshot. I like to keep that very first snapshot as a fail safe: if all else fails I can revert back to a known-good state. And obviously I keep the most recent one so I can revert back to it as needed.
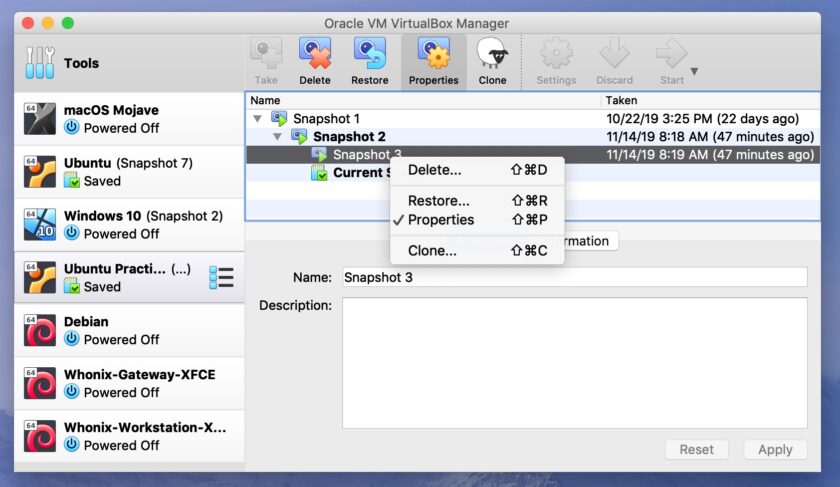
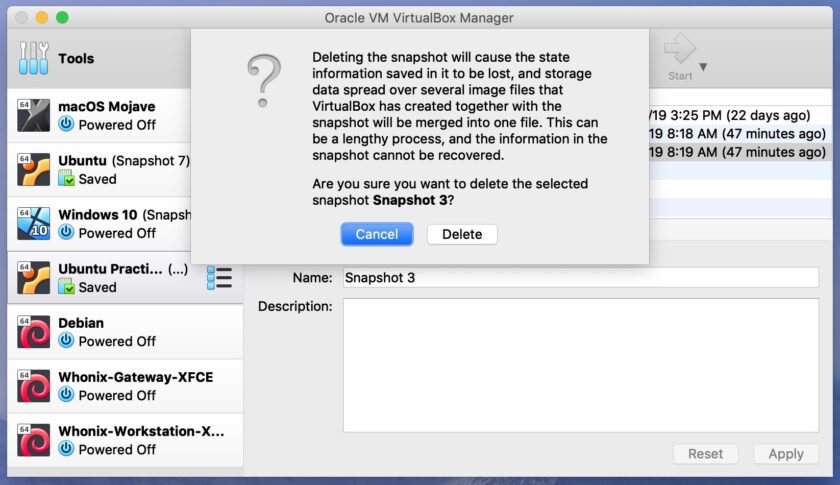
Only maintaining two snapshots means I delete almost every snapshot in between. In this instance I am going to delete Snapshot 3 because I have reverted past it, all the way back to Snapshot 2. Simply select the snapshot you wish to delete and right click on it. In the new dialogue click “Delete”.
You will be warned and asked to confirm the delete. This warning dialogue actually does a really good job of explaining what deleting a snapshot will do.
In Summary
I hope you’ve gotten something out of these last three posts. This is the tutorial I wish I had had five years ago. If I’ve done my job this should be enough to get anyone started using Virtual Machines – I believe they are just as important as virtual private networks and password managers. I still have a few articles planned that will talk about VMs and Linux, so stay tuned!