Survival Cooking: DIY Denatured Alcohol Stove
The soda can stove has always intrigued me. It's about as cheap as a camping stove can possibly get: it takes about 30 minutes of your time and can be made from two soda cans. Fuel is also cheap; a gallon of denatured alcohol will cost you under $20 at Lowes. Today I'm going to talk about the infinitely accessible "soda can stove" or DIY denatured alcohol stove.
This article contains affiliate links.
Building a Soda Can Stove
I'm not going to give specific instructions for building this stove. That has already been done by Ryan over at TheSodaCanStove.com. His instructions are fantastic and I'm not going to try to steal his thunder. Seriously - go read his instructions if you want to make one of these. I managed to make a serviceable stove on my first go. I am going to talk just a bit about the process and what's needed.

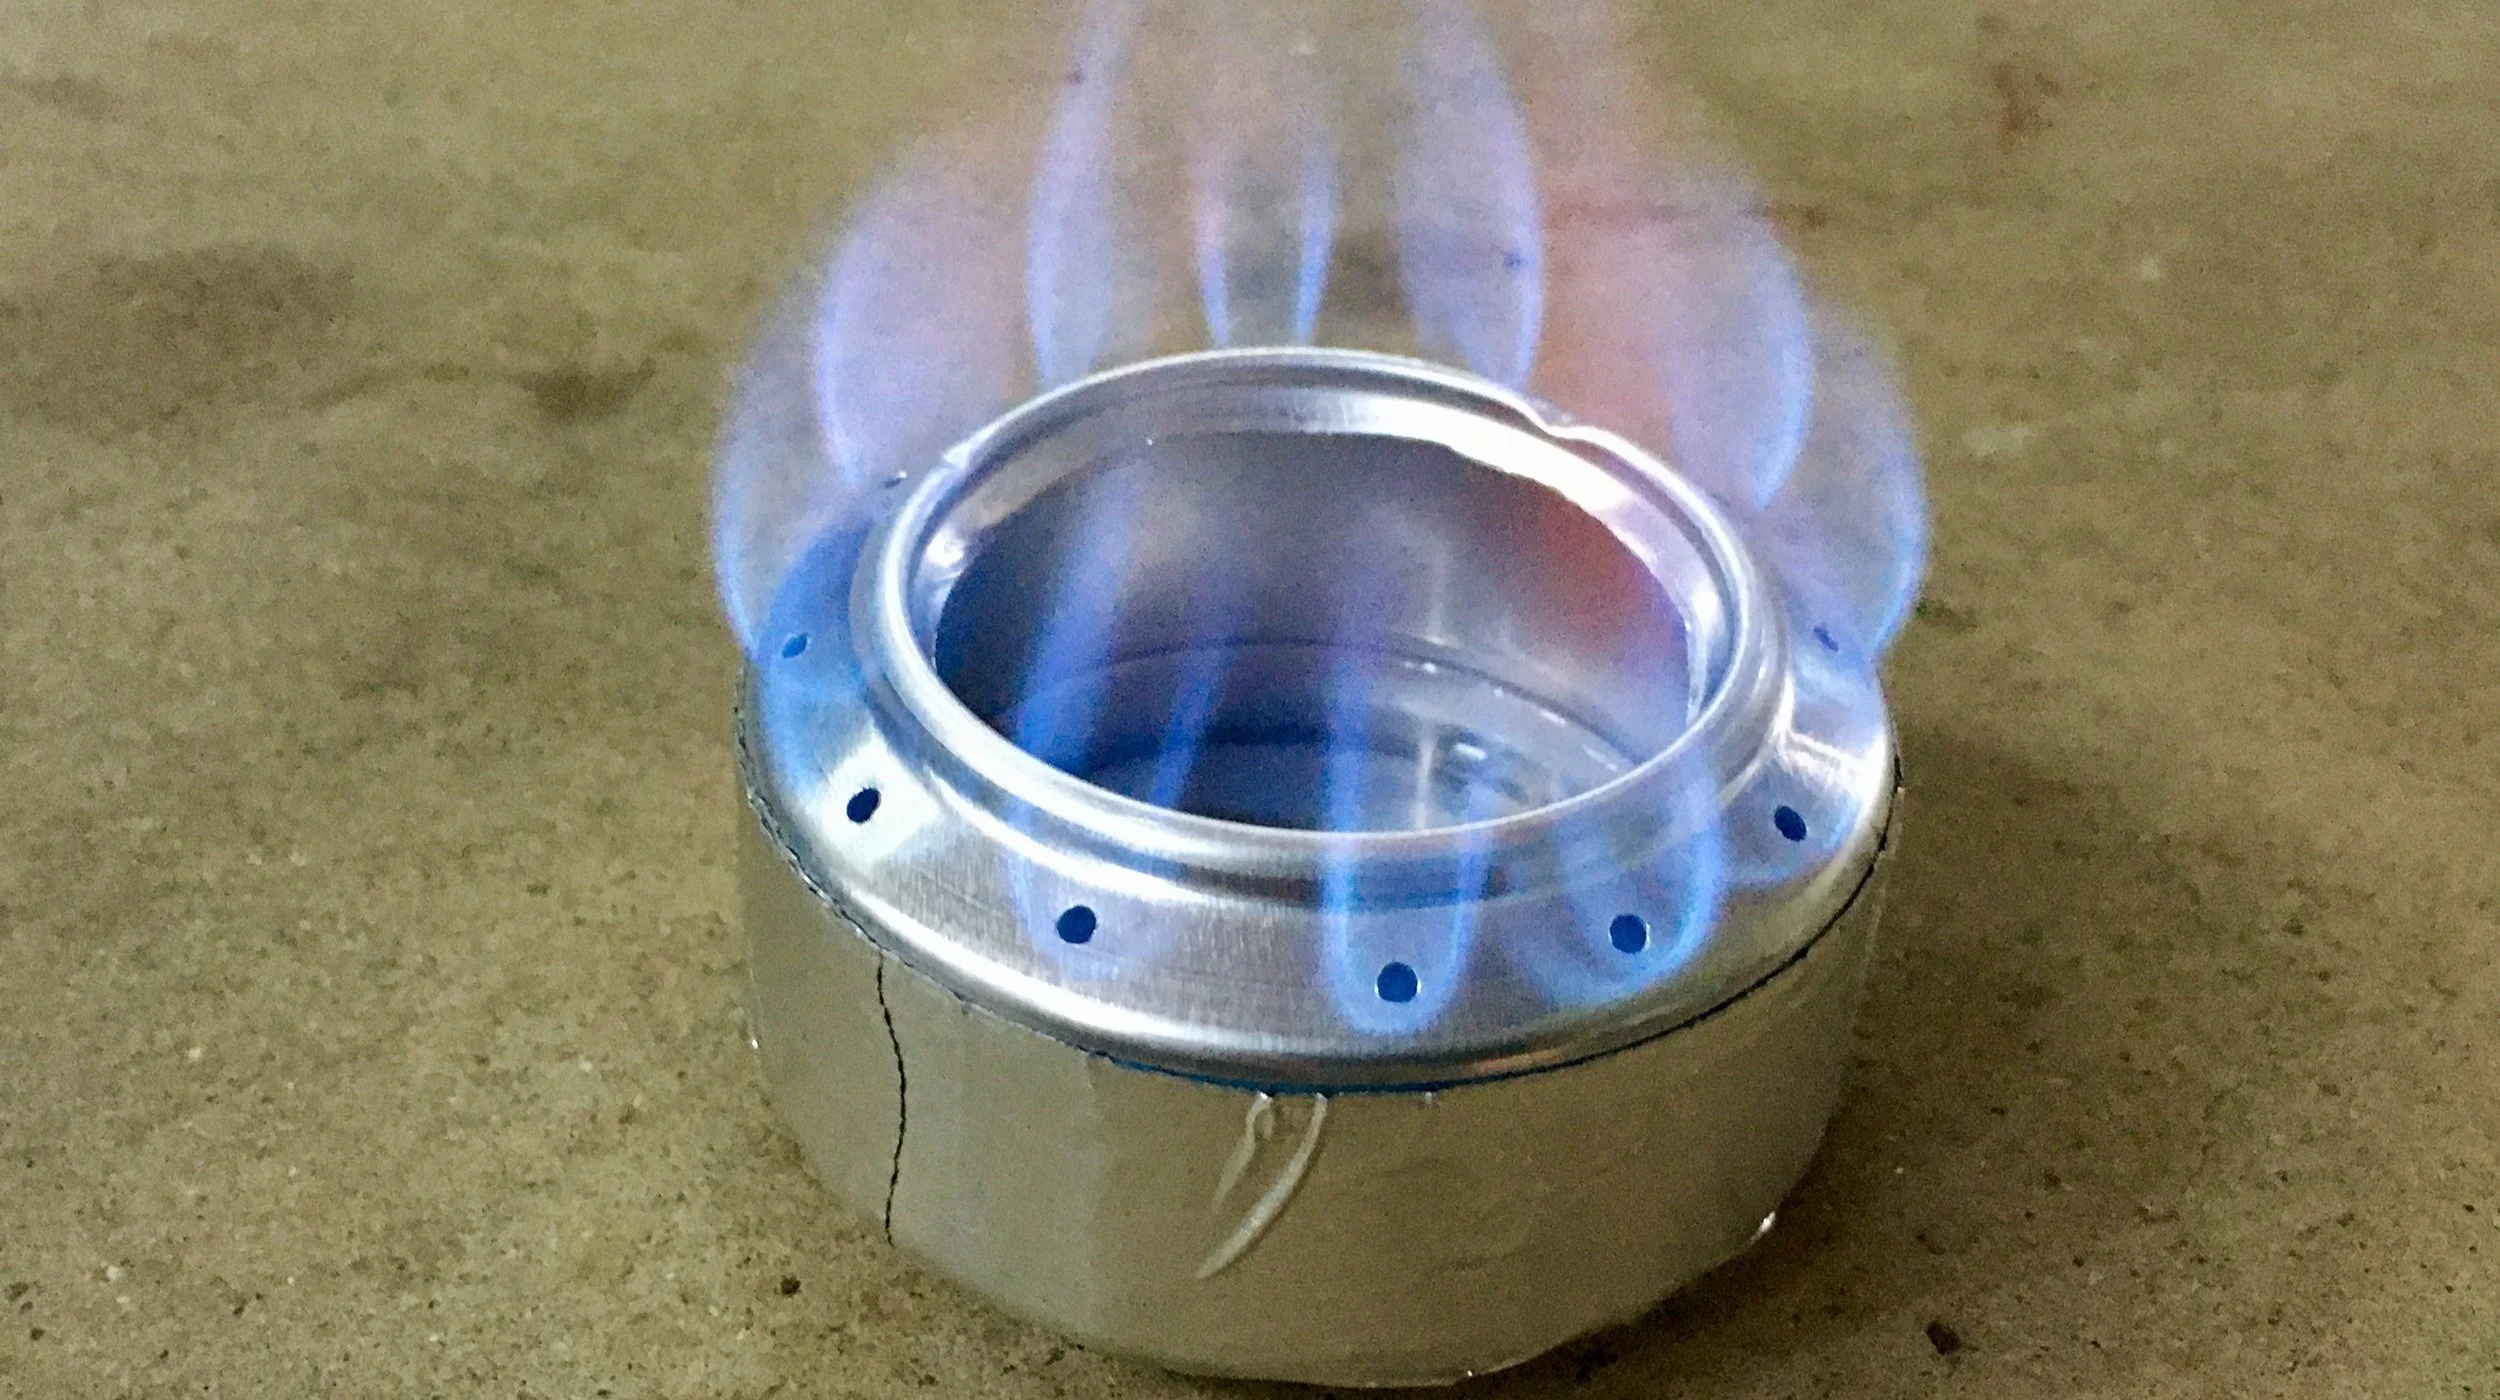
Building my stove took maybe half an hour. I did it sitting at the coffee table while we were watching TV one night, so it wasn't time that I should have been spending elsewhere. The only tools I used were a drill and 5/32" bit (to drill the holes around the burner)(I did that part at my work bench), utility knife, ruler, Sharpie, and aluminum tape (the tape is optional but I like it). You don't need a drill - you could use a scratch awl instead. And kitchen scissors would probably be better than a utility knife. I got it done, though, which probably illustrates a bigger point about how non-specialized the tools for making this stove are.

I also wanted a pot support for the stove; it's not terribly helpful without one. The instructions on TheSodaCanStove.com want you to build one from hardware mesh, but I didn't have any on hand. What did have were some 28-ounce cans of tomatoes. So, I made a batch of spaghetti sauce and saved the can. I didn't do much to it. I removed the label and drilled some holes at the top and bottom to permit air flow.

If you want one of these stoves but don't want to build you, you can buy one. The Trangia Spirit burner is practically the same thing, but made of brass. Brass is more durable, but heavier which has pros and cons. The Trangia model also has a some available accessories (like pot supports) but functionally is almost exactly the same as this $0.25 stove.
Fueling the DIY Denatured Alcohol Stove
Next, I knew I needed fuel so I ran out to Lowes. I bought a quart of denatured alcohol for around $7. I wasn't sure I wanted to commit to a gallon, but in retrospect I probably should have. If you can't get to a Lowes, TheSodaCanStove.com has a list of acceptable fuels, and you can purchase denatured alcohol for about the same price on Amazon.

Using the DIY Denatured Stove
With the stove built, it was time to see what it would do. These things are a little finicky to get lit, and once lit you have to let them warm up before the jet-like action forces the flames through the holes. This usually takes a couple of minutes. Once it's running, though, it burns pretty well with a high, blue flame. I used an 775ml MSR Stowaway pot to test its boil time.

First, I filled the stove to between 1/2 and 2/3 full of denatured alcohol. I lit the stove, then slipped the pot support on over it. It took several minutes for the stove to warm up (ambient temp: ~70°). Once flames were jetting out of the stove, I filled the pot with two cups of cold water and started the timer.

The time for the first boil was 14:36. I let the entire apparatus cool down, and ran it a second time, with almost identical results. Dissatisfied with taking 20+ minutes to warm up and boil water, I tried building a taller stove.

Using a Soda Can Stove: Take 2
I decided to build a taller stove to match my taller pot support. It seemed this might help get the flame closer to the pot. I also made another modification: more and smaller holes in the burner ring. Rather than a 5/32" bit, I used a 1/16th and made twice as many holes. To be honest, I'm not sure the size or number of holes made an appreciable difference.

I lit the stove and put my pot on. At the end of 15 minutes there were plenty of bubbles at the bottom of the pot, but it certainly wasn't boiling. I noticed something interesting: when I lifted the pot slightly, the water would become much more active. For whatever reason this lead me to believe I needed more air flow at the top of the pot support. Back to the basement I went. I drilled three times as many holes in the top of the pot support and tried again.

I also went back to the original stove. This time I hit pay dirt. I noticed that the pot became much more active and had bubbles forming after just a minute or so. In just a tad over 4 and a half minutes I had water at a hard, rolling boil. In fact, this was the liveliest boil I'd seen yet.

Applicability to Preparedness
First, why the soda can stove when there are a million prefabricated stoves out there? Quite simply, they are so inexpensive as to be almost free. The only costs are the alcohol, soda cans, and aluminum tape. Don't have soda cans? Snag a couple out of the recycle bin at work. Don't have a recycle bin at work? Snag a couple beer cans out of your local park's garbage can. On top of that, this stove works almost as well as anything else.
Then you can spend 20-30 minutes when you get home and have a working stove. At the end of a week, you can have one for every member of your family. At the end of a month...well, I'm not sure why you'd need 30 stoves, but you get the idea. Actually, I take that back. If you're the type of prepper who believes a barter economy might be in your future, these might be worth something to someone. They might be worth something to someone now in the form of gifts. Or it might just be an inexpensive way of helping others to become more prepared. And they'd be great for redundant car kits and that sort of thing.

Role of the DIY Denatured Alcohol Stove
Let's talk about the role of these stoves briefly. I view preparedness stoves as falling into one of two categories: the first is unsustainable. This means that you will have to find some sort of specialized fuel. You can stockpile it, but it will eventually run out. The second category is sustainable. Sustainable stoves require fuel, obviously, but fuel is usually wood and is in abundance just about everywhere (at least where I live).
The DIY denatured alcohol stove falls in to the former category. Ethyl alcohol is something that you will have to find or produce to keep these stoves running over the long term. Unsustainable stoves have some huge benefits, though. They are lightweight. This stove weighs nearly nothing, and just a few ounces with its pot support. They are also fast; it would take me longer than five minutes to get a fire going; with this I can have water boiling in not much more than that. They are also packable. Though I deeply loathe the thought of ever having to "bug out" of my house and property, I don't rule it out.
Closing Thoughts
The DIY denatured alcohol stove isn't my end-all, be-all stove. But if I were very cash strapped I'd have no problem with it. I'd also have no problem at all depending on it as a very cheap backup to my JetBoil. It's super compact, super lightweight, super affordable. To repeat myself, it also works really well. Make one and see for yourself. What have you got to lose?
