I absolutely love hiking. We live within the boundaries of a National Forest, and a short drive from two federally-designated wilderness areas. Our house is only an hour’s drive to another National Park. We see a lot of people in the woods, many of whom are grossly unprepared, and we’ve taken our fair share of newbies for their first “real” hike. Here is the advice I would give a beginner on how to start hiking.
This article contains affiliate links.
How to Start Hiking
Hiking seems like a pretty straightforward activity: find a trail, then walk it. Getting into it can be a little bit intimidating, though. I have heard this first-hand from some people we have taken hiking.
As I mentioned in the opening paragraph we run across a lot of brand-new hikers. many of whom haven’t a clue what they are doing. At least three or four times a year we run across someone asking for directions who has no clue where they are. Every time we see others on the trail we see people with minimal equipment or no equipment at all, in actual wilderness areas.
I’ve also recently started writing my recce series. If you fancy yourself as having a recce capability but have never been for a hike on an unmarked trail (let alone an off-trail hike), maybe you should start with some straightforward trail hiking.
This article intends to teach you how to start hiking safely. This article will be broken into two parts. In the first, I will cover the basic gear you need to hike and keep yourself out of trouble. In the second part I will discuss choosing a trail and navigation. I hope this article helps get you out of the house and into the woods safely!
Why Start Hiking
When I started this article I assumed it would be self-evident why you would want to start hiking. I further assumed that anyone reading this would already want to start hiking. Since you’re reading it might be a good time to offer an additional little nudge to get started. Here are a couple reasons to start hiking.
The first reason is hiking is fun. Hiking is tremendously satisfying. There is something deep and ancestral about using your own two legs as a mode of transportation to someplace inaccessible to vehicles. To be out on one’s own, seeing things that the vehicle-bound will never see…there’s something about it.
Hiking is good for you. Walking is very good exercise. Walking strengthens your heart, helps burn fat, lowers your blood sugar, boosts your immune system, strengthens muscles and improves your joints, and is good for your mental health. Hiking has added benefits because it’s really just walking made a little harder.
Hiking also has a bunch of secondary health benefits. It gets you outdoors which exposes you to the sun and fresh air. Sunlight gives you vitamin D and helps regulate sleep cycles. Going for a long hike and making your body tired helps you sleep better. Being in good physical condition improves your confidence. Obviously if you are preparedness-minded, being in good physical condition should be important to you.
How to Start Hiking: Hiking Gear
The first question on everyone’s mind after “how to start hiking” is “what gear do I need?” You need a little bit of stuff but not much. Hiking is really just walking, but in the woods. You need a little bit of stuff to support your body, and just a few things in case something goes wrong, but it’s a pretty manageable list.
Outdoor gear is expensive, but you don’t need to mortgage your house to buy equipment. It might seem like sacrilege, but you actually don’t need all that much stuff. I recommend you carry a backpack with some food and water, some extra clothing, survival and first-aid basics, and have some sort of mapping/navigation. Below I’ll talk about each one of these categories.
I really tried hard to be cost-conscious and to keep my recommendations affordable. You absolutely DO NOT have to spend a fortune to get geared up to hike. If you want to upgrade your gear you can – I probably don’t need to tell you how to spend more money.
Clothing & Shoes
You will need some clothing to begin hiking. Chances are you already have what you need, though. You will need some comfortably, loose-fitting, somewhat durable pants or shorts, a shirt, and shoes. I would steer clear of wearing jeans; denim is heavy, hot, and holds a lot of water if you get wet. Make sure whatever you wear is appropriate to the weather. This shouldn’t be too big a problem if you choose weather conditions appropriate to a brand-new hiker.
Your shoes should be comfortable and broken in. For hikes under five miles on flat, even terrain, you are probably fine wearing athletic shoes. On more rugged terrain you will want something that is more durable, offers better traction, and provides ankle support. I have had excellent experiences with Asolo and Salomon boots. Though they are expensive a pair should last for a long time, especially if only used for hiking.
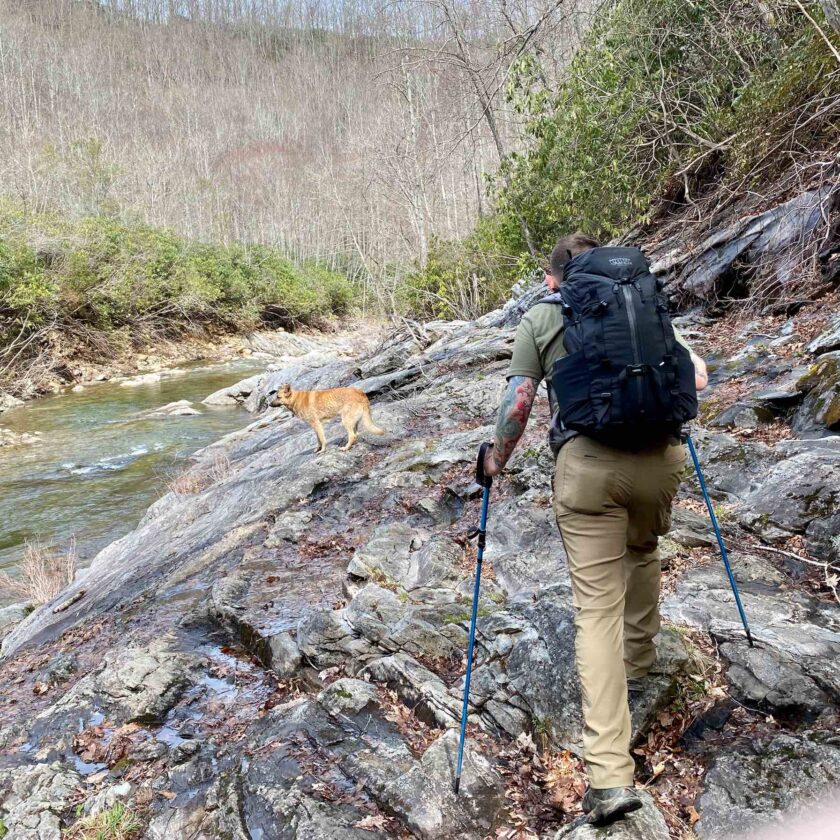
Backpack
Ah the backpack – the mark of a “hiker.” You will probably want a backpack to carry all gear. Even though it isn’t that much stuff, you don’t want to try to juggle it all in your hands. You may need your hands, and a backpack will keep them free. A comfortable backpack is also easy to forget, as long as you don’t overload it with stuff.
A backpack is probably the single most expensive item here. If you can afford it, I would go ahead and get a decent one. You will probably upgrade later if you find you enjoy hiking. If you can’t afford an expensive backpack, don’t worry about it! For our basic hiking load we’re going to be carrying maybe 15 pounds of stuff. You don’t need an uber-technical pack to carry such a light load. Your old Jansport book bag, or any halfway decent backpack from the thrift store will work just fine at this point.
I will offer a couple places to start your search for a pack. Though I haven’t owned all of these exact models, I have owned gear from all these companies.
- Osprey Hikelite 18, $85: Osprey gear is absolutely bomb-proof, and it has the “almighty guarantee.”
- REI Flash 22, $55: this is a 22-liter pack, on the bigger end of what you need for a day pack. REI gear has treated me well over the years.
- Mountainsmith Lumbar, $80-120: I absolutely LOVE my Mountainsmith Tour lumbar pack for lightweight summer hiking. The larger “Day” model costs $10 more, and adding strappettes like mine has increases the price by another $30.
Once you have the backpack, what do you want to put in it?
Water
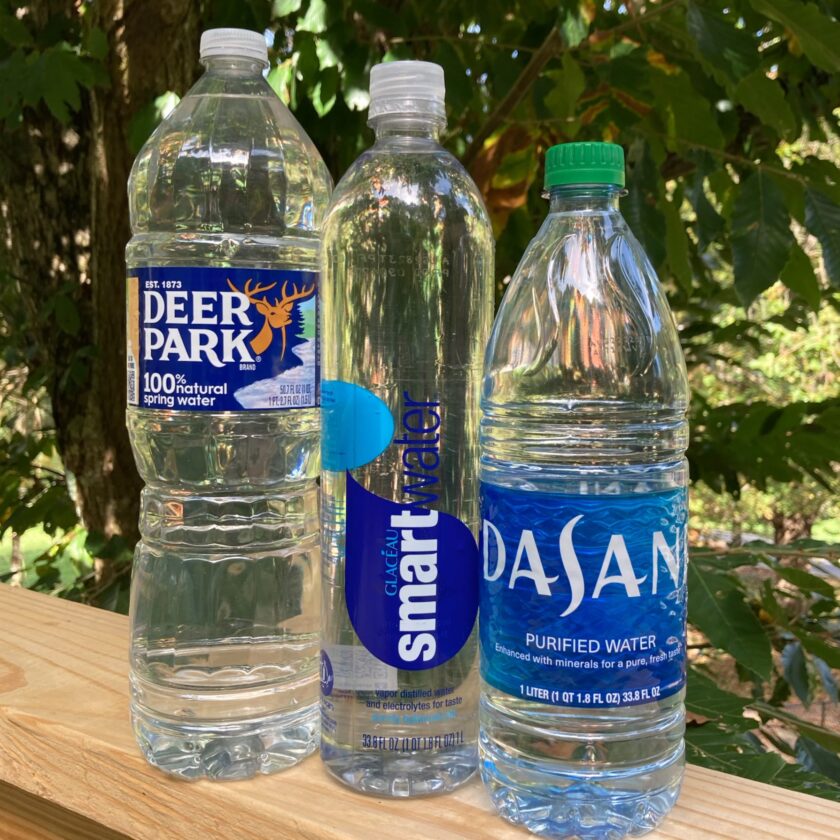
Water is way, way more important than food. If you carry nothing else, carry water! Stay away from soda, beer, and other sweetened, caffeinated, and/or alcoholic beverages. Stick with the good, old-fashioned, unadulterated wet stuff. I recommend a quart of water at an absolute, bare-bones minimum. Two is preferred if you have the room for them. Keep in mind that each quart of water weighs a little over two pounds, so don’t go overboard.
I really like reusable water bottles, especially stainless steel water bottles (Nalgene bottles are really good, too). Unfortunately they can be expensive. There is nothing whatsoever wrong with re-using a water bottle from the cooler at the gas station. I (and many, many backpackers) really like the tall, skinny SmartWater-brand bottles because the fit really easily into a pack. Two of those for a total of $6 and you’re good to go.
Food
You’ll probably want to take a little food on most hikes. If you’re doing a longer hike you’ll probably want to stop for lunch. If you’re doing a shorter hike, it’s still a good idea to have a few things…just in case you end up being out longer than expected. Again, you don’t have to invest a ton of money into expensive hiking foods. Here are some ideas:
- Crackers – those pre-packaged, peanut butter crackers are filling and give a good combo of carbs, fat, protein, and salt.
- Candy – My favorite is a PayDay bar. It’s loaded with sugar for quick energy, and peanuts for longer-term energy.
- Jerky – I like the new Jack Link’s beef jerky bars. They’re compact, durable, tasty, and pack some decent caloric punch.
- Nuts – especially the little single-serve packs. You can buy these individually at the gas station or in boxes at the grocery store.
- Fresh Fruit – Throw in an orange or an apple. Though not quite as durable it’s way healthier than any of the store-bought stuff, and it’s delicious. Just remember to take it out of your pack if you don’t eat it.
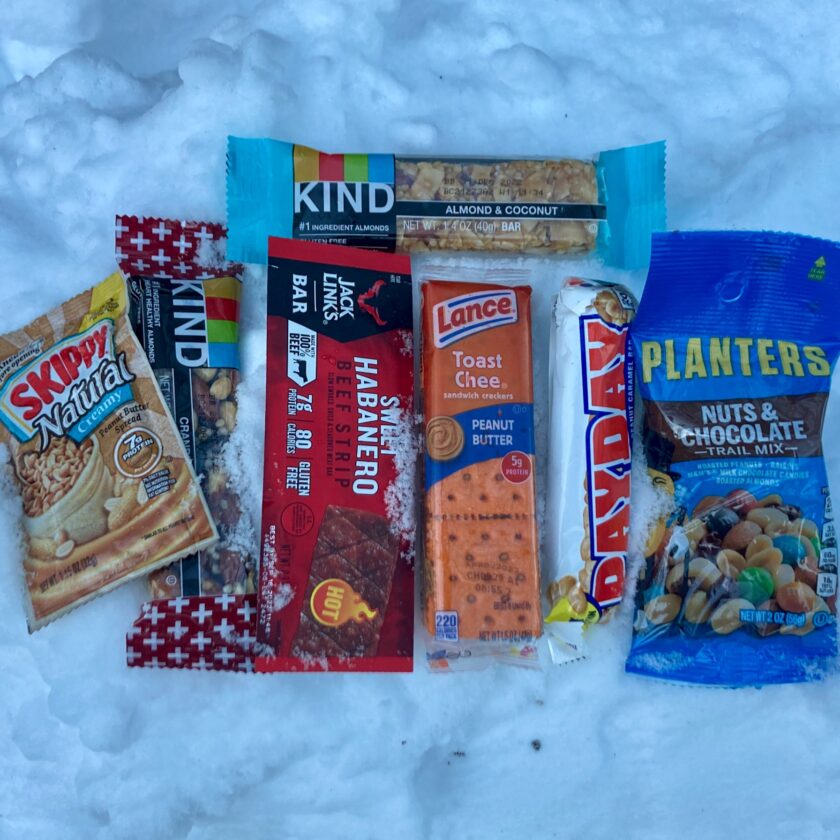
I normally err on the side of having a little bit more than I need without burdening myself with three days of food. If my trip ends up being longer – or much more difficult – than expected I’d like to have an extra bite to eat. On a day hike of twelve – fifteen miles or less this means I can still fit all my food easily into a 1-quart Ziploc bag.
Inclement Weather Gear
Contrary to popular belief you don’t need a bunch of fancy, specialized clothing to go on a hike – at least not for fair-weather hiking. Though specialized clothing does have a place, you can hike in “regular” comfortable clothing. Until very recently I hiked in khaki pants and a t-shirt.
Common sense does apply, however. If you’re planning to hike on a rainy day, you want to wear a rain coat. If you’re hiking in the desert you’ll probably want long sleeves, long pants, and a hat to prevent sunburn. Check the weather before you plan a hike – I would avoid hiking in inclement weather when you’re just getting started.
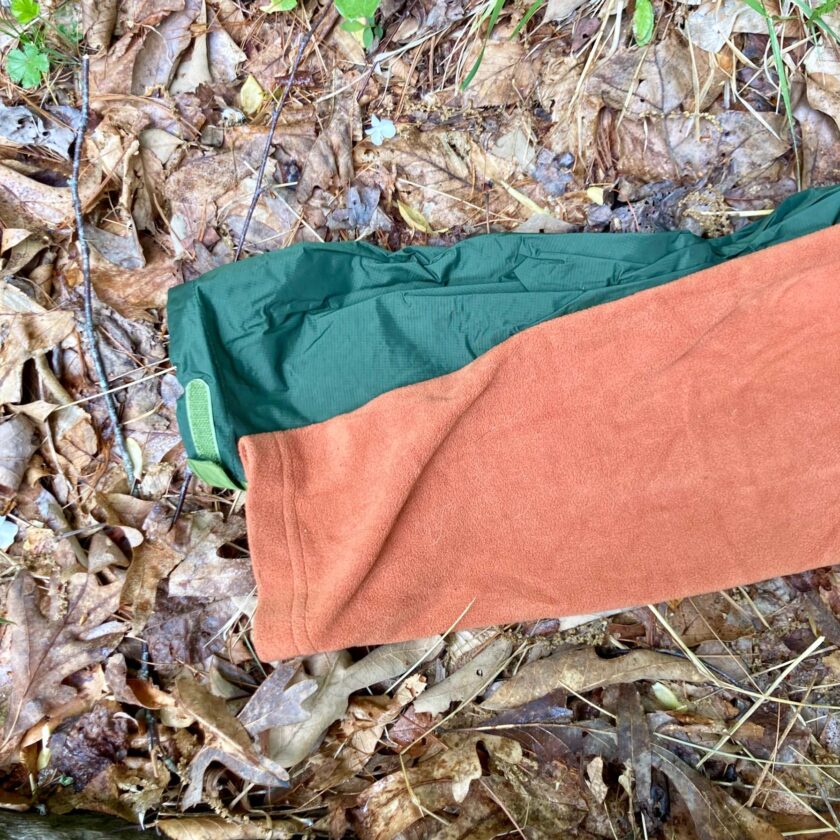
I strongly recommend carrying a couple additional items of clothing, above and beyond what you are wearing. Even if the weather report looks good I would carry a water-resistant jacket and a warming layer like a hooded sweatshirt. These don’t have to be super expensive or fancy – they can be thrift store finds or stuff you have retired from day-to-day wear. I strongly recommend both, even if no rain is the forecast.
If, for some reason, you end up being out longer than you expected these items can make you massively more comfortable. The rain jacket can obviously be used if it rains. But it can also double-up with the warming layer to act as a wind-breaker. In combination the two preserve much more body heat than just one alone, and keep you dry. If your hike ends up being longer than expected, or conditions are worse than expected, this will help you preserve some precious body heat. If you are hiking in very cold weather, I also recommend carrying a hat and pair of gloves.
Emergency Equipment
Mother Nature gets a vote. Despite our best laid plans, things can and do go wrong. When going into the woods it’s a good idea to have some very basic emergency equipment. It’s easy to go overboard here, but I do recommend just a few things to keep you safe, warm, and dry in the event something goes wrong.
Survival & First Aid
I have previously written about assembling a basic first aid kit, a basic fire-starting kit, and a basic survival kit. I strongly recommend going back and re-reading those articles. At least early on in your journey when you’re likely to be hiking relatively easy, well-marked, well-traveled trails, you can get by on the lighter end of the spectrum. At a minimum I think you should have a good knife, the ability to start a fire, and a basic first aid kit.
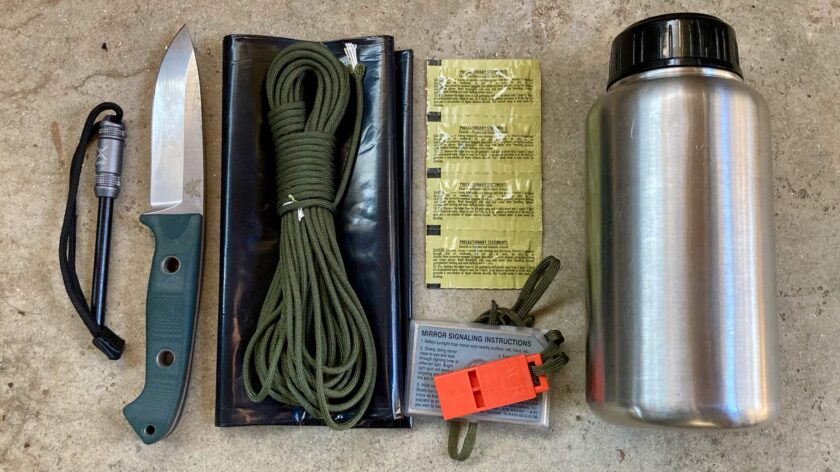
I won’t belabor survival gear. I strongly recommend you go check out my Basic Survival Kit and Comprehensive Fire Starting articles. These articles not only explain the gear, but the “why” behind them. They will also give you some of the knowledge you need to survive an unplanned overnight in the woods while you wait for help to arrive.
I also recommend reading 98.6 Degrees: The Art of Keeping Your Ass Alive by Cody Lundin. It is probably my favorite wilderness survival book. Knowledge trumps gear; on the other hand some gear will make your knowledge go much, much further.
First Aid
I recommend carrying a very basic first aid kit. I wrote a detailed article on such a kit here. For day-hikes on well-traveled trails you’re unlikely to need a first aid kit, and this one will work for just about any trauma you experience.
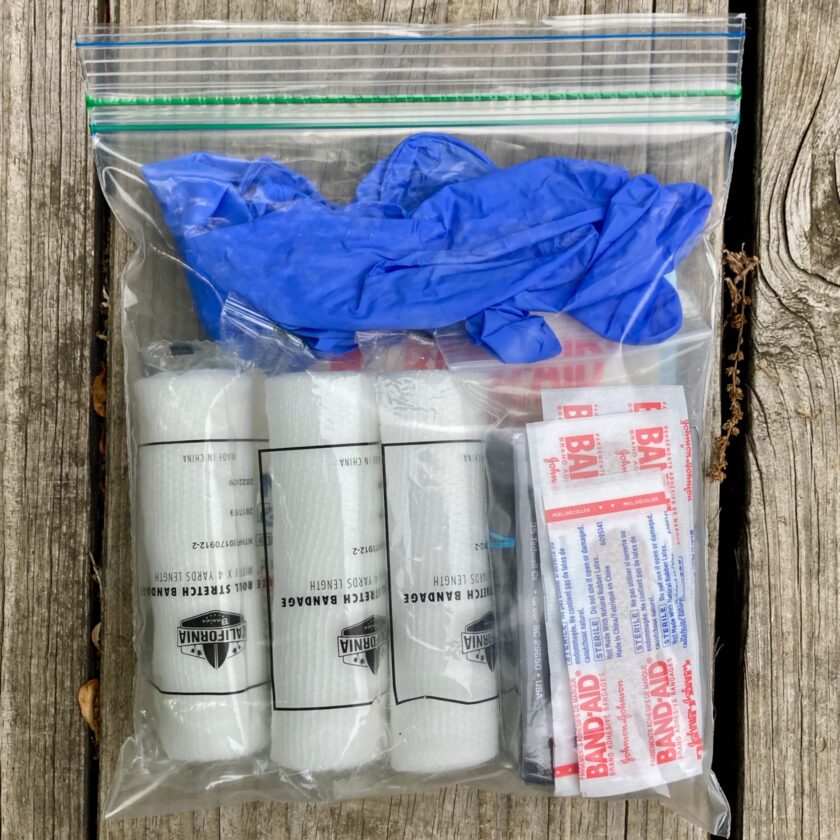
If you don’t want to put together your own kit I would reservedly recommend something from Adventure Medical Kits. These kits have a really good reputation, but in my professional opinion (as a practicing paramedic) are a little light on bandaging supplies. I would still recommend beefing up these pre-made kits if you go that route.
Water Procurement
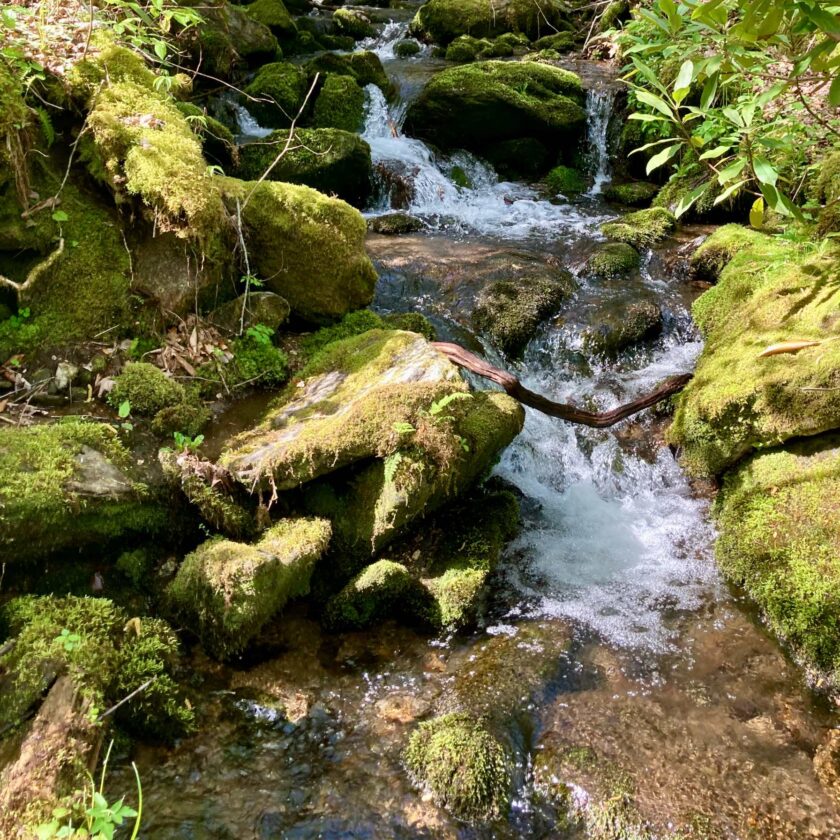
You should also go into the woods with some method of disinfecting water. Your two quarts won’t last forever, and dehydration can kill you quickly. Any water you collect from the outdoors should be disinfected, no matter how clear or pure it looks! You simply have no clue what biological hazards are entering the water upstream.
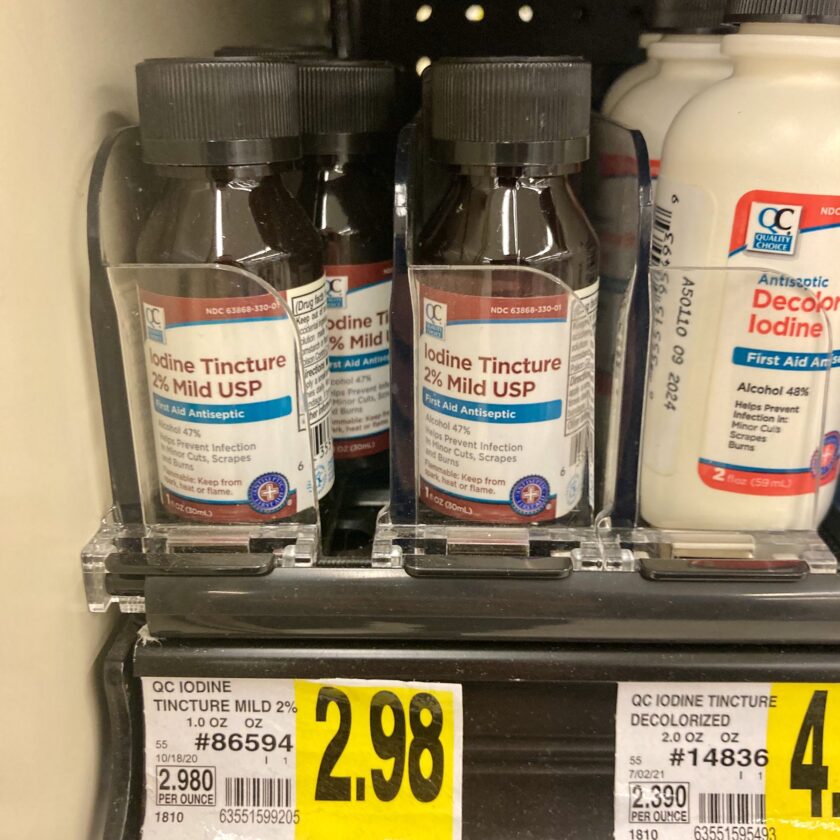
You can purchase water purification tablets. I really like Katadyn MicroPur MP1 tablets or Portable Aqua. If you want to save a few bucks pick up a bottle of 2% tincture of iodine ($3 at the grocery store or pharmacy). Add 5 drops to a quart of clear water and 10 drops to a quart of murky water. Let it stand for an hour and your water is good to go. It won’t taste good, but this is for emergency use only. You can also filter water, but quality filters are more expensive and bulky than tablets.
Maps & Navigation
You will need some sort of navigational capability. I happen to like good, old-fashioned paper maps and a compass. The work when batteries die, phones get wet, smashed, or lost. Unfortunately there is a great deal to learn in order to use a compass effectively. For the average hiker, you’ll probably do just fine using a mapping app on your phone. I use two apps to keep track of my location.
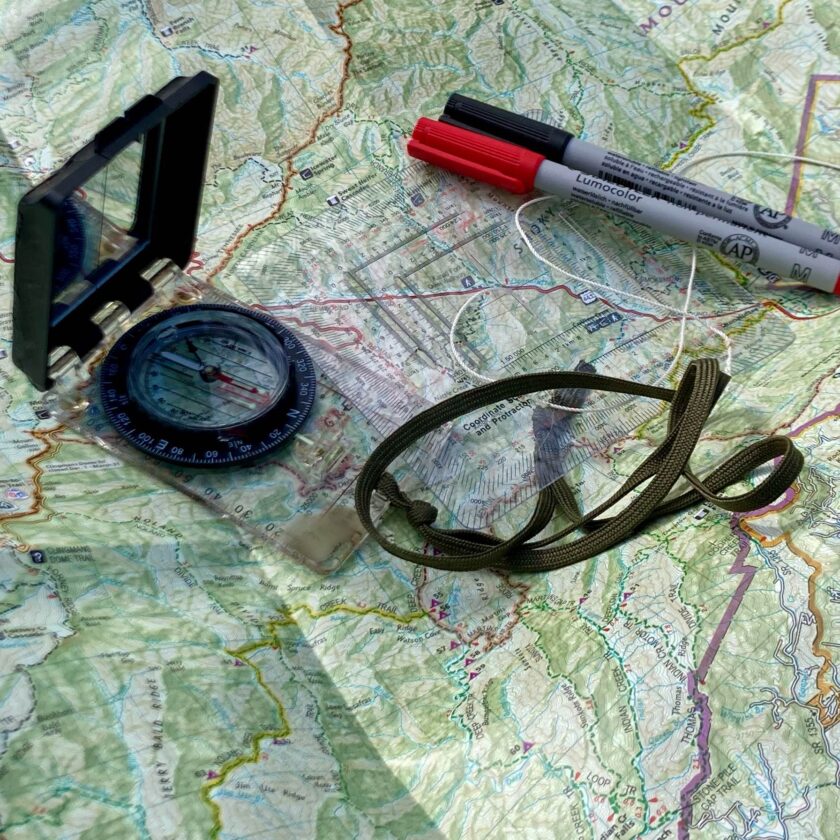
First, AllTrails is probably the most accessible app for beginners (and a fine one for pros!). AllTrails has the ability to download maps so they are available when you don’t have service. AllTrails will map your route and preserve your statistics throughout the year. It also has a really, really handy search function that lets you find hikes that meet criteria including length, difficulty, dog-friendly (or not), type of trail (see next section), and plenty more.
More advanced users might be interested in Avenza. This is the mapping application used by our Search and Rescue team. It allows you to import all kinds of custom maps. I have simple PDFs of the maps of my local hiking areas. All Avenza really does for me is confirm where I am by putting a dot with my position on the map. It’s the best of both worlds – the same paper map I’m using, but with my position indicated on it for me. There is a Pro version of Avenza but I find that the free version works just fine for my needs.
How to Start Hiking: Types of Trails
Once you’ve gotten some basic, lightweight, inexpensive gear, you’re ready to start hiking. One of the first things you need to do to start hiking is pick a trail you want to walk. There are tons of resources out there to help you start hiking. We really like the All Trails app for helping choose our trails.
When you are deciding on a trail there are a number of factors to consider. One of the first is the type of trail you’re looking for. There are basically three trail layouts: the loop, the out-and-back, and the point-to-point.
Loops
Loops are probably my favorite trail layout. As the name implies they go in a loop: they start and end in the same place, but don’t require any backtracking. You can typically walk a loop in either direction, which can help avoid crowds. Loops have something of a psychological advantage to me. Since there is no backtracking over terrain you’re already walked you’re seeing something new for the entire way. Also, loops just somehow feel more “complete,” and you are always seeing something new.
On a loop, every step you take is a step toward the finish line. On the other hand, if you have little idea how far you’ve gone, you have no idea how far you have to go because you haven’t seen this territory before. Unfortunately, loops aren’t the most common type of trail. They’re definitely out there, but are less prolific than the next style.
Out-and-Back Trails
The most common trail you will encounter is the out-and-back. Out-and-back trails require that you walk out…then turn around and walk back. Usually the “out” portion will take you to something cool: a waterfall, a scenic vista, something of that nature. Not always, but more times than not a trail is there for a reason – to take you to something cool. Another huge benefit of an out-and-back is that you have familiar landmarks on the way back.
The only downside of out-and-back trails to me is that they can sometimes be mentally challenging. Every step out is another step you’re going to have to take to get back. Usually this isn’t an actual problem, just a mental challenge sometimes, at least to me. Once you get a long distance in and are already feeling tired, it can be hard to keeping walking further from the parking lot. On the other hand, you can turn around anytime while walking an out-and-back trail and you’re less than halfway to your car.
Point-to-Point Trails
This is one of the less common trails, and probably not the trail you want to start with. Point-to-point means you get dropped off at one point and walk to another, where your ride is waiting. Usually this means dropping one car off at the end of the trail, then driving another car to the beginning.
Usually point-to-point trails are setup thusly because of distance or difficult terrain; they’re too long or hard to turn around and walk back, at least in a reasonable amount of time. If you’re just learning how to start hiking these probably aren’t the trails you want to begin with.
Trail Considerations
Some thought should go into the trail you tackle, and when you tackle it. This is not only for comfort reasons, but for safety reasons, as well. Some trails can be very difficult and require some technical level of skill. If you’re completely inexperienced you can find yourself in a bind in a hurry if something goes wrong.
Trail Difficulty
A huge consideration when looking for your first trail is trail difficulty. Unfortunately there is no universal standard for what makes a trail difficult, and often trails aren’t marked with a difficulty rating. If they are consider yourself lucky. Trails are generally rated based on the condition of the trail, elevation gain, obstacles, and technical difficulty.
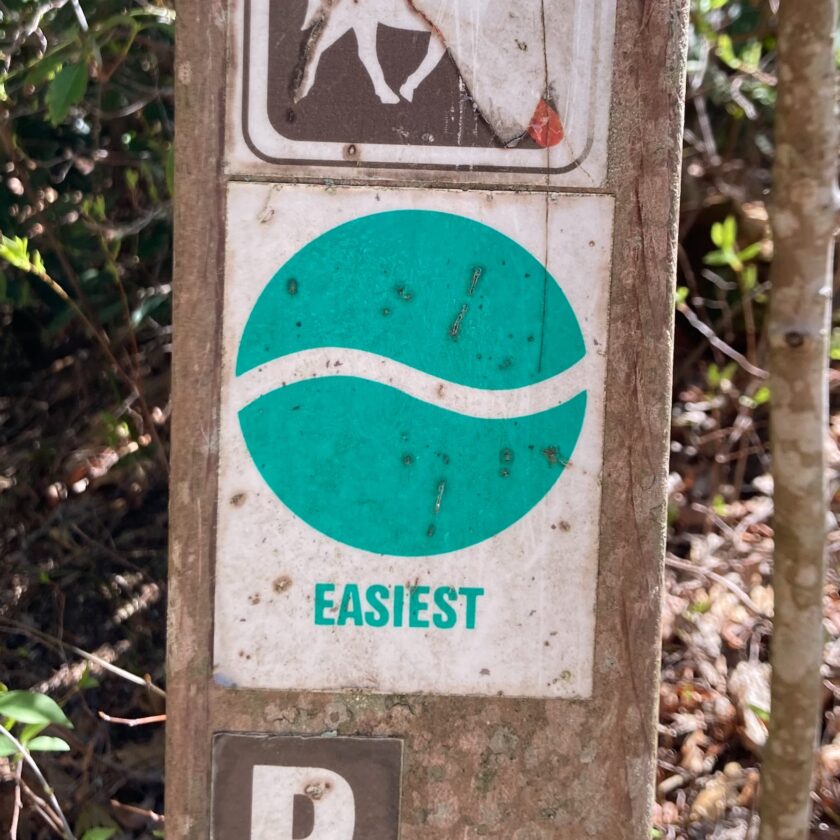
The US Forest Service has a pretty robust trail rating system that should be in effect if you are on USFS-maintained trails. This system is based on the trail’s width, elevation gain/loss, overgrowth, evenness of the terrain,etc. Additionally, the AllTrails app has it’s own rating system rating trails as easy, moderate, or difficult.
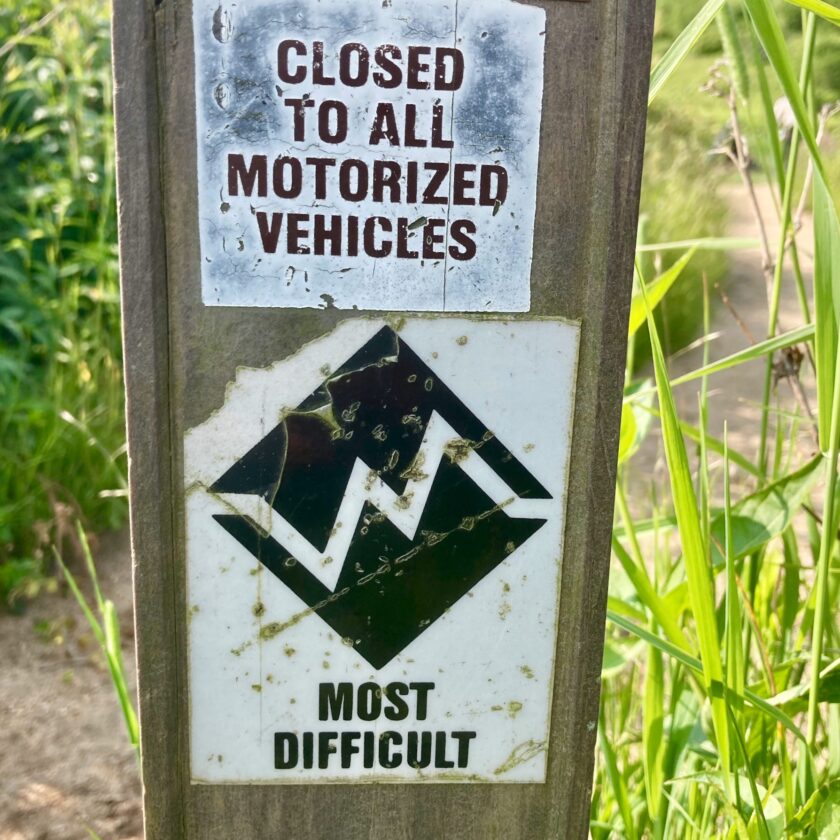
A number of factors make a trail difficult. A trail that gains several thousand feet in elevation is going to be difficult because it is tiring to walk, to put it politely. Trails can also be difficult because of terrain. Broken ground, deep ruts, and rocks can make trails difficult. The USFS system also rates the technical difficulty of trails, i.e. whether or not specialized equipment like climbing gear is needed.
If you’re brand new to hiking I strongly recommend starting with some “easy” trails. I know there can be a tendency to jump in on something hard, but there’s no shame in trails marked “easy.” In fact the photo above with the “Easiest” sign is one of my favorite trails, and definitely my most commonly hiked trail – I probably hike it at least once a month.
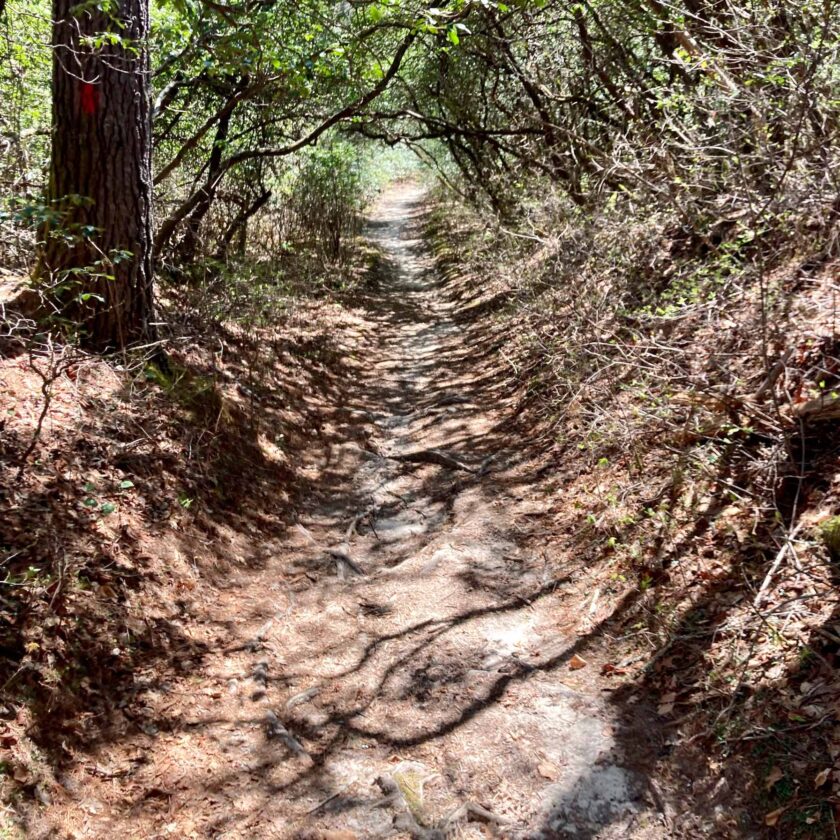
Trail Markings
Not all trails are marked, and many aren’t marked well. In federally-designated wilderness areas trails are not marked at all. In many parks markings are pretty sparse. This is a great reason to have a mapping capability that you’re comfortable with. Personally I like walking trails with as few markings as possible.
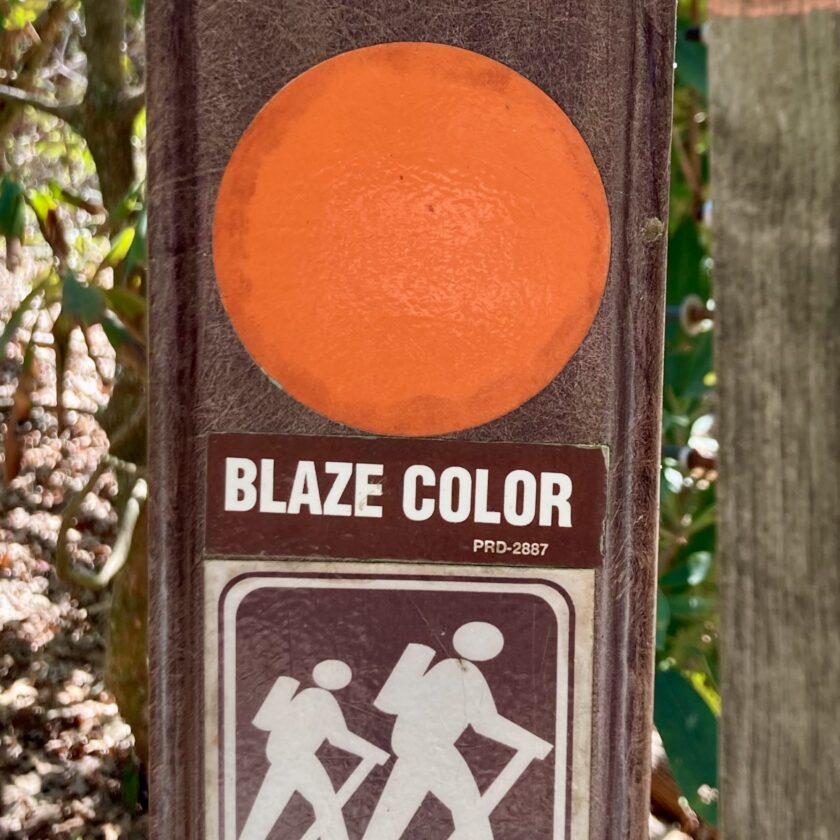
Most marked trails are marked with blazes. These are usually in the form of spray painted marks on trees and rocks in a certain shape or color. For example, blazes on the Appalachian Trail are white rectangles. Sometimes blazes might be more complicated, like the double-blue bars below.
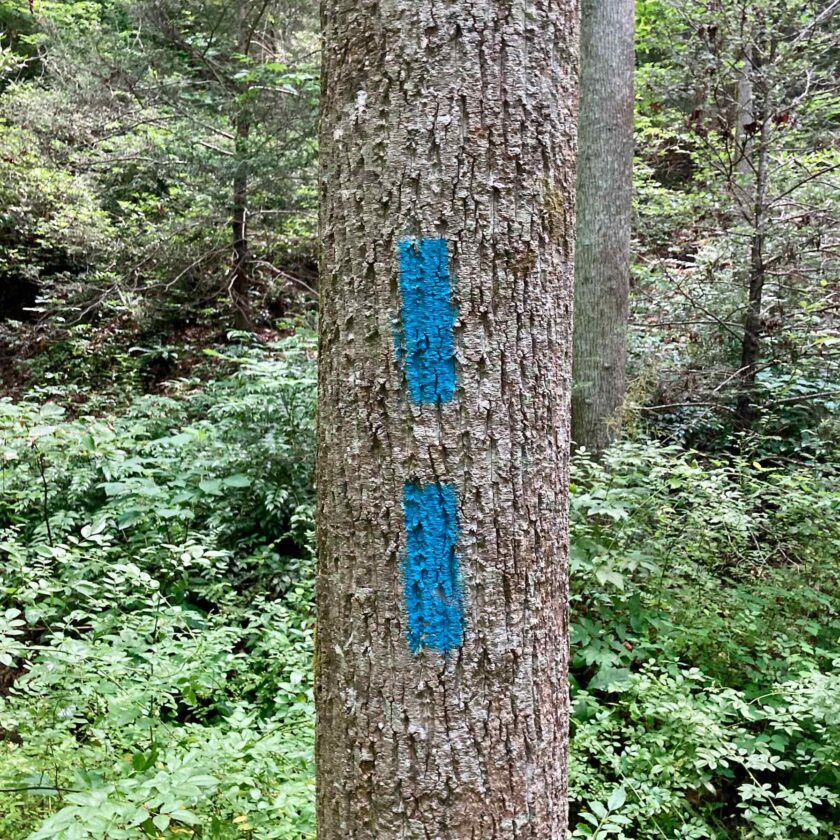
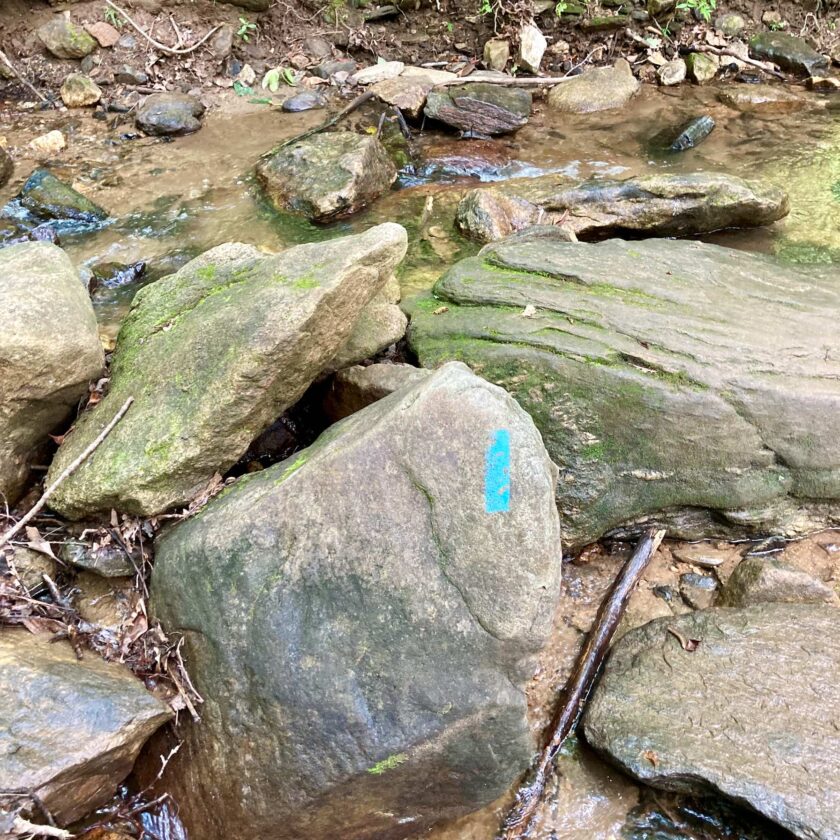
Though generally on trees, blazes are sometimes found on rocks, as well. The photo below illustrates this; this blaze was a at a creek crossing that could have been a little confusing.
Be sure you know the color and shape of your trail’s blazes before you start walking. Sometimes one trailhead is the head of several trails. These trails may be of drastically different distances and difficulty. You’ll want to be careful to follow the correct set of blazes.
Distance
If you are just beginning I would recommend you start with some shorter trails. If you are a reasonably healthy adult you should be able to complete trails of 5 miles and under as long as the difficulty is not too great. I understand the compulsion to try to dive into a big 10-miler, but keep the first few hikes reasonable. If you really want to increase distance in the future after you build up a bit of experience, you can.
Other Factors
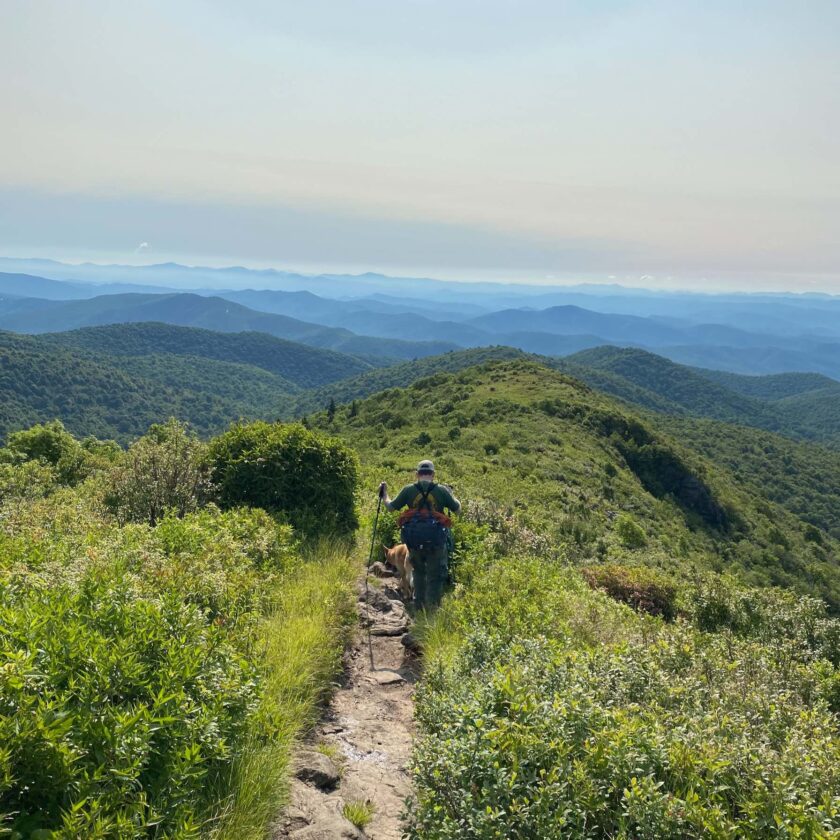
There are a couple other factors that you may want to pay attention to. If you plan to take your dog you will want to make sure the trail is dog-friendly. In some areas, like National Parks, dogs are not allowed on trails at all. And on most trails where dogs are allowed, they are required to be leashed.
You will also probably want to know what other activities are permitted on the trail. For example I always like to know if mountain bikes are allowed on the trail. If so, I’ll probably pick another trail – hiking with mountain bikes whizzing by just isn’t all that much fun. I also like to know if horseback riding is permitted. It’s pretty exciting to walk around a bend and see a 1,500-pound animal standing in your path.
When to Hike
Choosing when to hike can be just as important as the trail you choose.
Time of Day
This one is easy and I won’t beat it to death: you should start your hike in the morning or very early afternoon. If you’re sticking to the “easy trail, 5 miles and under” guidance this should give you plenty of time to finish before dark. I’m a big fan of starting in the morning. This gives me plenty of time should something go wrong, and just works with my natural calendar.
The average adult should plan to walk about 2 miles per hour over relatively even trail. This means you should plan on 2 1/2 hours for a five-miler. When you give someone your plan (always leave a plan with someone) add some fudge-factor time. I usually pad my time estimates by an hour or 25%, whichever is longer.
Season
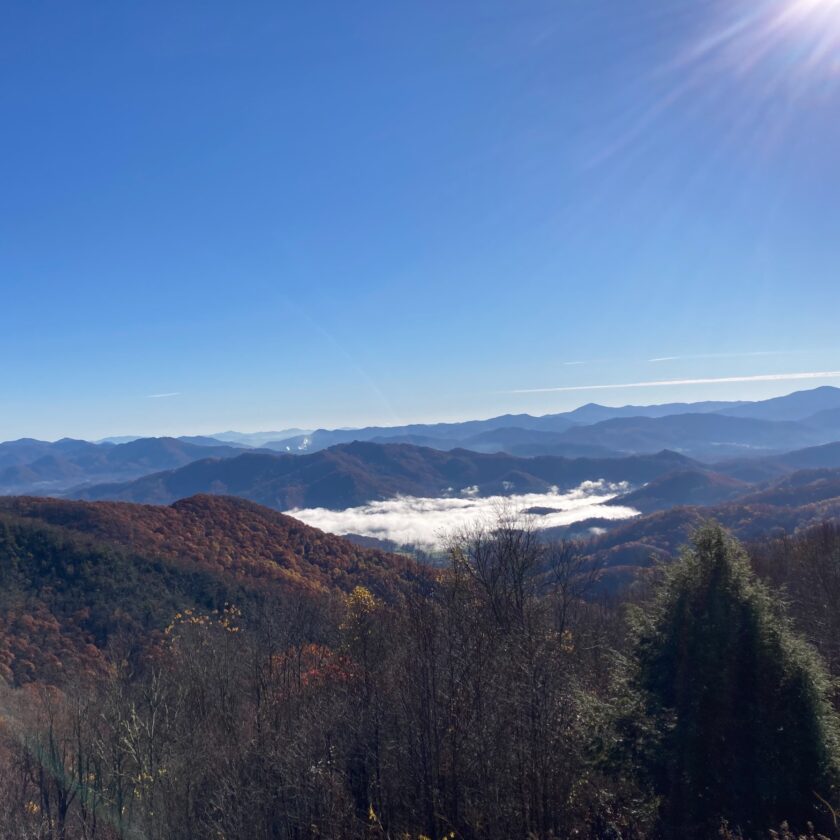
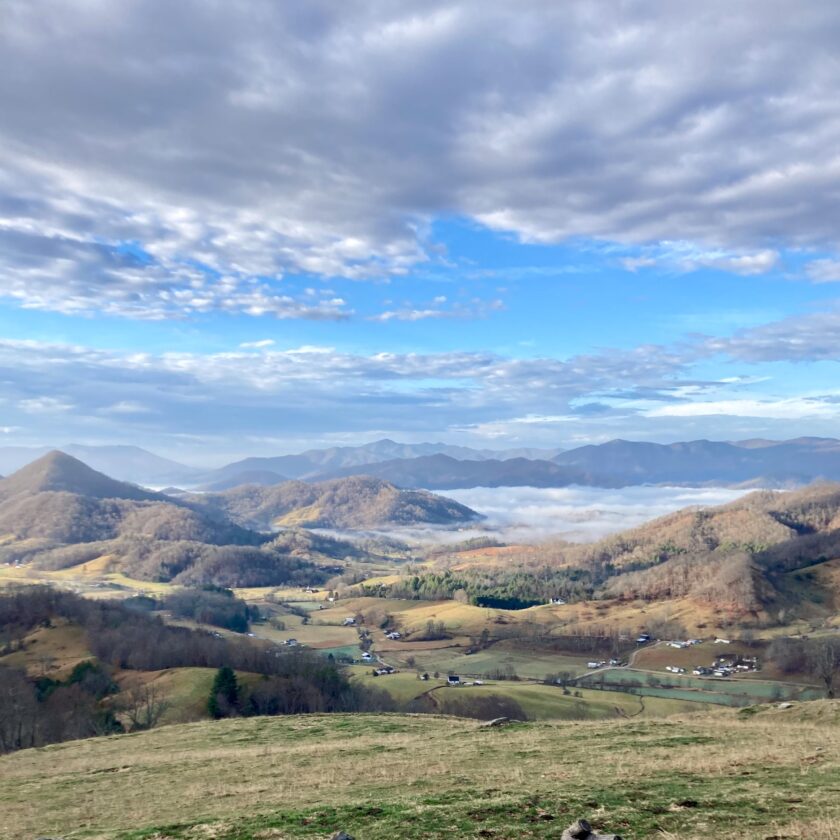
Though most of us think of being outdoors in the summer, hiking in wintertime can be very gratifying. In fact, it’s my favorite time of year to hike. Wintertime lacks the “Three Ts” of summer: tourists, ticks, and traffic. Additionally, in winter all the scenic vistas really open up. Wintertime also presents some specific hazards, though.
The first is, obviously, cold. The risk of complications of any kind of injury drastically increase in very cold weather. A sprained ankle that make keep you in the woods for a few more hours in summer may cause you to get hypothermic when it’s 17 degrees out.
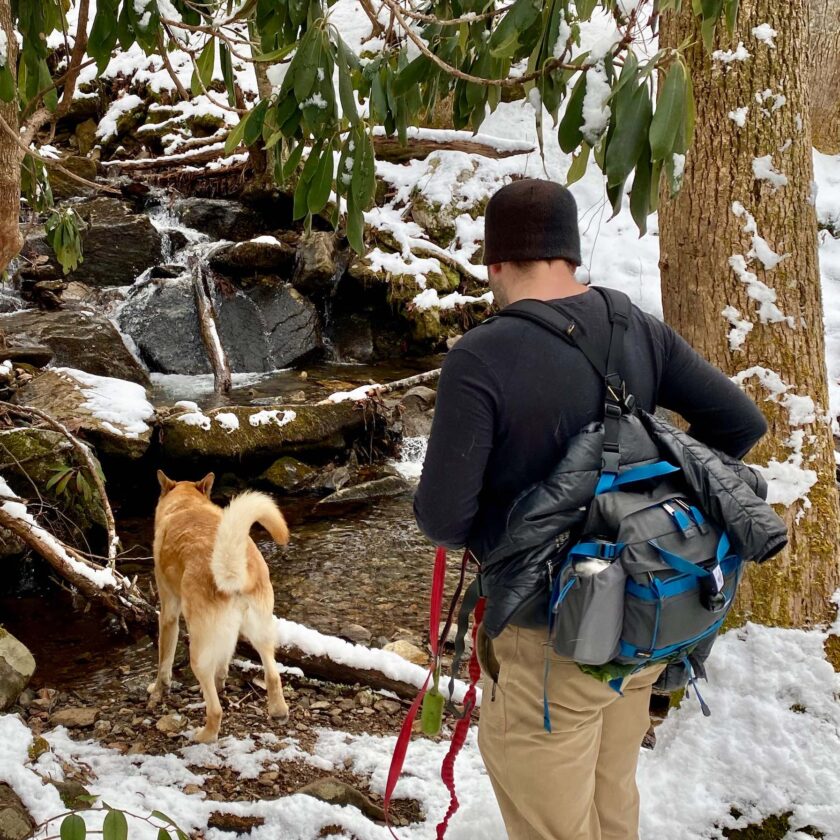
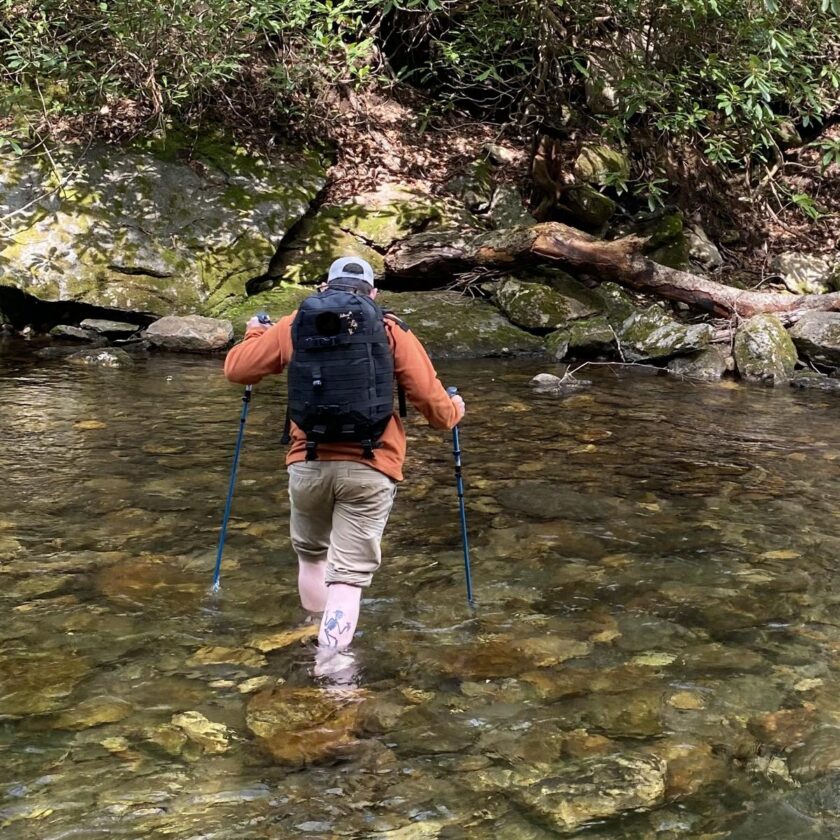
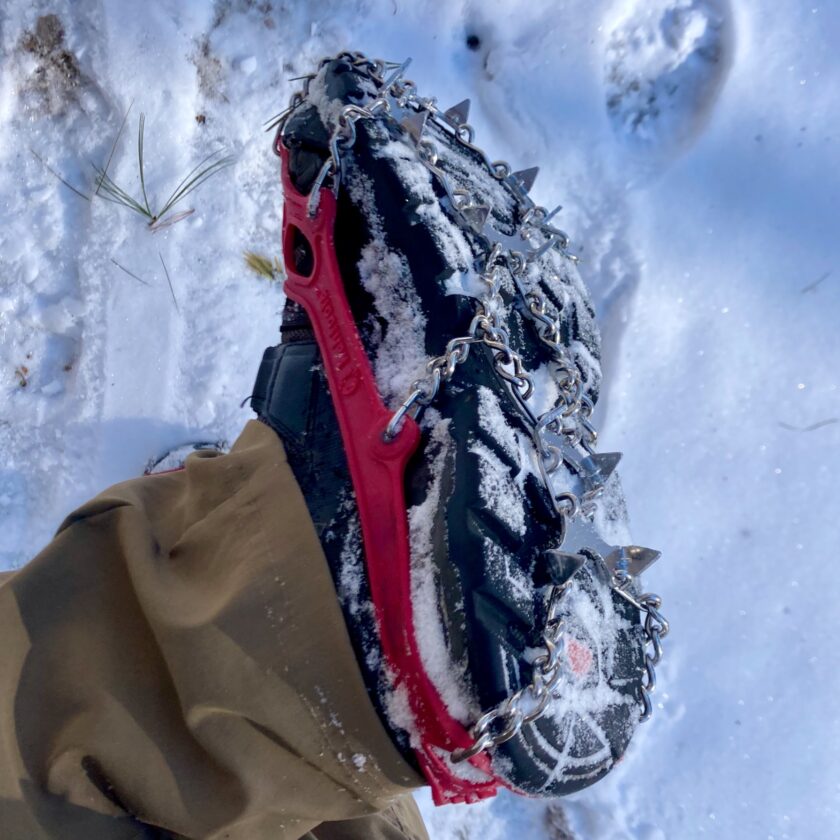
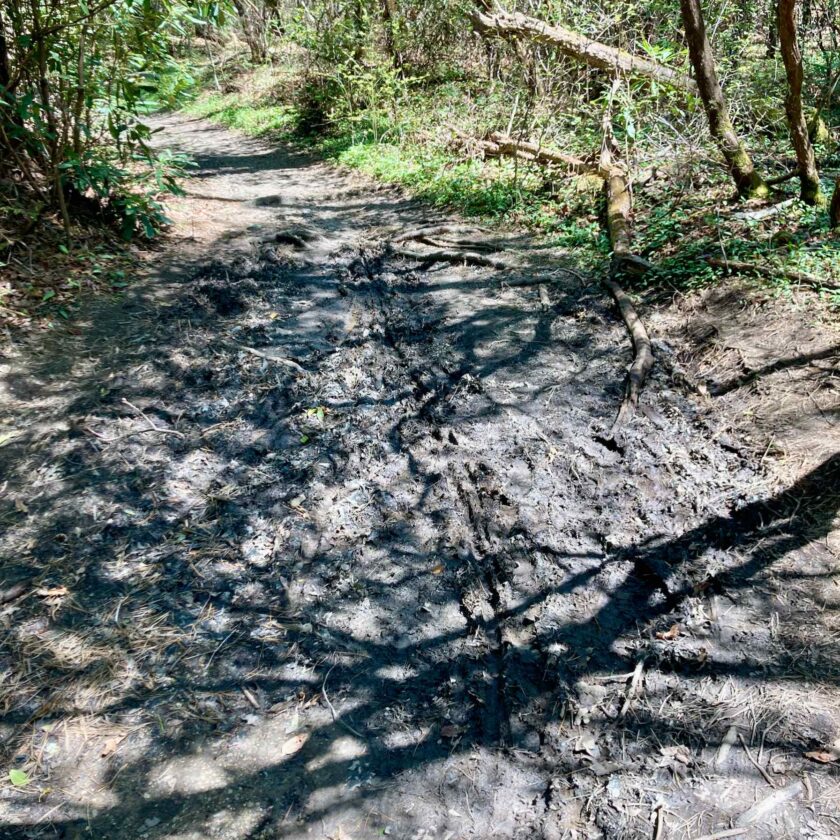
Wintertime also presents hazards like ice and snow. In the photo above I’m basically picking across a river of ice. This is a small spring that flows down this particular trail. In the winter this water freezes and becomes really, really treacherous. If you do hike in very cold weather I recommend having a set of Kathoola Micro-Spikes. Winter also comes with snow, which among other things can obscure a trail.
Of course summertime has its hazards, too. A lot of people immediately flash to visions of bears and rattlesnakes but actual risks form animals is incredibly tiny If you’re concerned about these things check out my article on wilderness predator defense. Your biggest wildlife threats are bees, fire ants, mosquitos, and stuff of that nature.
Regardless of when you choose to hike, understand the dangers the seasons presents. In some places it may be more comfortable to hike in mild winter weather, and in others winter hiking may be unacceptably uncomfortable and dangerous.
Weather
This one is probably a no-brainer. You should try to hike when weather conditions are favorable. While hiking can certainly be done in rain, snow, hard winds, and other adverse conditions, it’s probably not ideal to start under these conditions. Nor is it probably a good idea to begin when it is sweltering outside.
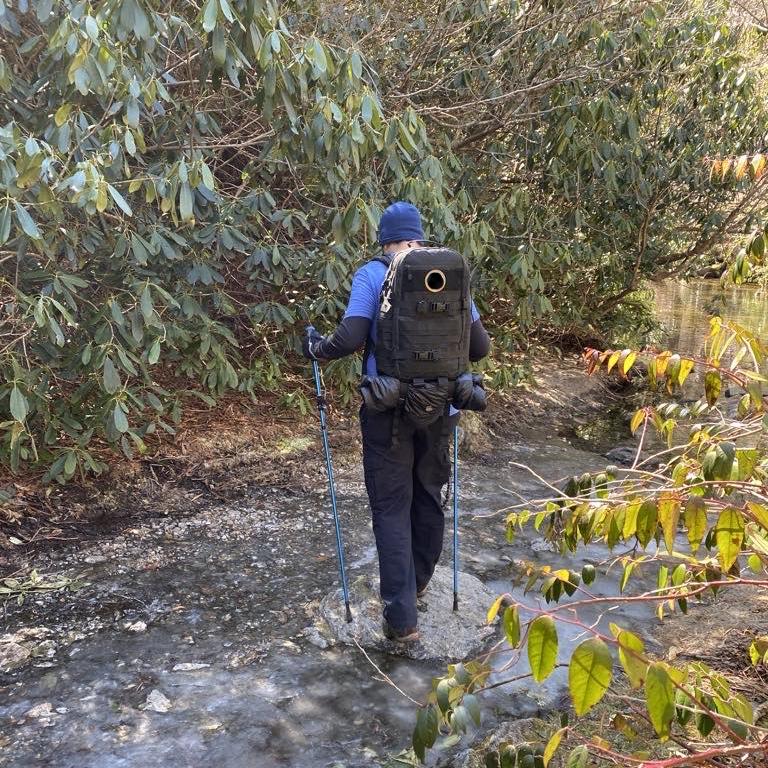
Also pay attention to the weather for a couple days before your hike. Some low-lying trails or trails that border creeks and streams can get swamped with just a little rain. That shouldn’t necessarily stop you from hiking but it should maybe inform your decision of trail and clothing.
A Hiking Partner
Once you’ve gathered your gear and picked out a trail, you’re ready to get started. I would say you have but one task left before you head out to the trailhead: find someone to go with you. Hiking with a partner is fun – you have someone to talk to and share the experience with. You have someone to take photos of you, and if they’re a bit more experienced, to help you out.
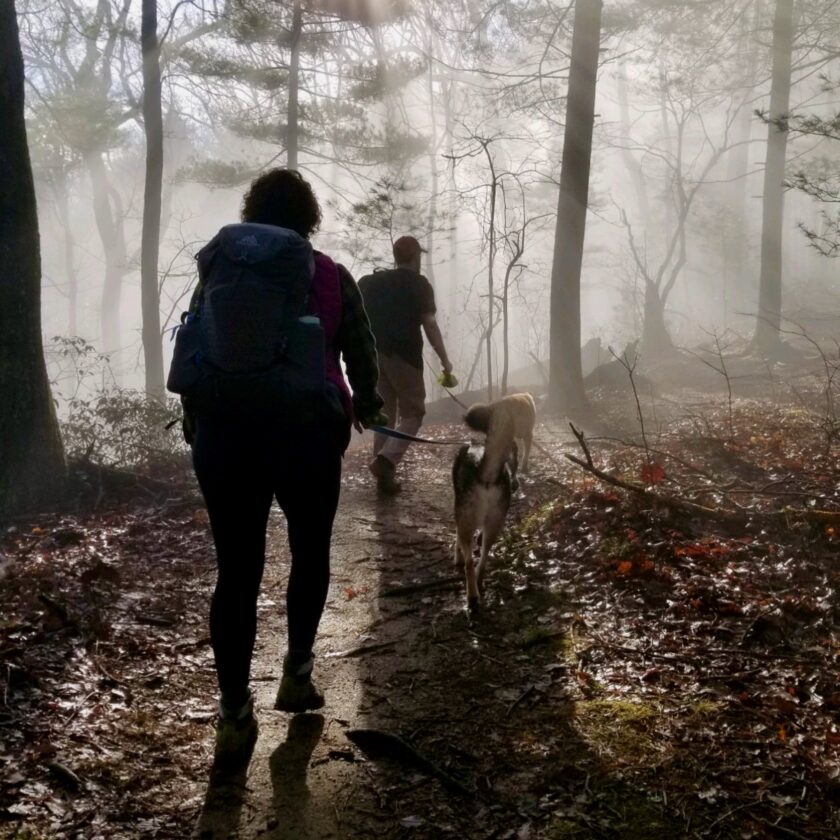
Hiking with a partner is also much safer than hiking alone. We go into the outdoors to experience a little bit of danger; otherwise we would just stay home. We want to keep that danger manageable, however. Any partner – even an inexperienced one – helps increase your safety margins. They function as someone to help you out, or go for help if needed.
Closing Thoughts
This article started out as a simple gear list for those new to hiking. I didn’t think it would grow this much, and it ended up taking a long time – a couple of months – to write. I just kept thinking of new things to add. I’m sure this article still doesn’t cover everything there is to know but it should get you pointed in the right direction. Get out there, have fun, and be safe!